Trust Wallet deception Text
This article explains the Trust Wallet KYC Scam Text sent through bogus emails and how to remove it.
On the internet tricks are etc. classic than ever and because of technological advancements this isn’t going to shift quickly. One such up-to-date scam is targeting people of the Trust Wallet service, requesting them to validate their KYC by replying to a false email.
Do you bear in mind receiving an email from Trust Wallet asking that you general your KYC internet freshly? If yes, you need to know that crooks have been discovered through a fictitious email that spreads the internet to fraud on the internet people onto verifying their wallet and doing an on the internet KYC.
According to assertions, people of the Trust Wallet have gotten a family of emails prompting them to finish the on the internet Know Your Customer affirmation procedure. However, even if such a validation procedure does exist and is the usual validation way employed by a bunch of monetary platforms, defense specialists are little that this up-to-date case is an work to get monetary data from people, as a result, it must be treated in packages with amazing care and ought to be bypassed as a cheat.
Download Removal Toolto remove Trust WalletWhat is Trust Wallet KYC?
Trust Wallet is a leading internet payment platform controlled by Binance, that is regarded as one of such most secure internet platforms for Cryptocurrencies. This wallet is utilized by many people to store, send, and get crypto. However, news of a Trust Wallet scam have freshly pressed the title of the service to the top of the search resolutions.
It looks like the end purpose of this cheat is to gain access to Trust Wallet users’ accounts. An email requesting for a KYC confirmation is utilized in this deceive, seeking to derive the recipients onto overfilling in private information. In no time, the wallet deceive began developing captions in the tech world, as a great number of computer users reported that their Trust Wallet accounts have been infected. Quite a lot of Australians have fallen victim to the Trust Wallet KYC trick because Trust Wallet is a well-known service in Australia.
What is the Trust Wallet trick text?
The Trust Wallet deception Text starts together with a well-developed email asking the Trust Wallet user to make sure their private information and pushing them to carry out a KYC on their Trust Wallet account. The Trust Wallet trick text in some of the emails inserts a button that claims “Click here to validate your email“, whilst in other deceitful emails there is a reroute relation placed.
People of Trust Wallets could be easily scammed onto slithering into their password because they acquire this email and are prompted to implement so by the site they arrive in following a press on the relate added to the email. The moment a computer user inputs their faith account login information, they shall no longer be able to get access their account or their cryptocurrencies.
Trust Wallet Scam Text
Quite a lot of Australians have gotten email alerts indicating that to keep via the wallet, they ought to bring up to date their KYC. However, defense professionals are notice that this is a rip-off.
Download Removal Toolto remove Trust WalletMalicious email notifications have been transmitted to users from an email ID that looks to be accurate. “Your wallet account isn’t KYC verified”, discloses an email transmitted from “”, according to assertions.
People have been pressured via a text notification to entire on the internet confirmation so to go on through the functions. According to the text, the account shall then be KYC-confirmed after the confirmation procedure is complete.
What is the Trust Wallet KYC trick?
KYC or “Know Your Customer” confirmation is a new confirmation way and a classic rule for a load of monetary platforms. Taking into account that Trust Wallet is an internet monetary wallet, people are hesitant about whether they would have to finish a “Know Your Customer” authentication. So, does Trust Wallet need a KYC confirmation?
Trust Wallet is usually used by cryptocurrency investors and people as a leading mobile wallet app. According to Trust Wallet’s Privacy Policy and Terms of functions, there are no KYC requirements for Trust Wallet people. In this non-custodial on the internet wallet, perks and sensitive data are kept in cold storage for maximum safeguarding. Trust Wallet makes use of a decentralized environment, where every user is in charge of his or her own perks, so no private details or KYC validation is essential to use the service. As a outcome, be cautious of emails pushing you to assure your KYC. If you are an manager of a Trust Wallet account and have lately gotten such an email, then it’s best to evade it.
Ways to dodge scams on the net?
Internet deceits asking people to validate their details, acquire different items and subscriptions, or entire some extra movement via tapping a web link or a button, aren’t new and akin trick scenarios are being transmitted to a lot web people each day.
Those hoaxes may generally keep an eye really credible, but they could be dodged by following some minimal internet defense prompts. First, ensure that you don’t go on untrusted pages. Also, don’t set up any unintended apps, particularly if they arise from non-reputed sources. In regards to your on the internet accounts, assure that you permit two-piece authentication for maximum safeguarding. Should you run into a contaminated note or a suspicious page, it’s best to article it immediately and try no to press on spam notifications or emails transmitted from unfamiliar senders.
Learn how to remove Trust Wallet from your computer
Step 1. Trust Wallet Removal from Windows
a) Windows 7/XP
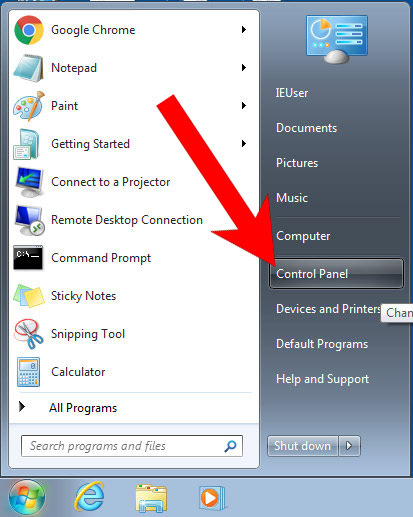
- Press on the Start icon.

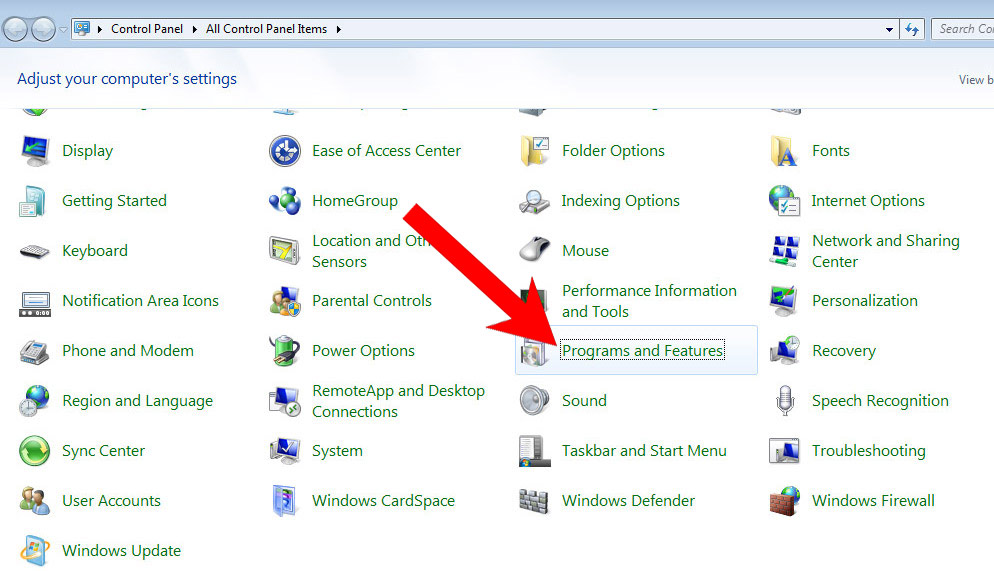
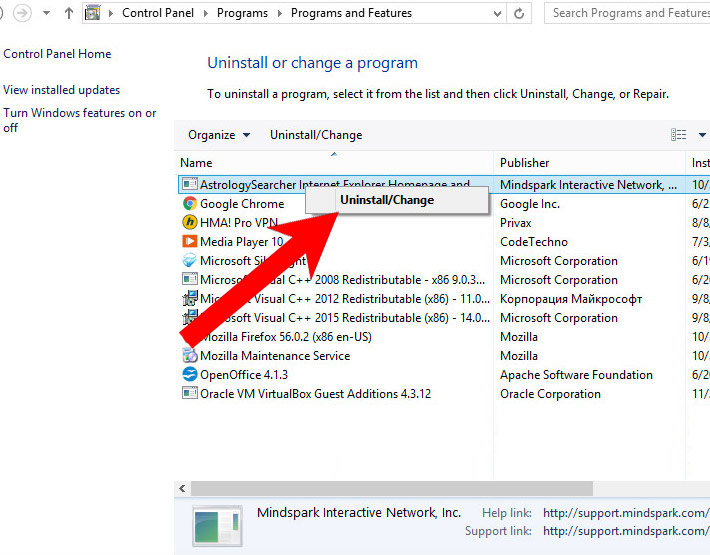
- Control Panel → Programs and Features.
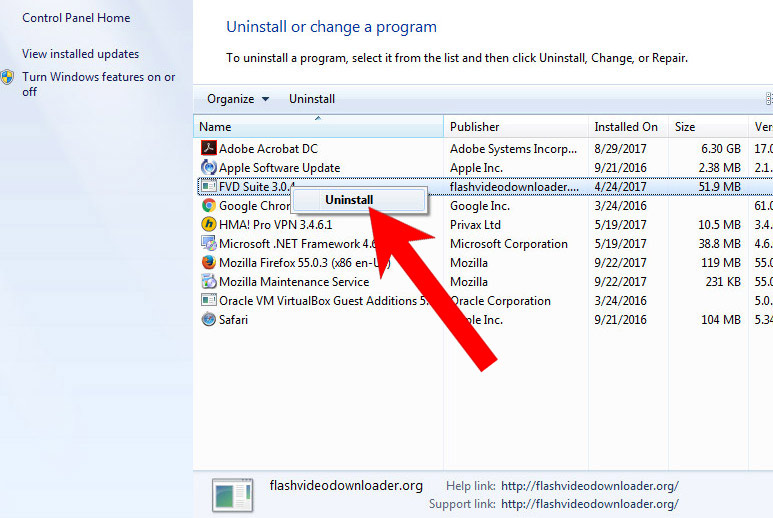
- Find the program you want to delete and press Uninstall.
b) Windows 8
- Right-click on the start icon (lower left corner).
- Select Control Panel.
- Click Programs and Features.
- Find and remove all unwanted programs.

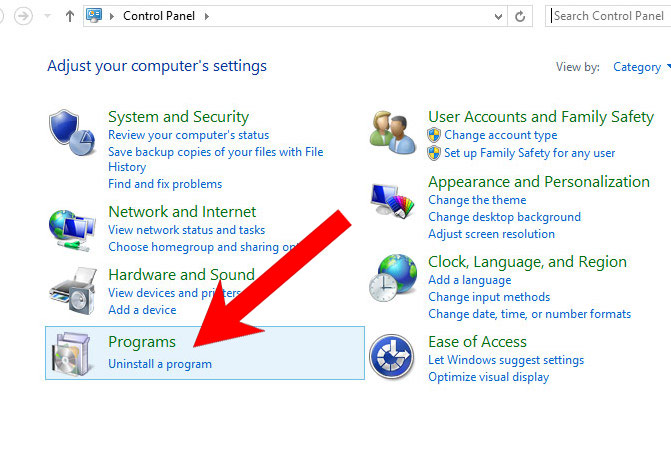
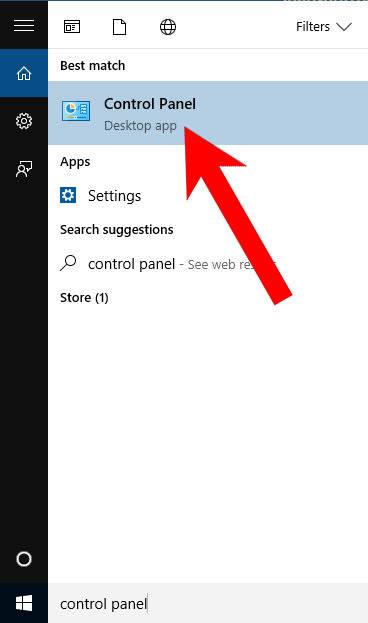
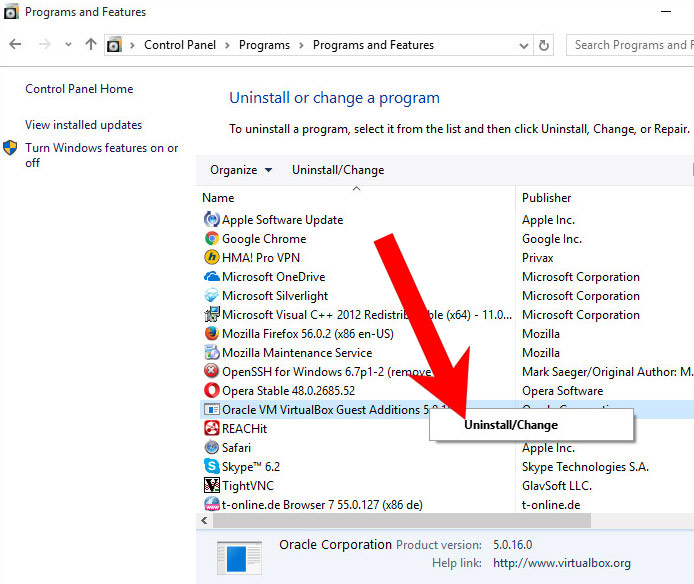
c) Windows 10
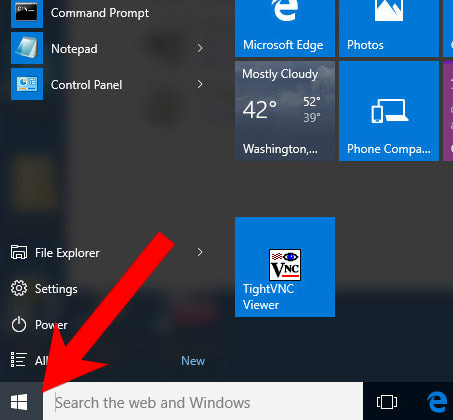
- Open Start menu and click on the magnifying glass (next to the shut down button).
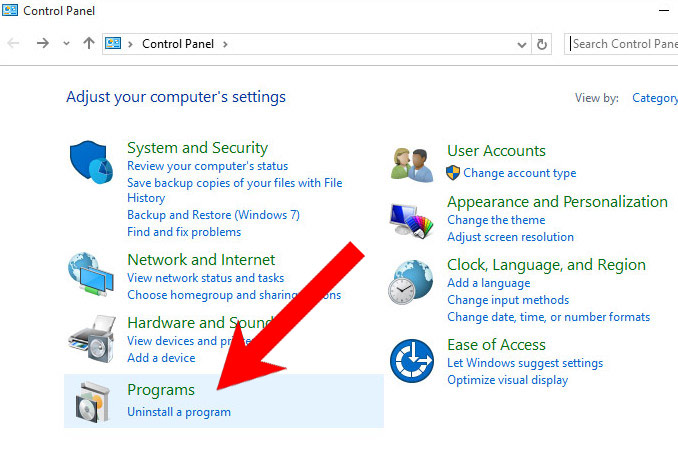
- Type in Control Panel.
- Control Panel → Programs and Features.
- Find and remove all unwanted programs.
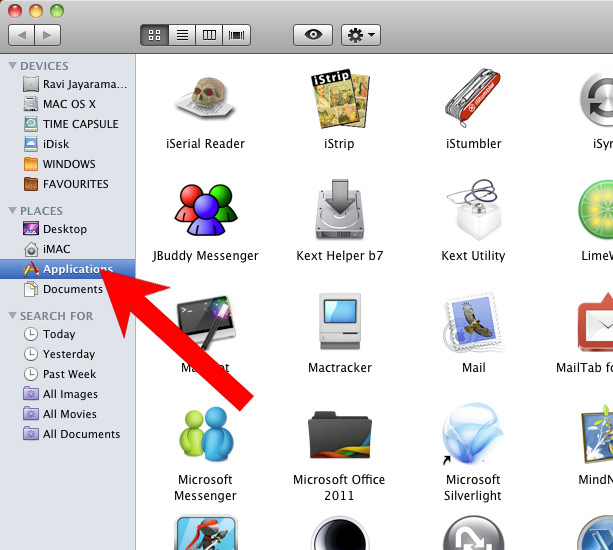
d) Mac OS X
- Open Finder and press Applications.
- Check all suspicious programs you want to get rid of.
- Drag them to the trash icon in your dock (Alternatively, right-click on the program and press Move to Trash).
- After you move all the unwanted programs, right-click on the trash icon and select Empty Trash.

Step 2. Delete Trust Wallet from browsers
a) Remove Trust Wallet from Microsoft Edge
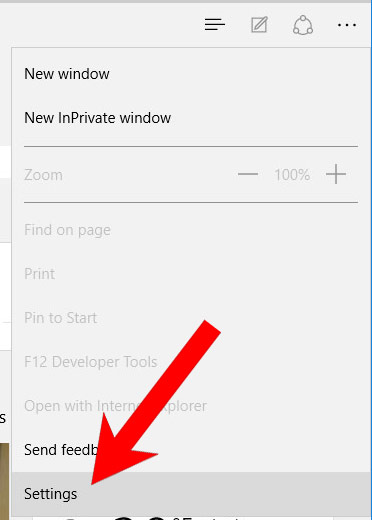
Reset Microsoft Edge (Method 1)
- Open Microsoft Edge.
- Press More located at the top right corner of the screen (the three dots).
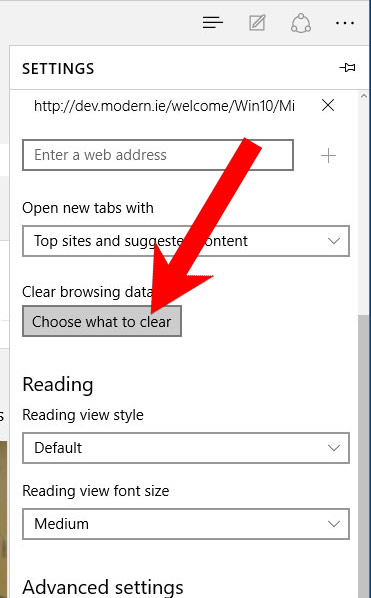
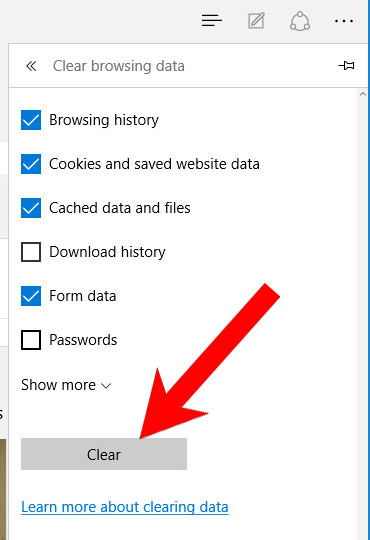
- Settings → Choose what to clear.
- Check the boxes of the items you want removed, and press Clear.
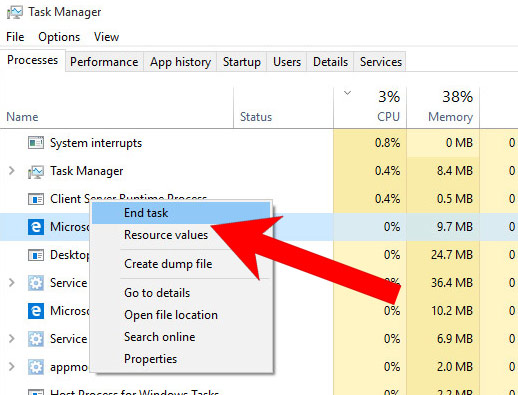
- Press Ctrl + Alt + Delete together.
- Choose Task Manager.
- In the Processes tab, find the Microsoft Edge process, right click on it, and press Go to details (or More details if Go to details is not available).
- Right-click on all Microsoft Edge processes, and choose End task.
(Method 2)
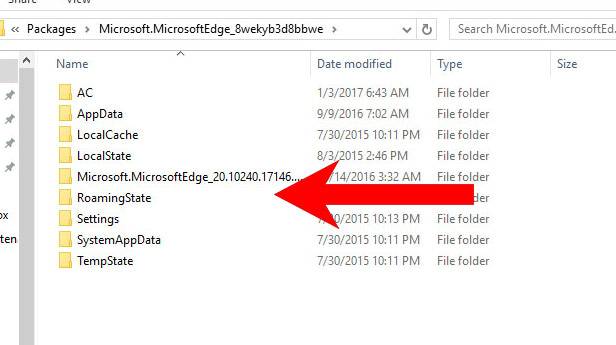
Before you proceed with this method, backup your data.- Go to C:\Users\%username%\AppData\Local\Packages\Microsoft.MicrosoftEdge_xxxxxxxxxx.
- Select all the folders, right-click on them and press Delete.
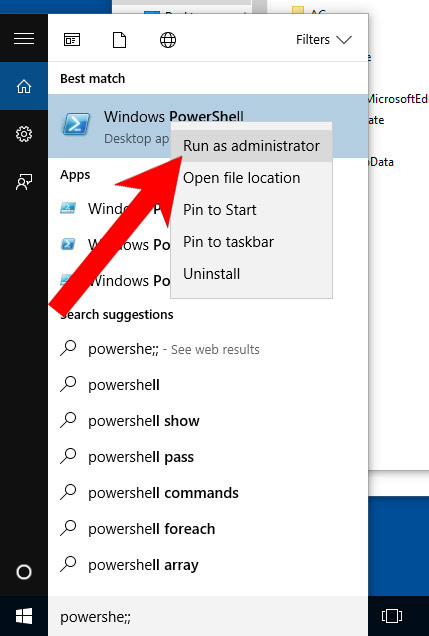
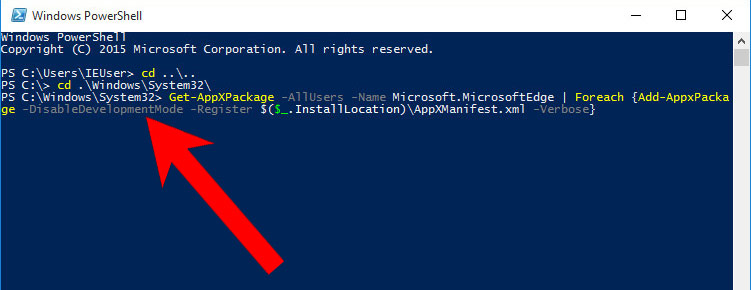
- Press the start button, and type in Windows PowerShell in the search box.
- Right-click on the result, and select Run as administrator.
- In Administrator: Windows PowerShell, paste
Get-AppXPackage -AllUsers -Name Microsoft.MicrosoftEdge | Foreach {Add-AppxPackage -DisableDevelopmentMode -Register $($_.InstallLocation)\AppXManifest.xml -Verbose}
under PS C:\WINDOWS\system32> and tap Enter.
- The issue should be gone now.
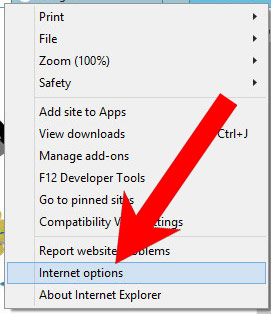
b) Remove Trust Wallet from Internet Explorer
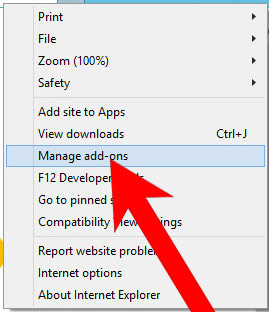
- Open Internet Explorer and press on the Gear icon.
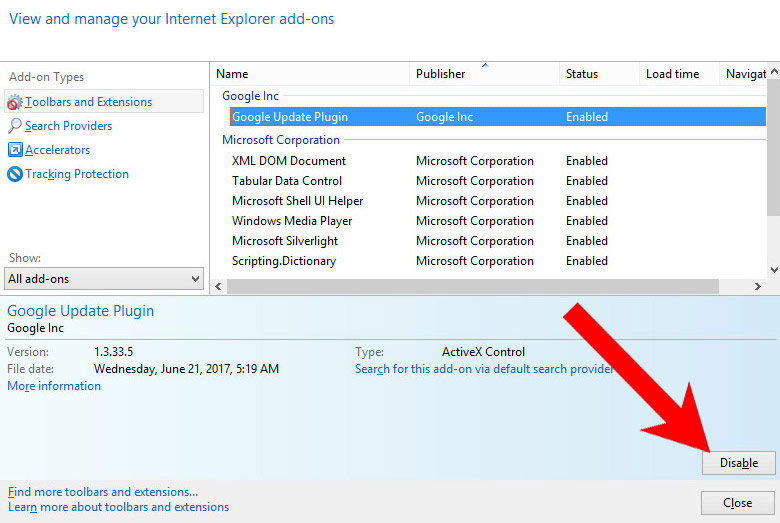
- Select Manage add-ons, and then Toolbars and Extensions.
- Find and disable all suspicious extensions.
- Close the window.
c) Restore your homepage on Internet Explorer
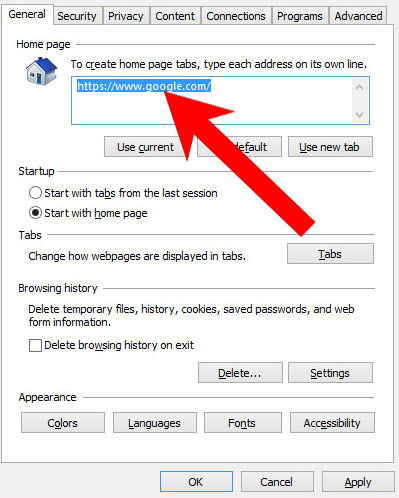
- Open Internet Explorer and press on the Gear icon.
- Internet Options → General tab. Delete the homepage URL and type in your preferred one.
- Press Apply.
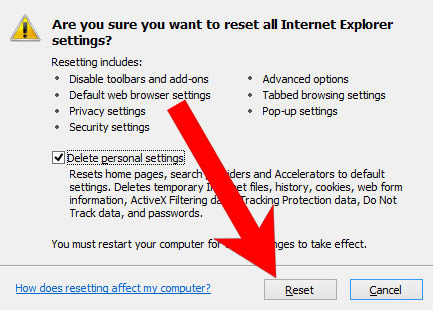
d) Reset Internet Explorer
- Open Internet Explorer and press on the Gear icon.
- Internet Options → Advanced tab.
- At the bottom, you will see a Reset button. Press that.
- In the window that appears, check the box that says Delete personal settings.
- Press Reset.
- Click OK to exit the window.
- Restart your browser.

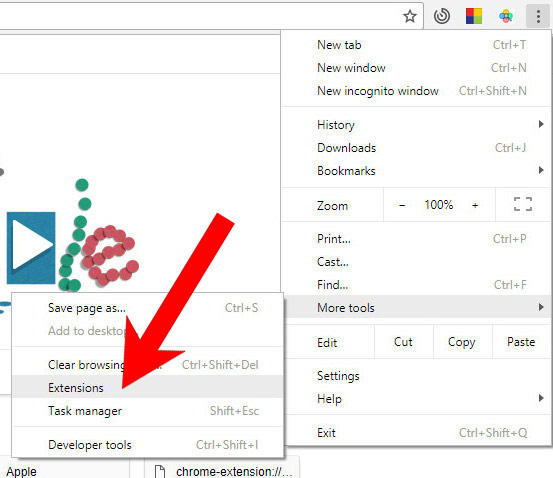
e) Remove Trust Wallet from Google Chrome
- Open Google Chrome and press the menu icon on the right, next to the URL field.
- Choose More tools and Extensions.
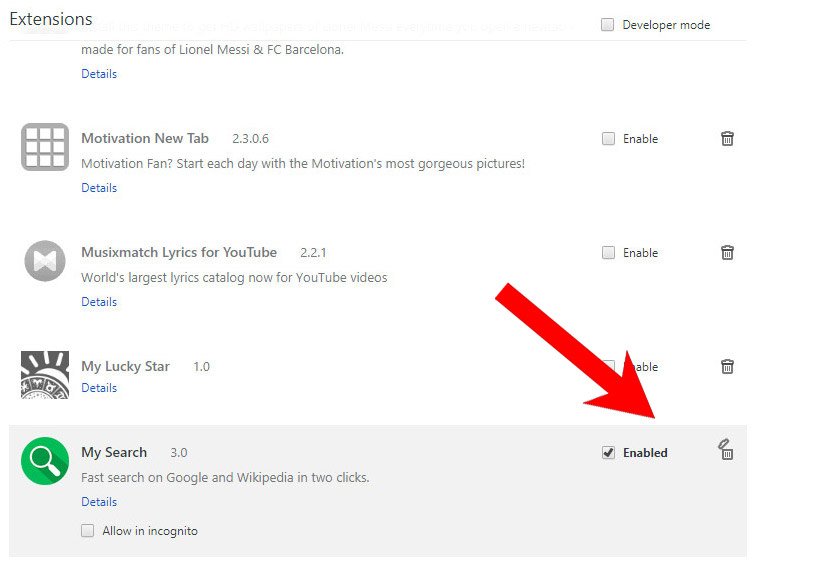
- Remove suspicious extensions by clicking the Trash icon next to them.
- If you are not certain about an extension, you can disable it by unchecking the box that says Enabled. If you later decide to keep it, simply check the box again.
f) Restore your homepage on Google Chrome
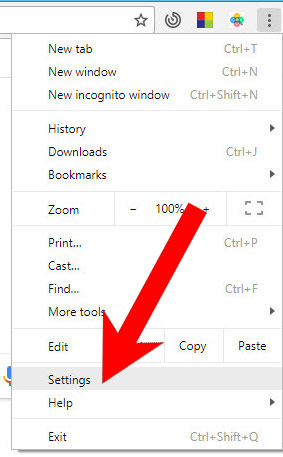
- Open Google Chrome and press the menu icon on the right, next to the URL field.
- Choose Settings.
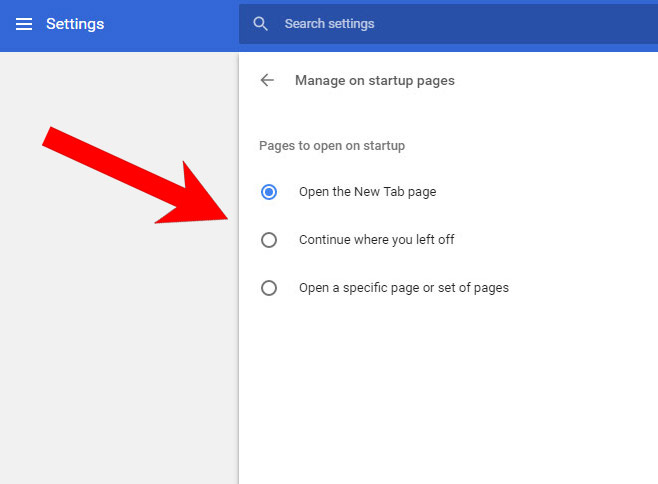
- In the window that appears, under On startup, there will be a Set pages option. Press on that.
- Remove the set website, and type in the one you prefer to be your homepage. Press OK.
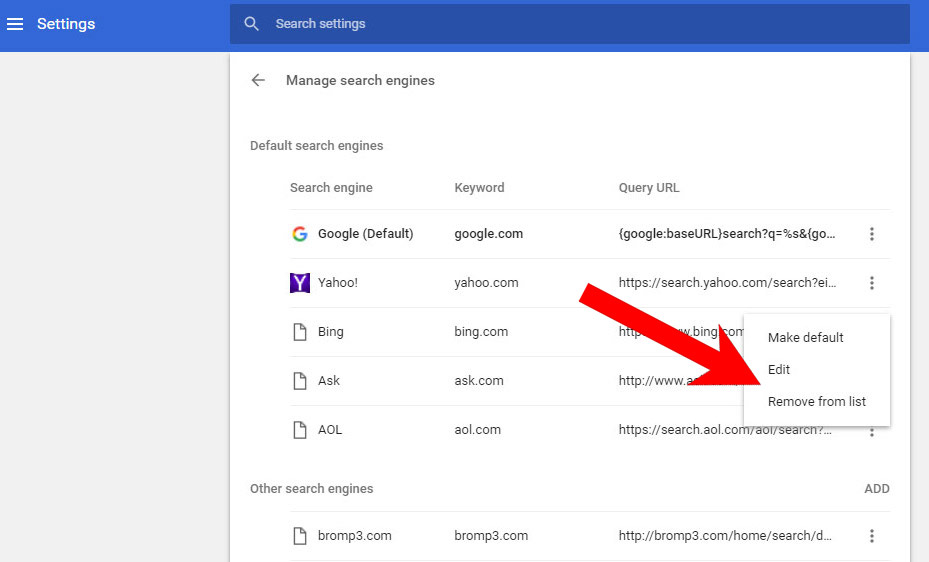
- In Settings, under Search, there is a Manage search engines option. Select that.
- Remove all search engines except the one you want to use. Click Done.
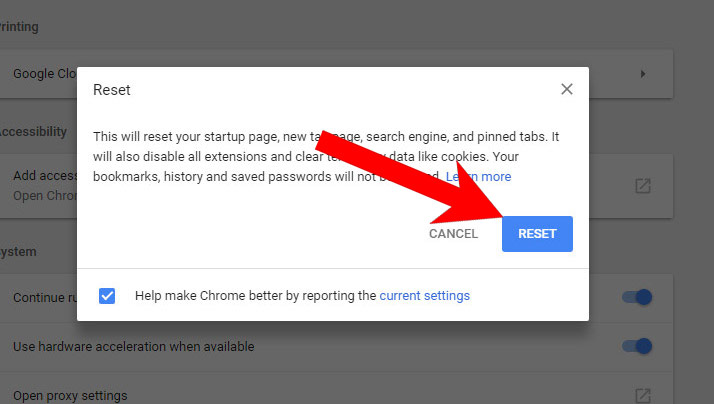
g) Reset Google Chrome
- Open Google Chrome and press the menu icon on the right, next to the URL field.
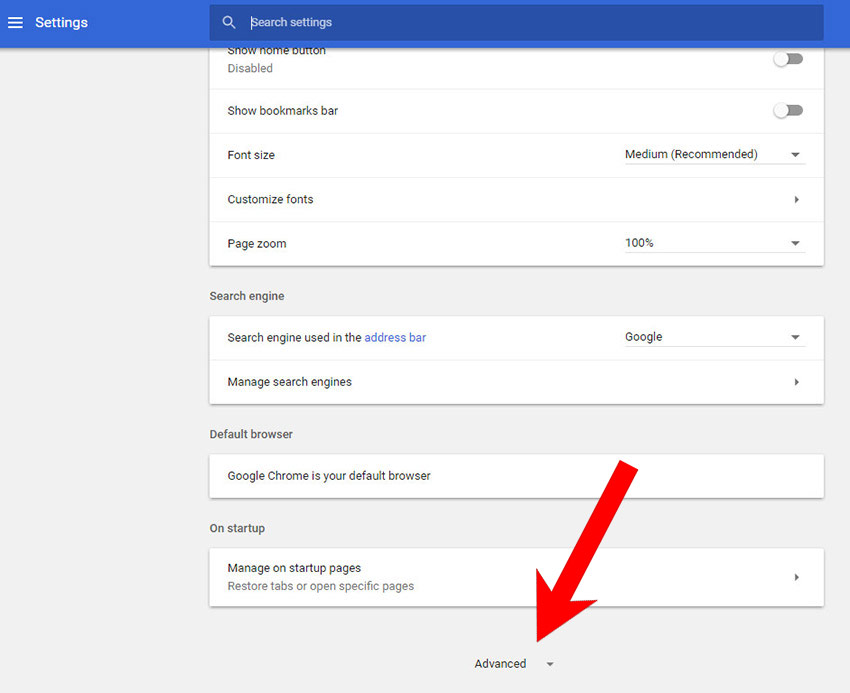
- Choose Settings.
- Scroll down and press on Show advanced settings.
- Find and press the Reset button.
- In the confirmation window that appears, press Reset.
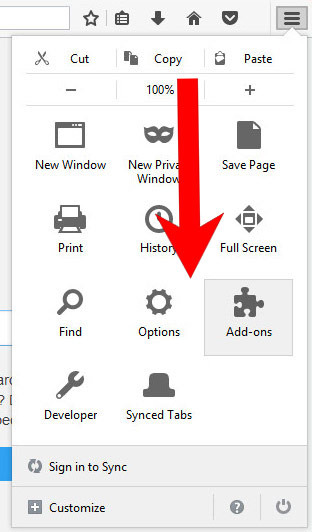
h) Remove Trust Wallet from Mozilla Firefox
- Open Mozilla Firefox and access the menu by clicking on the three bars on the right of the screen.
- Select Add-ons.
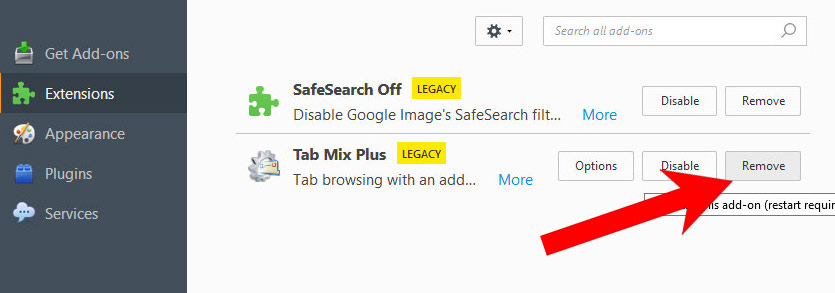
- Select the Extensions tab, and remove all questionable extensions.
- If you are not certain about an extension, you can disable it by clicking Disable. If you later decide to keep it, simply press Enable.
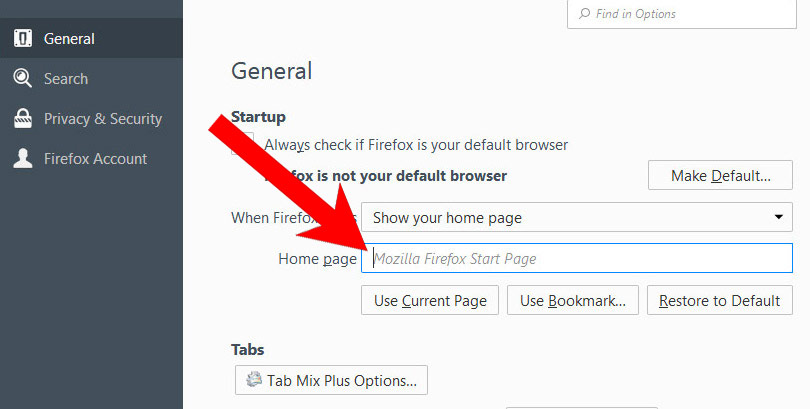
i) Restore your homepage on Mozilla Firefox
- Open Mozilla Firefox and access the menu by clicking on the three bars on the right side of the screen.
- Select Options.
- In General, click Restore to Default below the Home Page field.
j) Reset Mozilla Firefox
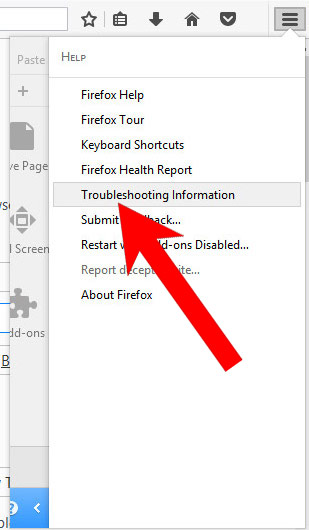
- Open Mozilla Firefox and access the menu by clicking on the three bars on the right of the screen.
- Press the question mark at the bottom of the menu.
- Select Troubleshooting Information.
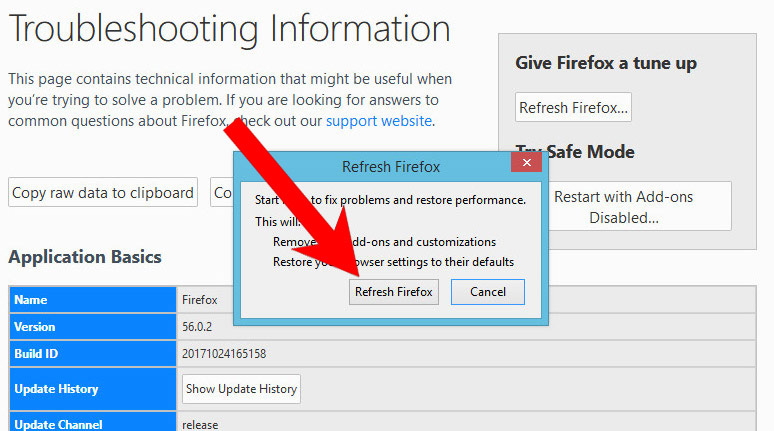
- Select the Refresh Firefox option.
k) Remove Trust Wallet from Safari (for Mac)
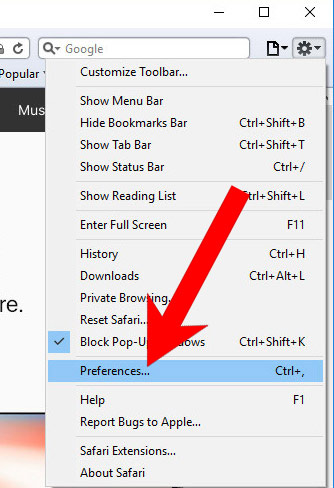
- Open Safari.
- Select Preferences (can be accesses by pressing on Safari at the top of your screen).
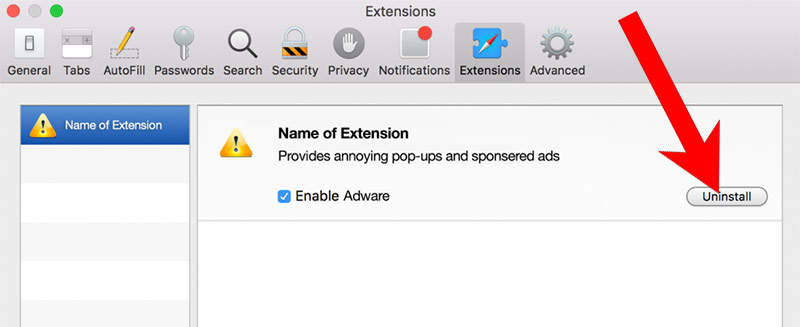
- Choose the Extensions tab.
- Uninstall all questionable extensions.
- If you are not certain about an extension, you can disable it by unchecking the box that says Enabled. If you later decide to keep it, simply check the box again.
l) Reset Safari
If you are using the Yosemite, El Capitan or the Sierra versions, the option to reset Safari with one click is not available. Thus you will have to clear the history and empty the caches in separate steps.- Open Safari.
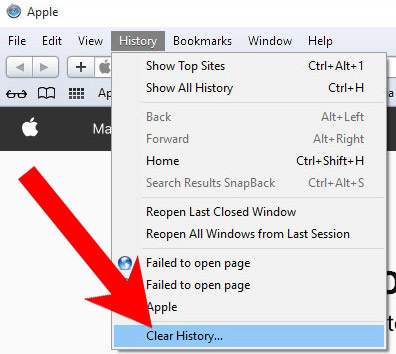
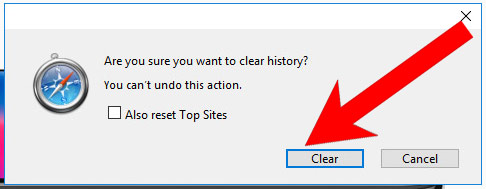
- Select Clear History (can be accesses by pressing on Safari at the top of your screen).
- Choose from what time you want the history deleted, and press Clear History.
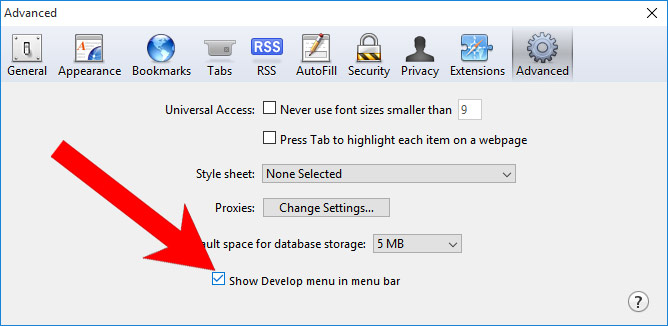
- Press on Safari at the top of the screen and select Preferences.
- Select the Advanced tab and check the box next to Show Develop menu in menu bar.
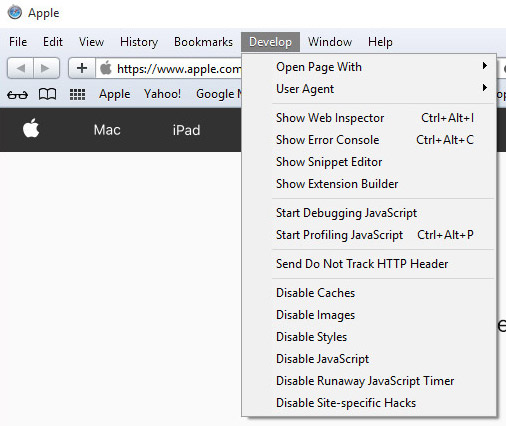
- Select Develop (from the menu bar at the top of the screen).
- Press Empty Caches.