You are possibly curious about reading our report since Yqal has in a hidden manner encoded your the biggest number of beneficial files and has requested you to transmit some income to the cryptocurrency account of some anonymous cyber criminals. The alternative proposed by the cyber criminals, regardless, isn’t the sole resolution to your matter. There are some additional techniques that can potentially assist you in avoiding the fine payment and regardless salvage some of your information. In the following lines, we shall say more connected to them and will supply you with a guide on how to erase the terrible Yqal ransomware from your pc.
The Yqal virus
The Yqal virus is a ransomware-based program that can scan a computer and encrypt the most commonly used data stored on it. After that, the Yqal malware scanner will generally request a payment in bitcoins so to offer its victims in packages with a log-decryption key.
Ransomware software like Yqal, Moia, Rigj are generally made for little etc. than unsophisticated blackmail. They may infiltrate a os in deceitful and encode a certain classification of files on your device without being discovered. Upon finishing this mission, they look to do something even more alarming. They showcase a note on the entered machine that declares that you are supposed to pay penalty if you’re determined your numbers to be accessible again. The invited number may range greatly from case to case, but in some instances, the culprits behind the ransomware may requirement the equivalent of a few of thousand of dollars in bitcoins.
Download Removal Toolto remove YqalThe techniques of delivery of Yqal may spectrum from an application bundle shared to junk email messages and their attachments. However, we must point out that Ransomware scarcely enters by itself. Instead, it as usual slithers in the device together with a Trojan horse that exploits the disadvantages in your operating system or the additional software set up on your system. Therefore, when you eliminate the Ransomware, you need to in addition assure you overview your machine for a concealed Trojan horse and terminate it as well.
The .Yqal file encryption
The .Yqal log encoding is a way i.e. employed to encrypt files and acquire them unreachable for the objective of profit deception. The .Yqal catalog enciphering can work in the background of the device and stay below the radar of the biggest part of defense software.
The two a majority of tapping doubts that we continuously get demanded connected to are whether it’s a brilliant idea to pay the asked penalty and whether the enchiphered info might be restored. Unfortunately, there is no respond that could be general for all the situations of ransomware parasite. However, it is NEVER a practical concept to transfer profits to anonymous cyber criminals as no problem what they vow. The reasoning is you merely can’t be positive that, earlier they get the profits, they will assist you decrypt your data. Therefore, we encourage to try some extra approaches of handling Yqal earlier you endanger your profit. In the case that you opt to eliminate Yqal and attempt to extract numbers from machine backups, our uninstallation instructions is here to help you.
Learn how to remove Yqal from your computer
- Step 1. Delete Yqal via anti-malware
- Step 2. Delete Yqal using System Restore
- Step 3. Recover your data
Step 1. Delete Yqal via anti-malware
a) Windows 7/Vista/XP
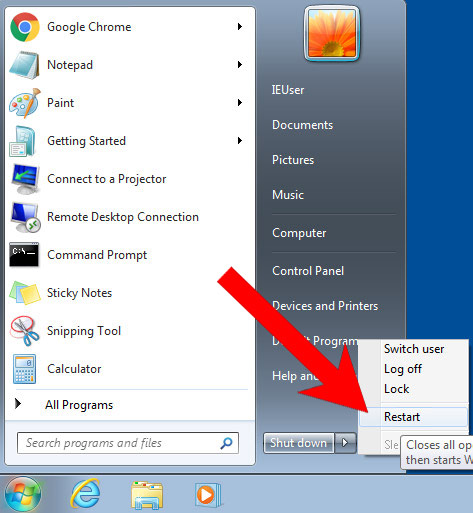
- Start → Shut down → Restart.

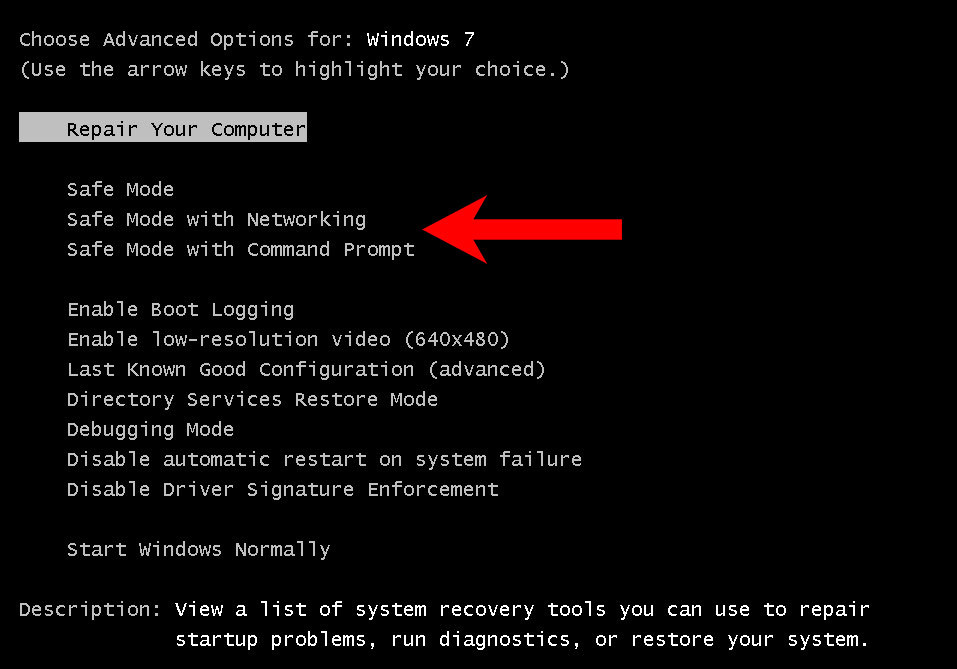
- When the PC starts loading, keep pressing F8 until Advanced Boot Options appear.
- Select Safe Mode with Networking.
- When your computer loads, download anti-malware using your browser.
- Use anti-malware to get rid of the ransomware.
b) Windows 8/10
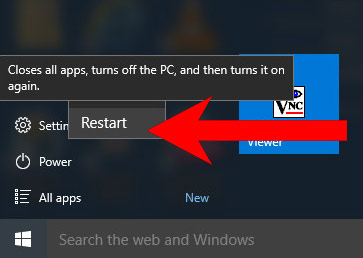
- Open the Start menu, press the Power logo.
- Hold the key Shift and press Restart.
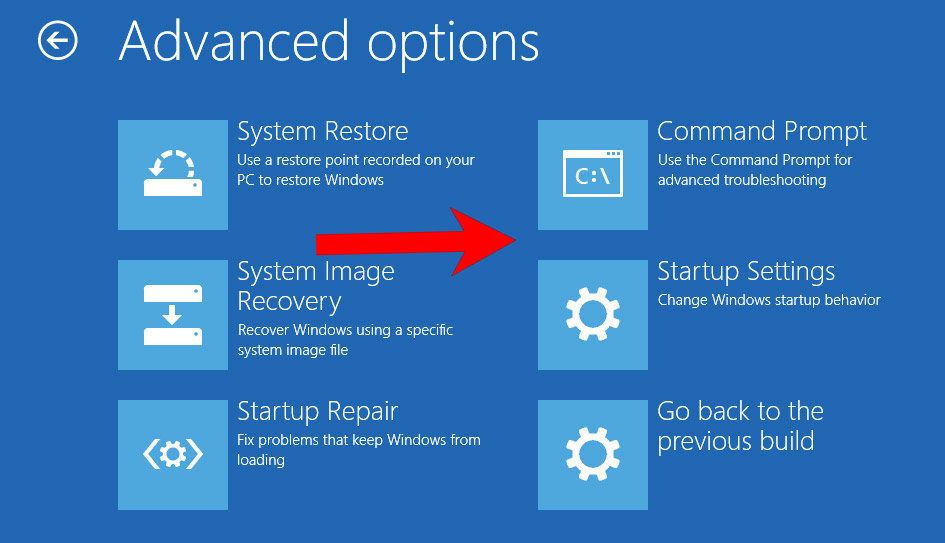
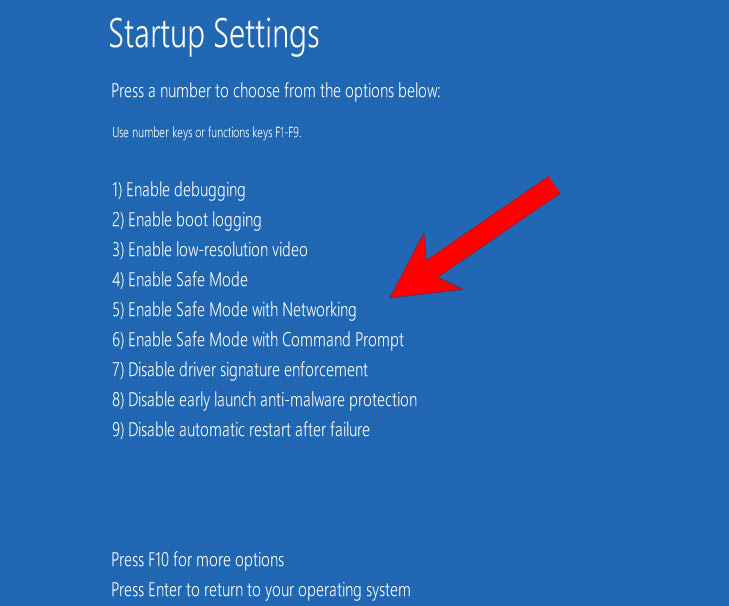
- Then Troubleshoot → Advanced options → Start Settings.
- Go down to Enable Safe Mode (or Safe Mode with networking).
- Press Restart.
- When your computer loads, download anti-malware using your browser.
- Use anti-malware to get rid of the ransomware.
Step 2. Delete Yqal using System Restore
a) Windows 7/Vista/XP
- Start → Shut down → Restart.
- When the PC starts loading, keep pressing F8 until Advanced Boot Options appear.
- Select Safe Mode with Command Prompt.
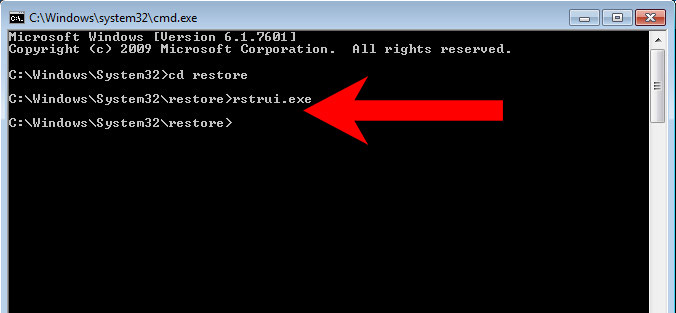
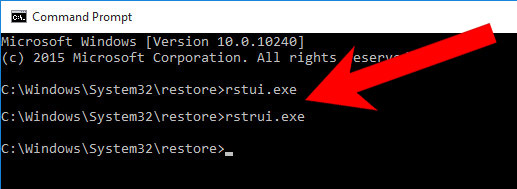
- In the window that appears, type in cd restore and press Enter.
- Type in rstrui.exe and press Enter.
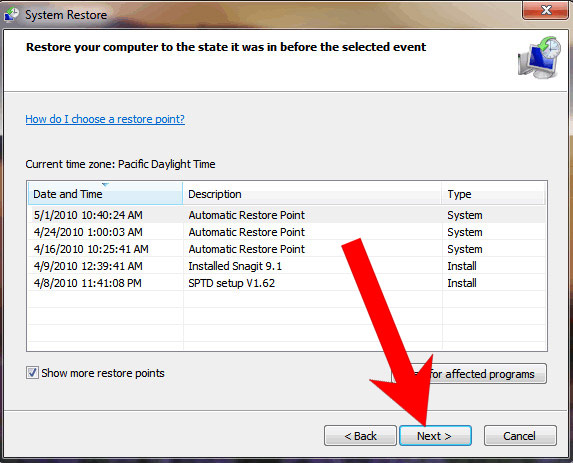
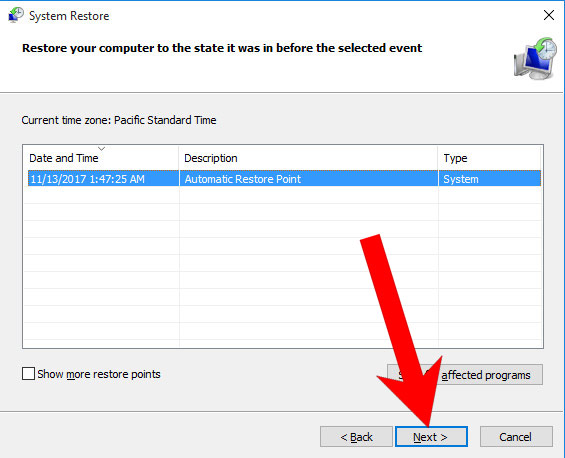
- In the Window that appears, select a restore point and press Next. Make sure that restore point is prior to the infection.
- In the confirmation window that appears, press Yes.
b) Windows 8/10
- Open the Start menu, press the Power logo.
- Hold the key Shift and press Restart.
- Then Troubleshoot → Advanced options → Command Prompt.
- Click Restart.
- In the window that appears, type in cd restore and press Enter.
- Type in rstrui.exe and press Enter.
- In the window that appears, press Next, choose a restore point (prior to infection) and press Next.
- In the confirmation window that appears, press Yes.
Step 3. Recover your data
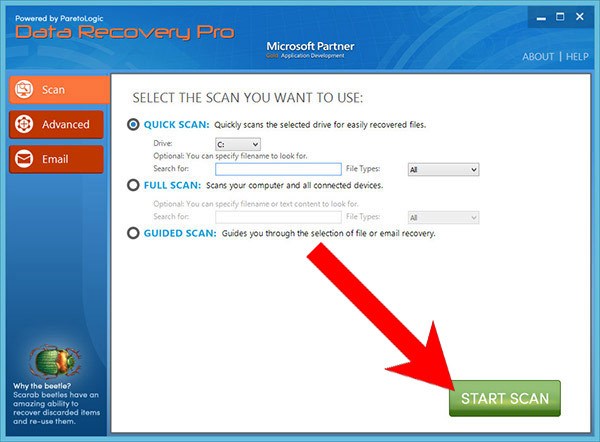
a) Method 1. Using Data Recovery Pro to recover files
- Obtain Data Recovery Pro from the official website.
- Install and open it.
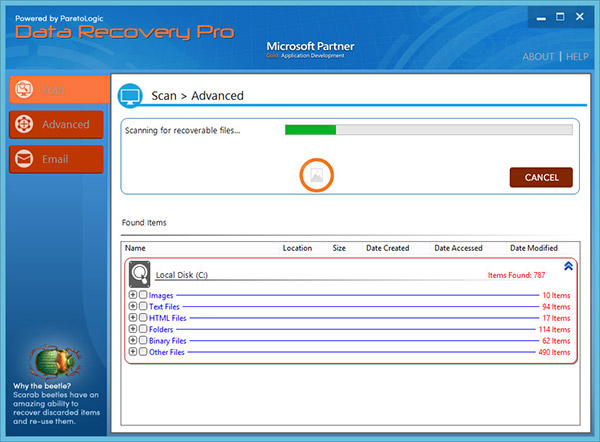
- Use the program to scan for encrypted files.
- It files are recoverable, the program will allow you to do it.
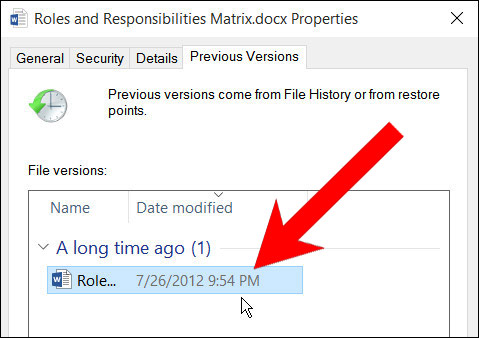
b) Method 2. Using Windows Previous Versions to recover files
For this method to work, System Restore must have been enabled prior to infections.- Right-click on the file you want to recover.
- Select Properties.
- Go to the Previous Versions tab, select the version of the file you want, and click Restore.
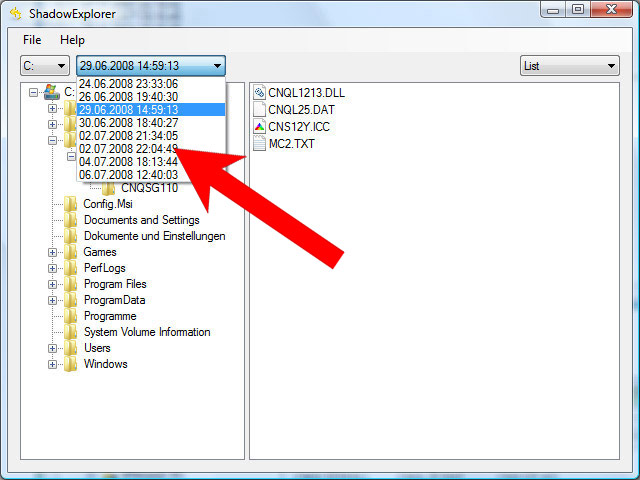
c) Method 3. Using Shadow Explorer to recover files
Your operating system automatically creates shadow copies of your files so that you can recover files if your system crashed. It is possible to recover files this way after a ransomware attack, but some threats manage to delete the shadow copies. If you are lucky, you should be able to recover files via Shadow Explorer.- You need to download the Shadow Explorer program, which can be obtained from the official site, shadowexplorer.com.
- Install and open it.
- Select the disk where the files are located, choose the date, and when the folders with files appear, press Export.