Windows Defender Security Notification
Windows Defender Security Notification is an undesirable app known for showing ads in the browser, page-redirecting the user’s searches, and changing the settings of the homepage and search engine. Windows Defender Security Notification could be potentially dangerous to the pc and so it have to not be kept set up in the browser.
The Windows Defender Security Notification Pop up
Apps such as Web navigator browser, Vip Captcha Live that behave like the Windows Defender Security Notification Pop up fraud are commonly referred to as browser-redirects or browser-hijackers. As quickly as their setup on the machine is conducted, they seize the primary browser on the machine and introduce certain modifies to it.
They could also change some Registry keys and some of the computer’s net settings so as to let on their own to sidestep some safety boundaries that would otherwise forbid them from carrying out their end-goal, which is to keep aggressively advertising-supported various merchandise, websites, and functions from inside the browser. The oriented browser may be Chrome, Edge, Firefox, Opera, or even Safari in case the certain invader app is Mac-compatible. In the case of Windows Defender Security Notification, so far it appears that this exact hijacker merely targets Windows PCs and not Macs.
Download Removal Toolto remove Windows Defender Security NotificationIn spite of the involved operating system or browser, regardless, the indications are generally nearly identical – modifies in really important to browser elements for example the home web page and the new-tab site addresses, the search website, and the toolbar, unanticipated and surprising directs to pages and web pages that Windows Defender Security Notification is presumed to endorse, generation of intrusive commercial advertisements and banner advertisements that pop-up in the middle of the screen or right over page-components for example hyperlinks or buttons that the user may are eager to engage with.
Obviously, the concept is that the user would be compelled to engage with the advertising content that Windows Defender Security Notification puts on their screen as this makes promotional money via the well-known Pay-Per-angle and Pay-Per-tap models. It is, regardless, very not suggested to press on anything that Windows Defender Security Notification might try to display in your browser whilst you’d be doing it merely to erase the intrusive ad or emblem.
The primary problem here is that the programs of the browser intruder category aren’t precisely famous for exhibiting the most dependable shapes of content. A lot of makers of such applications are paid commissions by the owners of mysterious, controversial, or even borderline unlawful websites so as to upgrade the ratings of those pages by drawing in etc. traffic. Needless to say, if you arrive in such a website or website, your machine’s safety may be compromised and you might become prone to all sorts of adverse malicious software, deception pieces, Ransomware malicious software, Trojan Horses, and etc.. This is the precise argument we firmly recommend that you don’t authorize Windows Defender Security Notification to steer affixed to your browser even if you suspect that you may avoid its continuous aims to promote something. Oftentimes, all that it takes for a os to get corrupted is a single misguided press on the risky relate, emblem, or ad.
Download Removal Toolto remove Windows Defender Security NotificationOf course, we will assist you to the safest of our capabilities together with the removal of Windows Defender Security Notification. The next instruction and the tested elimination-application attached to it will help you together with the termination process and help you guard your pc by creating any chances upon together with infections, Ransomware, Trojans, or malware a lot fewer potential.
Learn how to remove Windows Defender Security Notification from your computer
- Step 1. Windows Defender Security Notification Removal from Windows
- Step 2. Delete Windows Defender Security Notification from browsers
Step 1. Windows Defender Security Notification Removal from Windows
a) Windows 7/XP
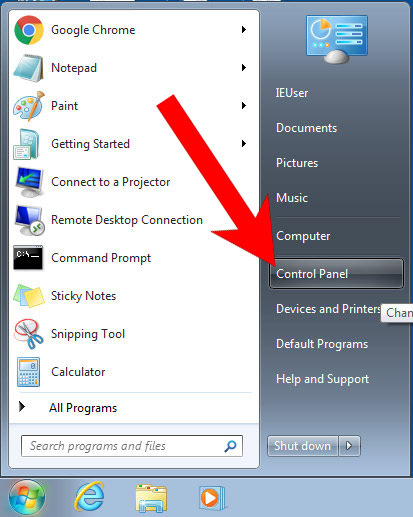
- Press on the Start icon.

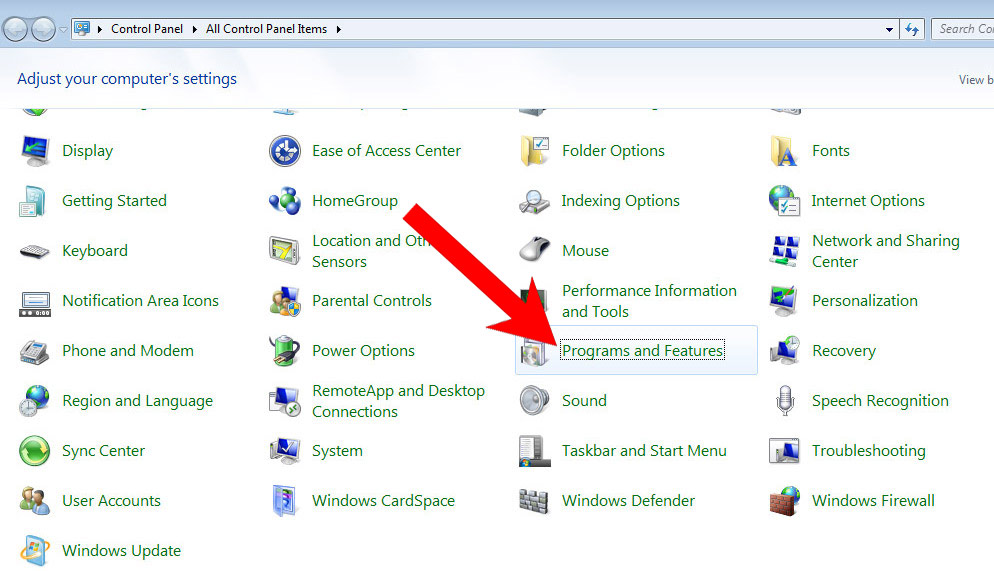
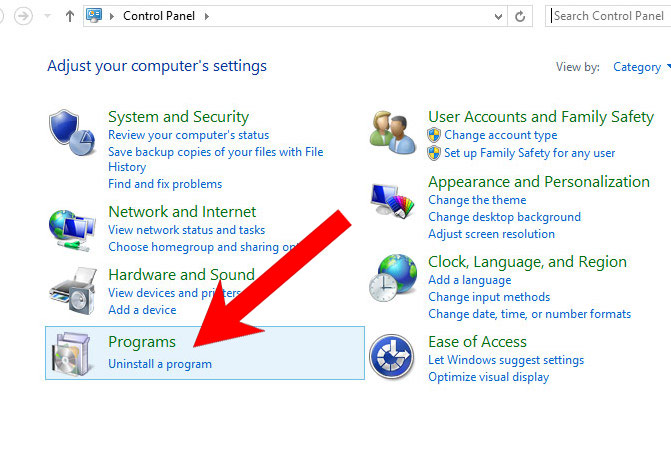
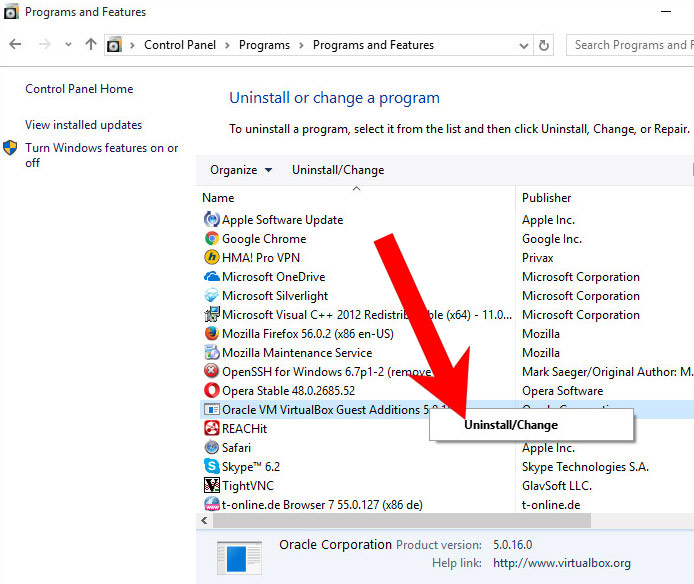
- Control Panel → Programs and Features.
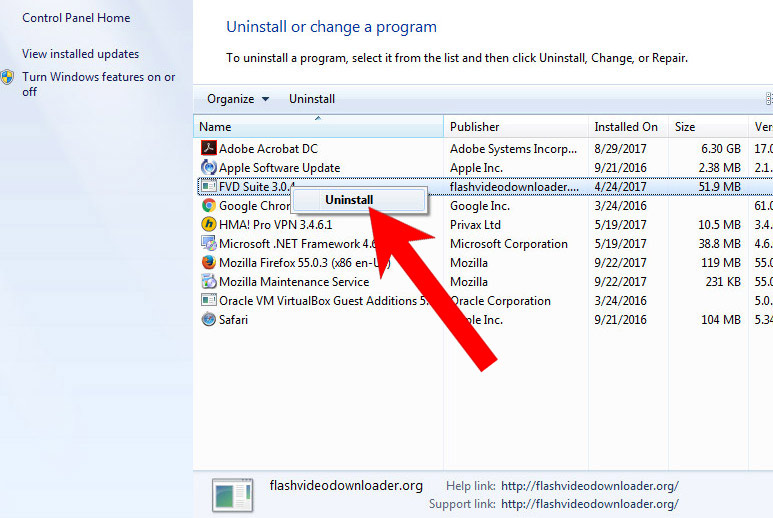
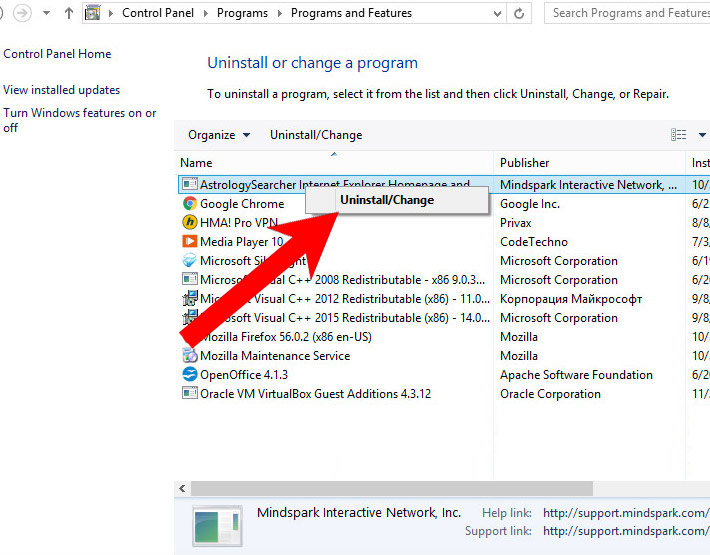
- Find the program you want to delete and press Uninstall.
b) Windows 8
- Right-click on the start icon (lower left corner).
- Select Control Panel.
- Click Programs and Features.
- Find and remove all unwanted programs.

c) Windows 10
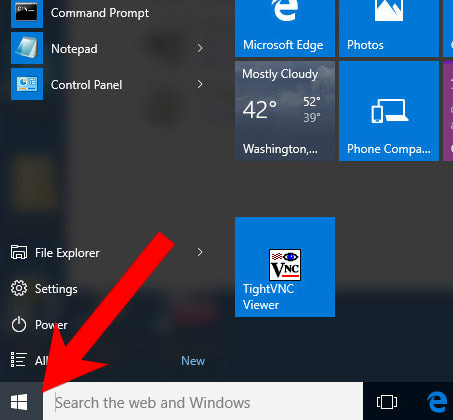
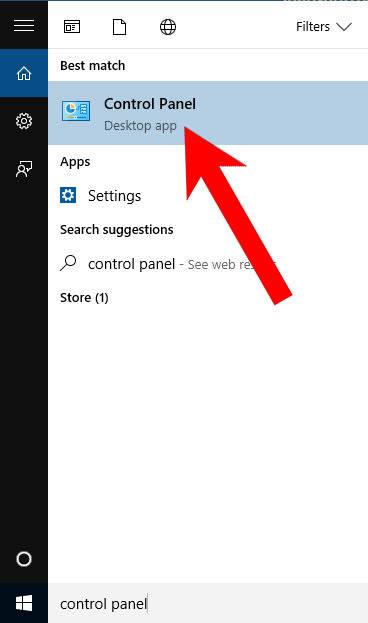
- Open Start menu and click on the magnifying glass (next to the shut down button).
- Type in Control Panel.
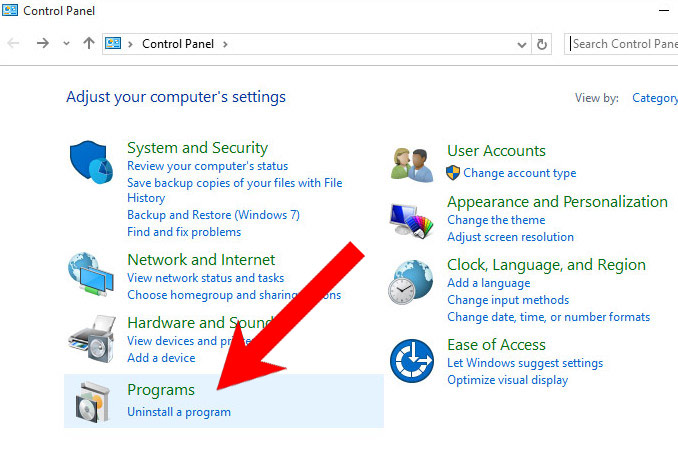
- Control Panel → Programs and Features.
- Find and remove all unwanted programs.
d) Mac OS X
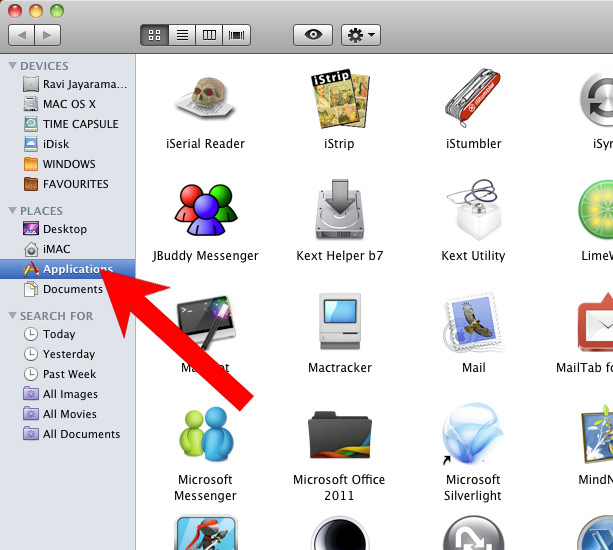
- Open Finder and press Applications.
- Check all suspicious programs you want to get rid of.
- Drag them to the trash icon in your dock (Alternatively, right-click on the program and press Move to Trash).
- After you move all the unwanted programs, right-click on the trash icon and select Empty Trash.

Step 2. Delete Windows Defender Security Notification from browsers
a) Remove Windows Defender Security Notification from Microsoft Edge
Reset Microsoft Edge (Method 1)
- Open Microsoft Edge.
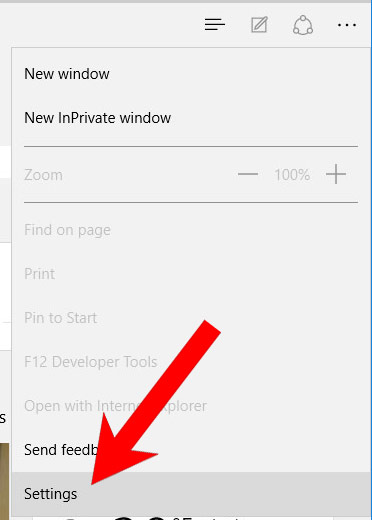
- Press More located at the top right corner of the screen (the three dots).
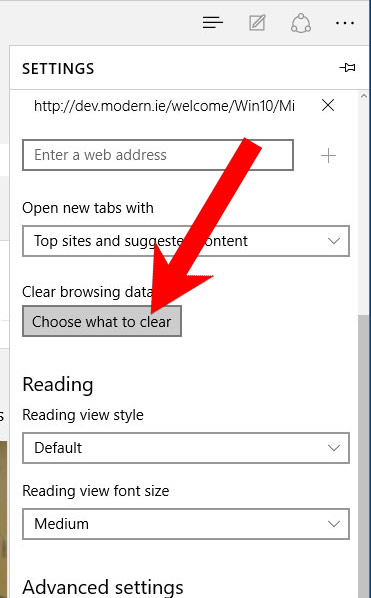
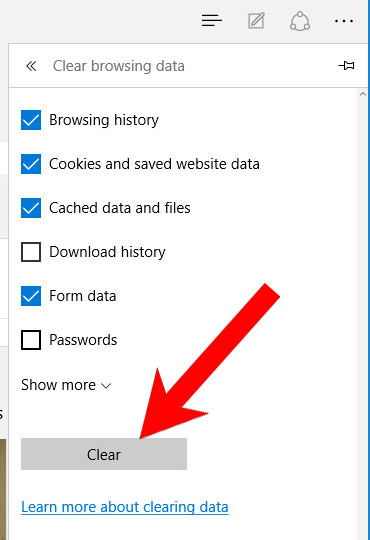
- Settings → Choose what to clear.
- Check the boxes of the items you want removed, and press Clear.
- Press Ctrl + Alt + Delete together.
- Choose Task Manager.
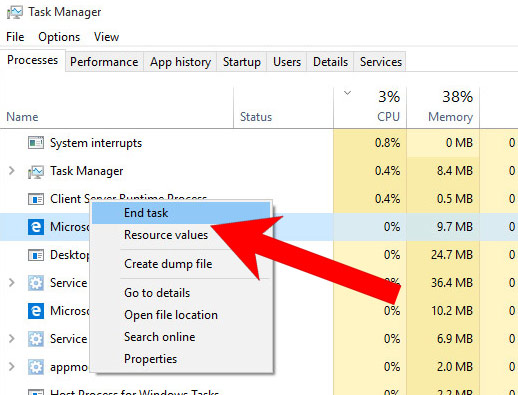
- In the Processes tab, find the Microsoft Edge process, right click on it, and press Go to details (or More details if Go to details is not available).
- Right-click on all Microsoft Edge processes, and choose End task.
(Method 2)
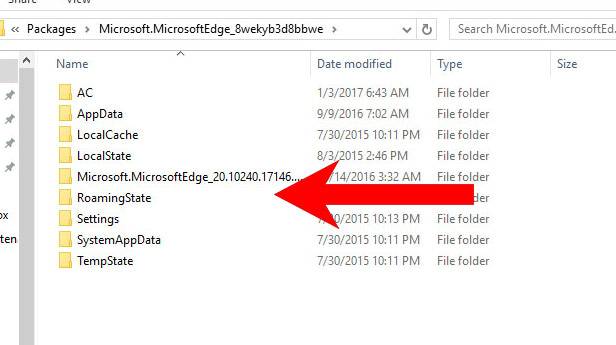
Before you proceed with this method, backup your data.- Go to C:\Users\%username%\AppData\Local\Packages\Microsoft.MicrosoftEdge_xxxxxxxxxx.
- Select all the folders, right-click on them and press Delete.
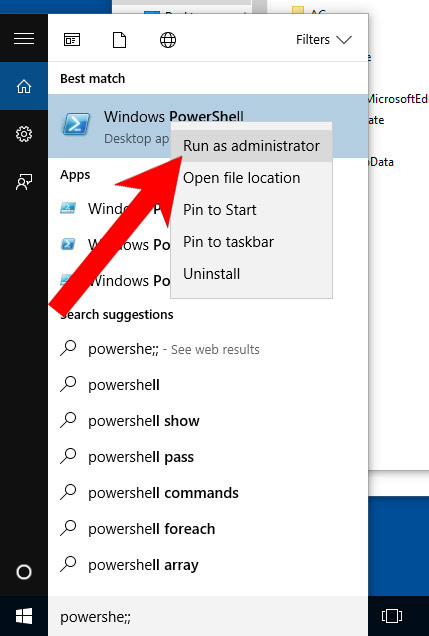
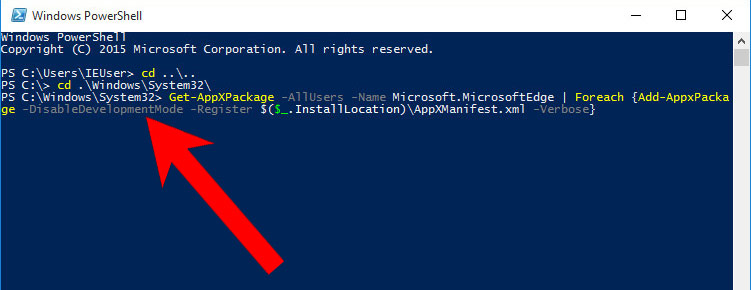
- Press the start button, and type in Windows PowerShell in the search box.
- Right-click on the result, and select Run as administrator.
- In Administrator: Windows PowerShell, paste
Get-AppXPackage -AllUsers -Name Microsoft.MicrosoftEdge | Foreach {Add-AppxPackage -DisableDevelopmentMode -Register $($_.InstallLocation)\AppXManifest.xml -Verbose}
under PS C:\WINDOWS\system32> and tap Enter.
- The issue should be gone now.
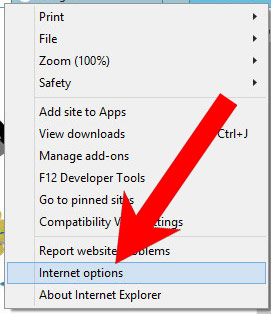
b) Remove Windows Defender Security Notification from Internet Explorer
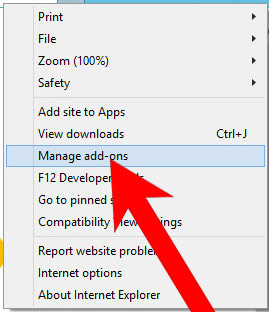
- Open Internet Explorer and press on the Gear icon.
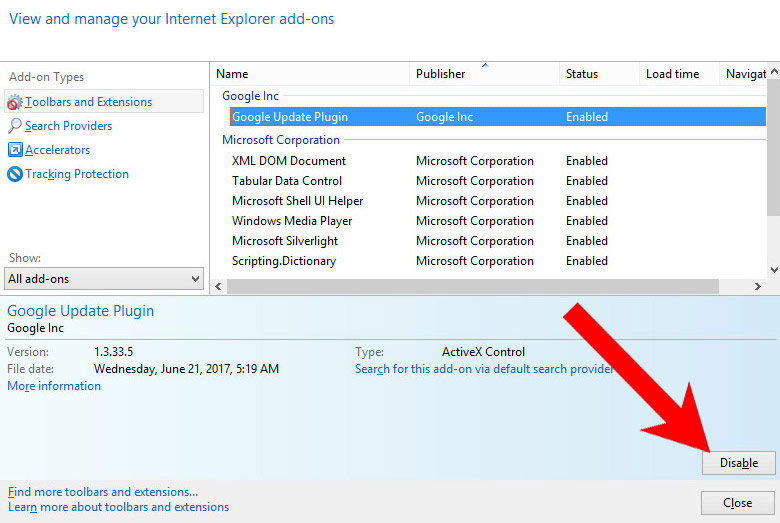
- Select Manage add-ons, and then Toolbars and Extensions.
- Find and disable all suspicious extensions.
- Close the window.
c) Restore your homepage on Internet Explorer
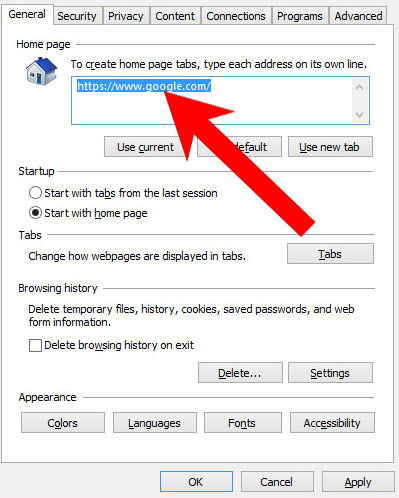
- Open Internet Explorer and press on the Gear icon.
- Internet Options → General tab. Delete the homepage URL and type in your preferred one.
- Press Apply.
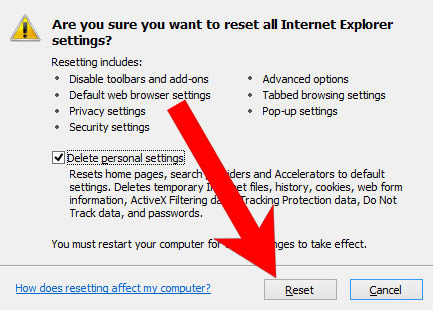
d) Reset Internet Explorer
- Open Internet Explorer and press on the Gear icon.
- Internet Options → Advanced tab.
- At the bottom, you will see a Reset button. Press that.
- In the window that appears, check the box that says Delete personal settings.
- Press Reset.
- Click OK to exit the window.
- Restart your browser.

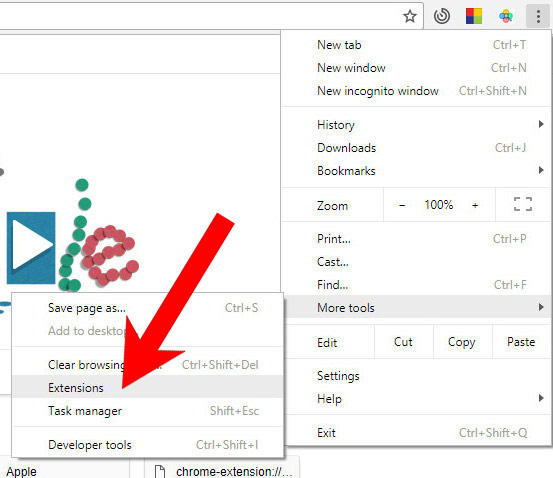
e) Remove Windows Defender Security Notification from Google Chrome
- Open Google Chrome and press the menu icon on the right, next to the URL field.
- Choose More tools and Extensions.
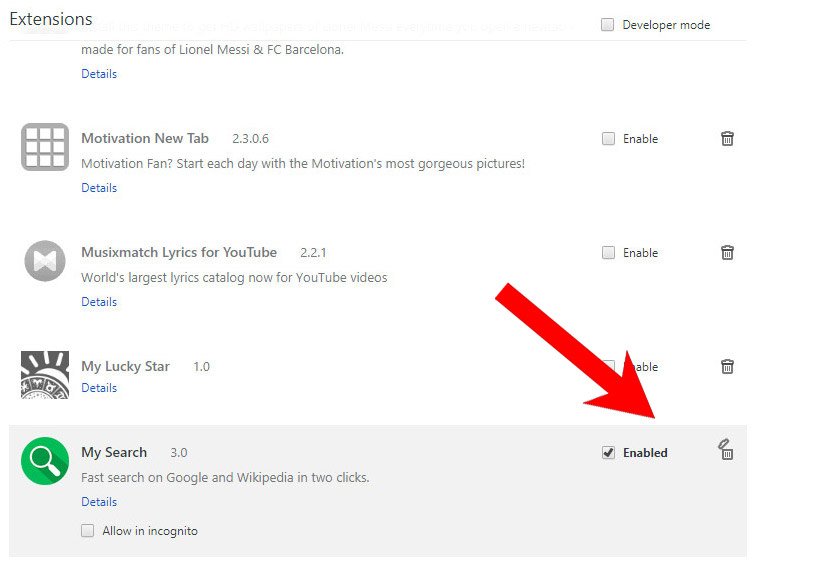
- Remove suspicious extensions by clicking the Trash icon next to them.
- If you are not certain about an extension, you can disable it by unchecking the box that says Enabled. If you later decide to keep it, simply check the box again.
f) Restore your homepage on Google Chrome
- Open Google Chrome and press the menu icon on the right, next to the URL field.
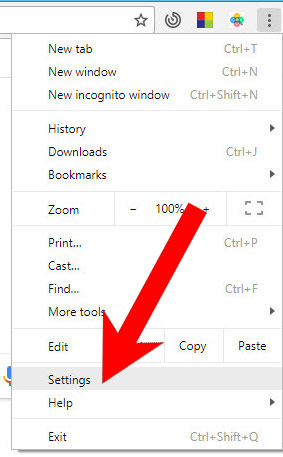
- Choose Settings.
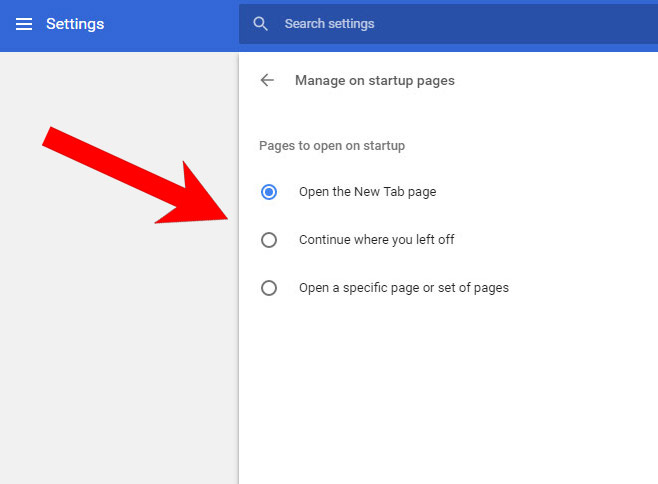
- In the window that appears, under On startup, there will be a Set pages option. Press on that.
- Remove the set website, and type in the one you prefer to be your homepage. Press OK.
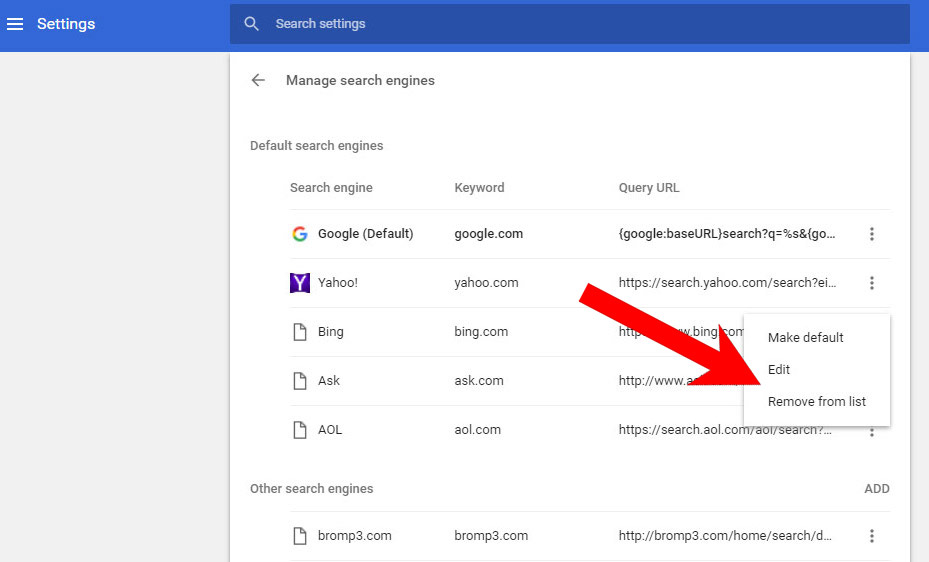
- In Settings, under Search, there is a Manage search engines option. Select that.
- Remove all search engines except the one you want to use. Click Done.
g) Reset Google Chrome
- Open Google Chrome and press the menu icon on the right, next to the URL field.
- Choose Settings.
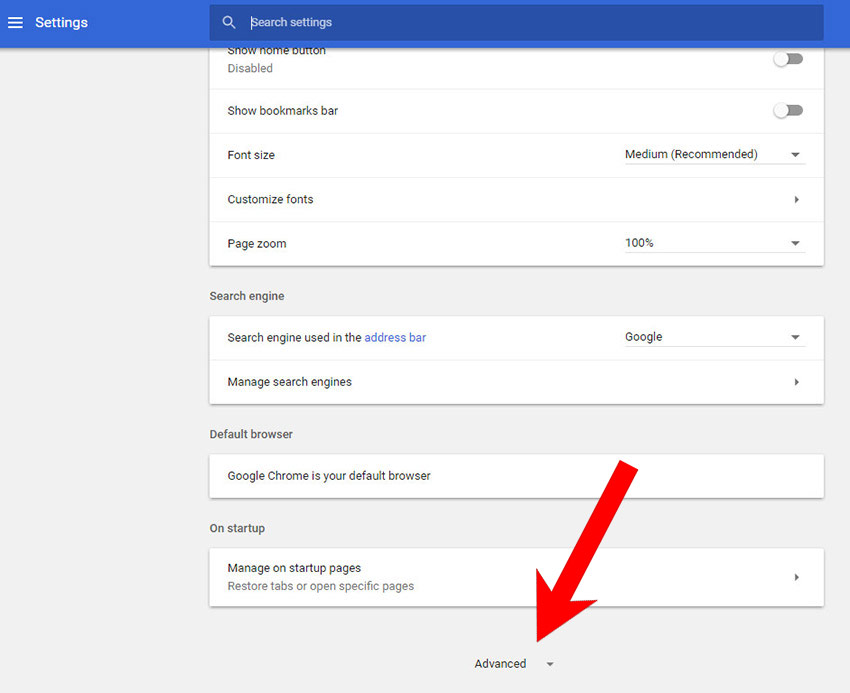
- Scroll down and press on Show advanced settings.
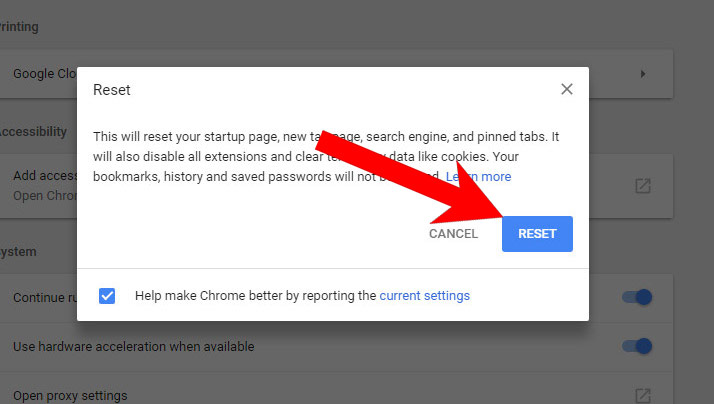
- Find and press the Reset button.
- In the confirmation window that appears, press Reset.
h) Remove Windows Defender Security Notification from Mozilla Firefox
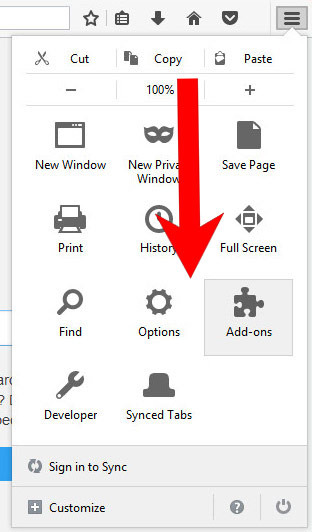
- Open Mozilla Firefox and access the menu by clicking on the three bars on the right of the screen.
- Select Add-ons.
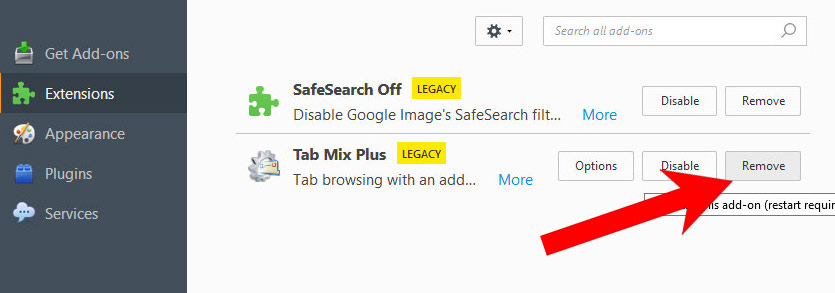
- Select the Extensions tab, and remove all questionable extensions.
- If you are not certain about an extension, you can disable it by clicking Disable. If you later decide to keep it, simply press Enable.
i) Restore your homepage on Mozilla Firefox
- Open Mozilla Firefox and access the menu by clicking on the three bars on the right side of the screen.
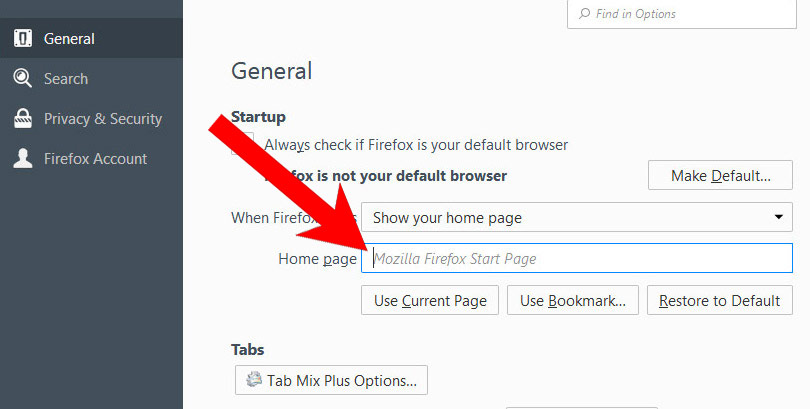
- Select Options.
- In General, click Restore to Default below the Home Page field.
j) Reset Mozilla Firefox
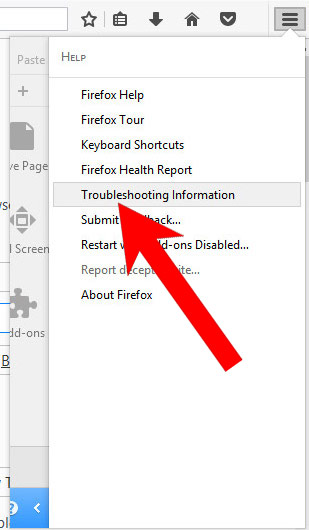
- Open Mozilla Firefox and access the menu by clicking on the three bars on the right of the screen.
- Press the question mark at the bottom of the menu.
- Select Troubleshooting Information.
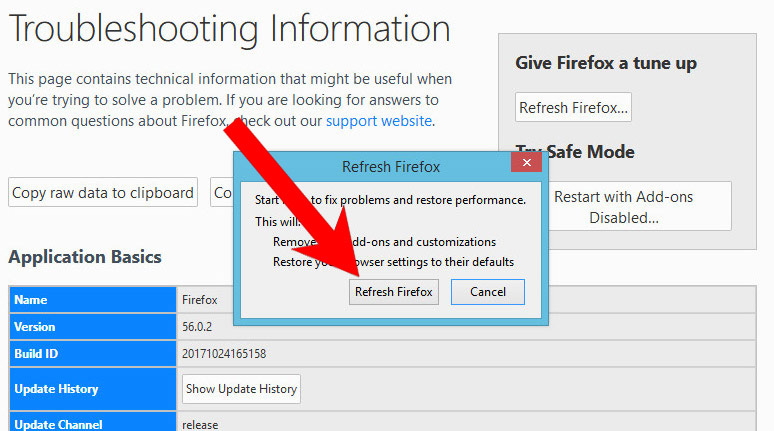
- Select the Refresh Firefox option.
k) Remove Windows Defender Security Notification from Safari (for Mac)
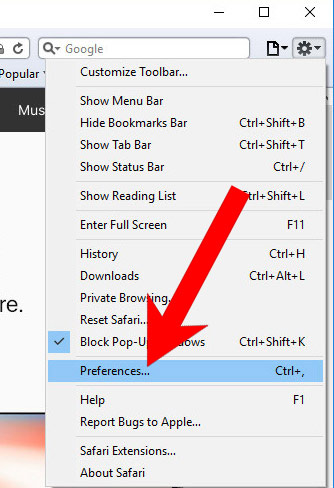
- Open Safari.
- Select Preferences (can be accesses by pressing on Safari at the top of your screen).
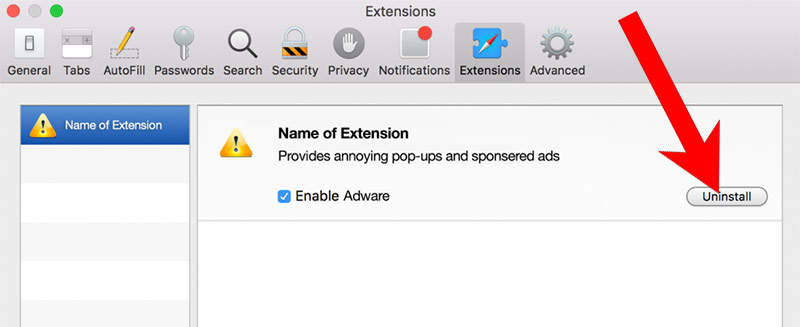
- Choose the Extensions tab.
- Uninstall all questionable extensions.
- If you are not certain about an extension, you can disable it by unchecking the box that says Enabled. If you later decide to keep it, simply check the box again.
l) Reset Safari
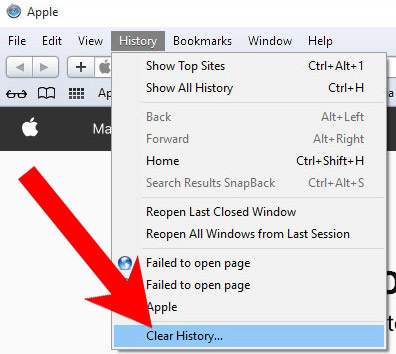
If you are using the Yosemite, El Capitan or the Sierra versions, the option to reset Safari with one click is not available. Thus you will have to clear the history and empty the caches in separate steps.- Open Safari.
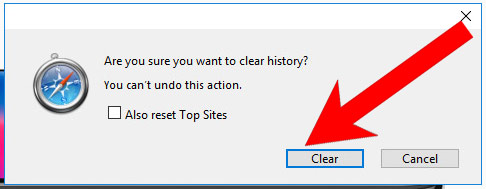
- Select Clear History (can be accesses by pressing on Safari at the top of your screen).
- Choose from what time you want the history deleted, and press Clear History.
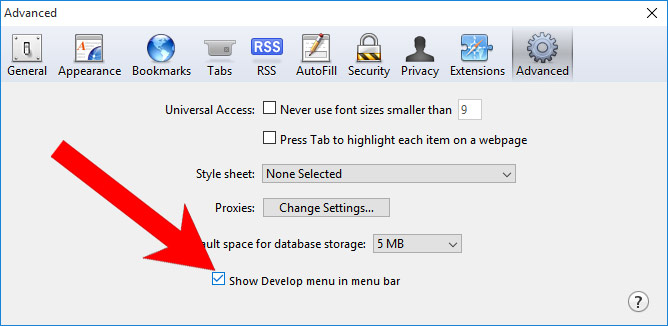
- Press on Safari at the top of the screen and select Preferences.
- Select the Advanced tab and check the box next to Show Develop menu in menu bar.
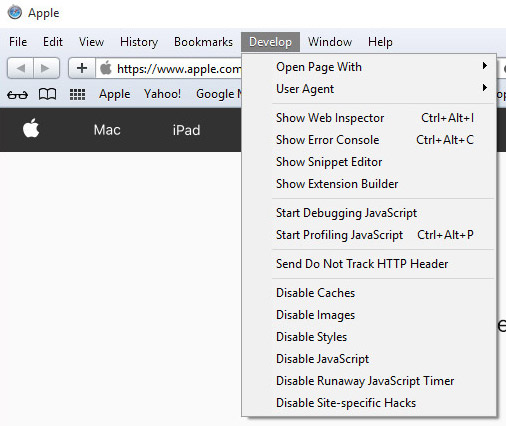
- Select Develop (from the menu bar at the top of the screen).
- Press Empty Caches.