Pro Power Save
The Pro Power Save Scam
Pro Power Save Scam
To begin with, Pro Power Save has ever been identified as a malicious kind of software. Pro Power Save as a matter of fact do not have any terribly fraudulent effects.
Pro Power Save is one more contaminated power-saving os that need to be ignored at all costs. It isn’t the sole machine of its class, as crooks have been leading to replace the title of their item earlier susceptible. Be careful of any computer that ensures to lower your electricity receipt by a whopping 90%. Such declares are baseless and do not have validity.
It is frustrating that some sites that sell Pro Power Save use false checks and comments to trick likely users. Those practices merely serve to damage innocent users who are expecting to salvage on their energy bills. If you intend to lessen your electricity utilization and bills, there are valid methods to carry out so.
It’s paramount to stay alert and ignore falling pray to hoaxes like Pro Power Save, Gokoayz, Mirouz. Instead, ponder following truthful energy-saving suggestions which will help you lower your usage and cut costs in a sustainable and sensible way.
Download Removal Toolto remove Pro Power SaveLearn how to remove Pro Power Save from your computer
Step 1. Pro Power Save Removal from Windows
a) Windows 7/XP
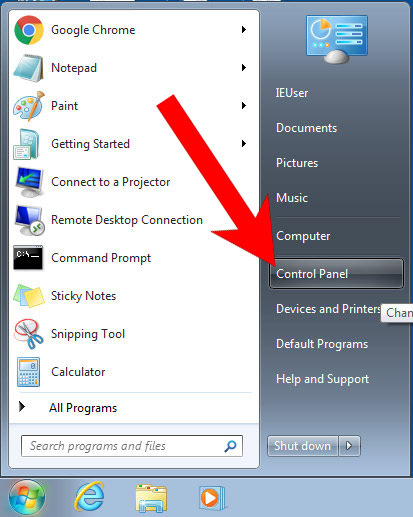
- Press on the Start icon.

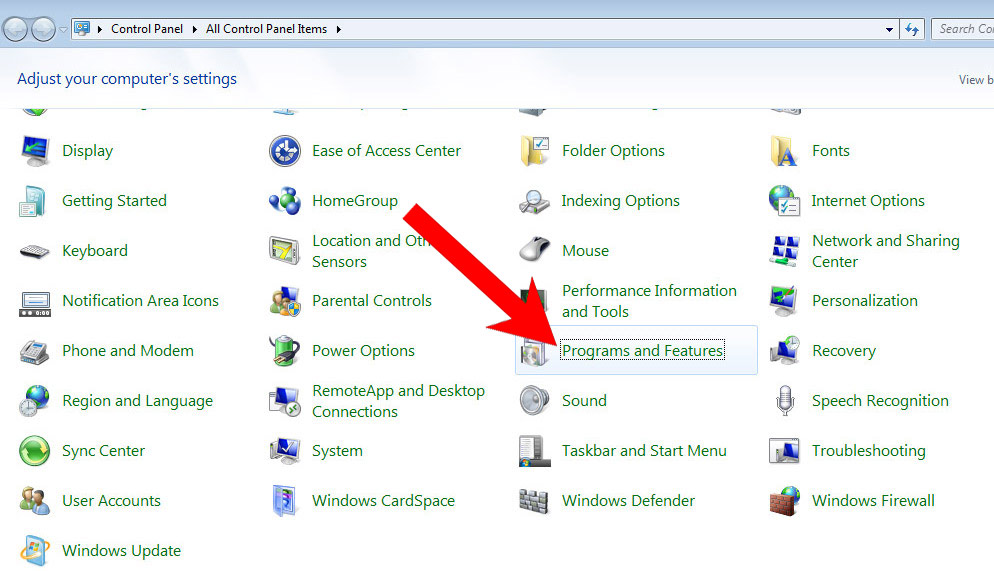
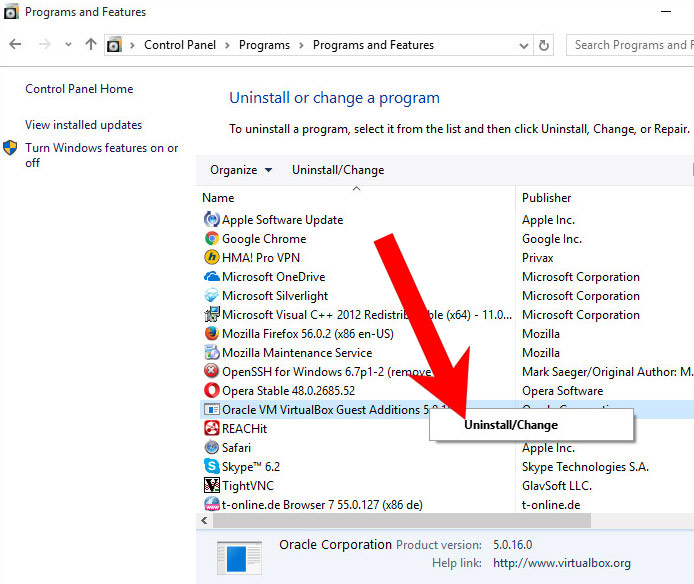
- Control Panel → Programs and Features.
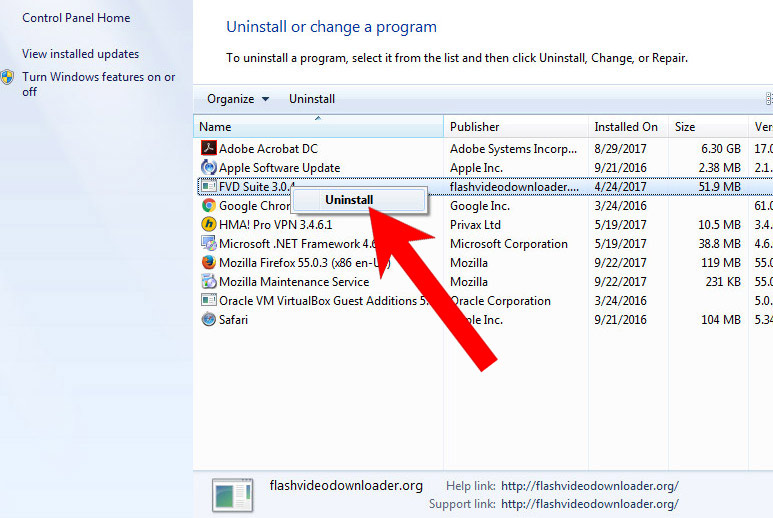
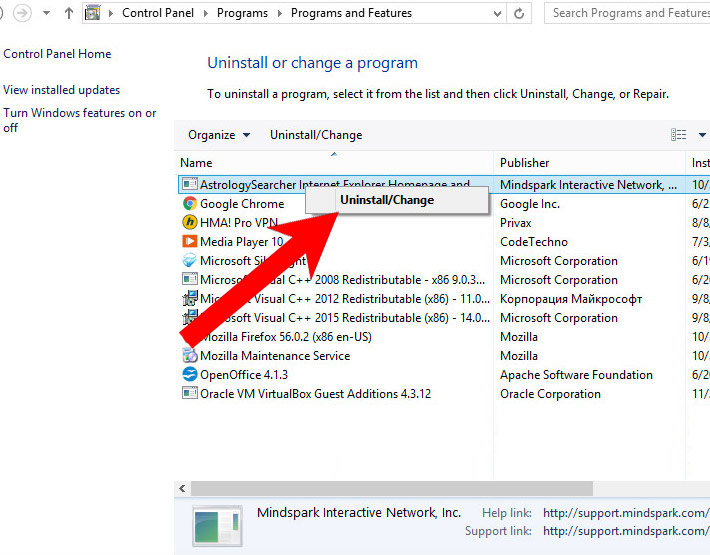
- Find the program you want to delete and press Uninstall.
b) Windows 8
- Right-click on the start icon (lower left corner).
- Select Control Panel.
- Click Programs and Features.
- Find and remove all unwanted programs.

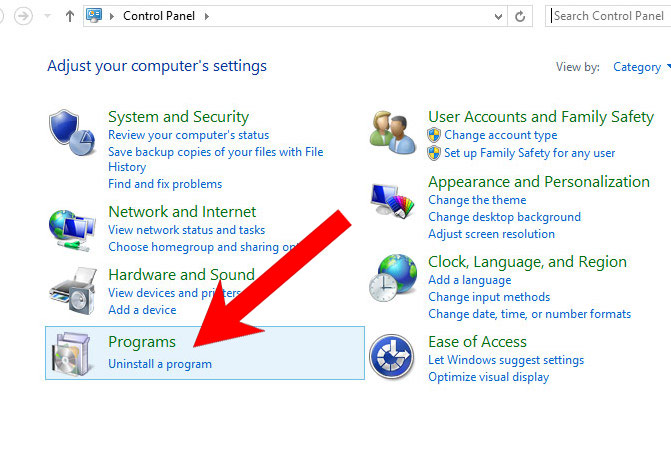
c) Windows 10
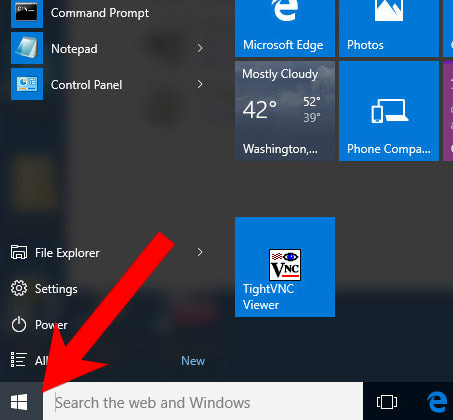
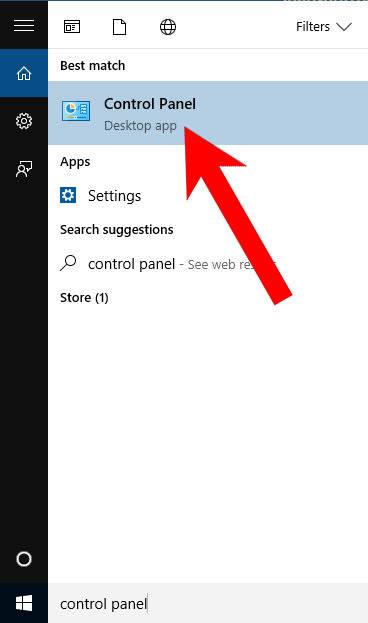
- Open Start menu and click on the magnifying glass (next to the shut down button).
- Type in Control Panel.
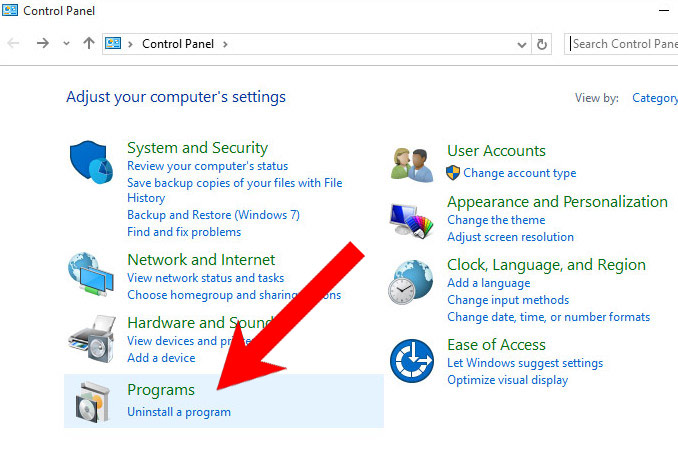
- Control Panel → Programs and Features.
- Find and remove all unwanted programs.
d) Mac OS X
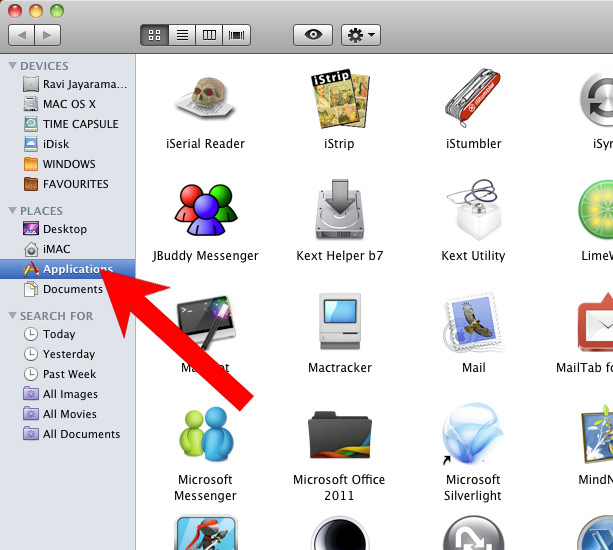
- Open Finder and press Applications.
- Check all suspicious programs you want to get rid of.
- Drag them to the trash icon in your dock (Alternatively, right-click on the program and press Move to Trash).
- After you move all the unwanted programs, right-click on the trash icon and select Empty Trash.

Step 2. Delete Pro Power Save from browsers
a) Remove Pro Power Save from Microsoft Edge
Reset Microsoft Edge (Method 1)
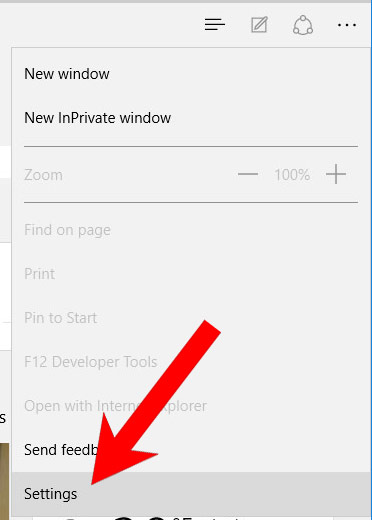
- Open Microsoft Edge.
- Press More located at the top right corner of the screen (the three dots).
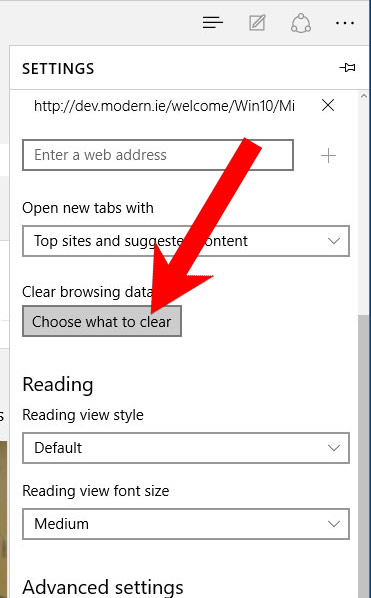
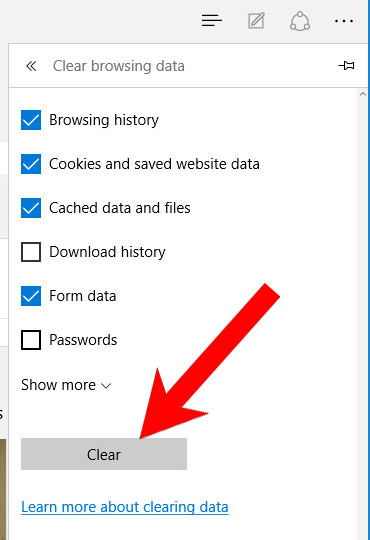
- Settings → Choose what to clear.
- Check the boxes of the items you want removed, and press Clear.
- Press Ctrl + Alt + Delete together.
- Choose Task Manager.
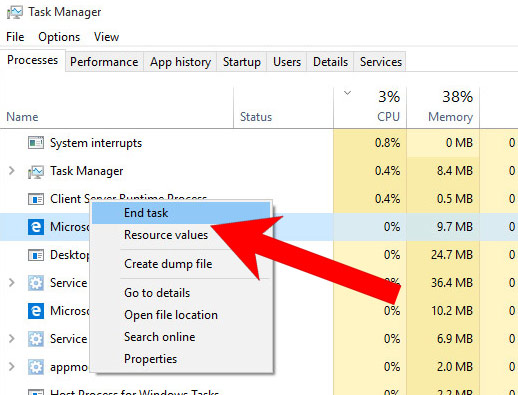
- In the Processes tab, find the Microsoft Edge process, right click on it, and press Go to details (or More details if Go to details is not available).
- Right-click on all Microsoft Edge processes, and choose End task.
(Method 2)
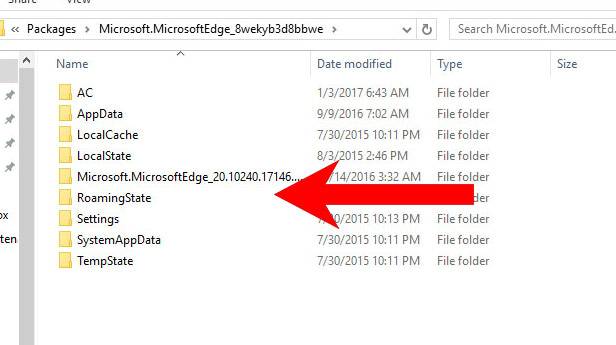
Before you proceed with this method, backup your data.- Go to C:\Users\%username%\AppData\Local\Packages\Microsoft.MicrosoftEdge_xxxxxxxxxx.
- Select all the folders, right-click on them and press Delete.
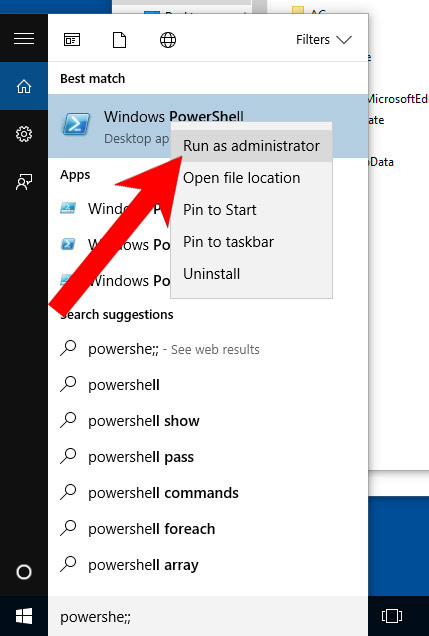
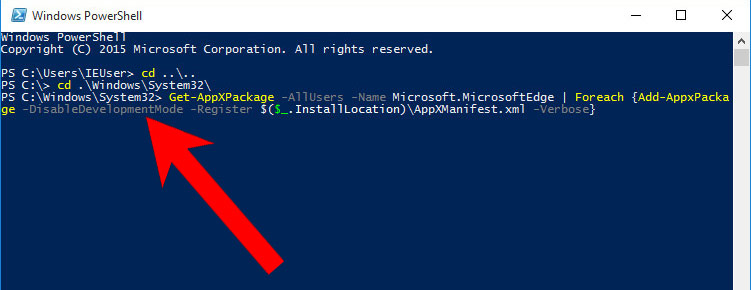
- Press the start button, and type in Windows PowerShell in the search box.
- Right-click on the result, and select Run as administrator.
- In Administrator: Windows PowerShell, paste
Get-AppXPackage -AllUsers -Name Microsoft.MicrosoftEdge | Foreach {Add-AppxPackage -DisableDevelopmentMode -Register $($_.InstallLocation)\AppXManifest.xml -Verbose}
under PS C:\WINDOWS\system32> and tap Enter.
- The issue should be gone now.
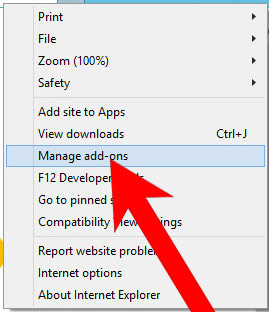
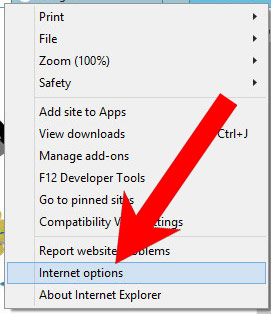
b) Remove Pro Power Save from Internet Explorer
- Open Internet Explorer and press on the Gear icon.
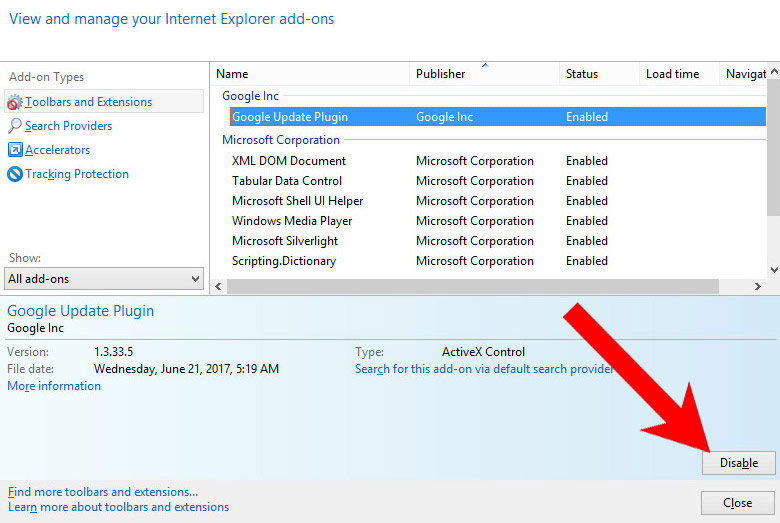
- Select Manage add-ons, and then Toolbars and Extensions.
- Find and disable all suspicious extensions.
- Close the window.
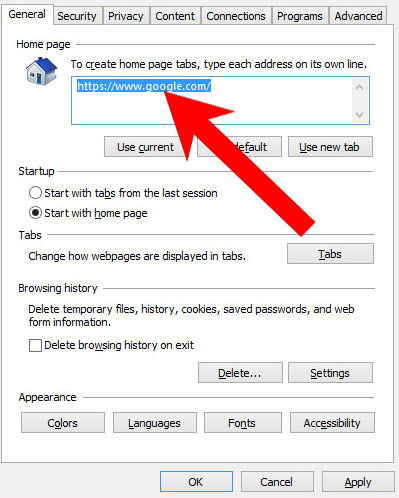
c) Restore your homepage on Internet Explorer
Download Removal Toolto remove Pro Power Save- Open Internet Explorer and press on the Gear icon.
- Internet Options → General tab. Delete the homepage URL and type in your preferred one.
- Press Apply.
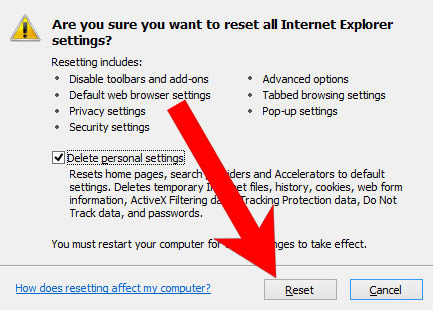
d) Reset Internet Explorer
- Open Internet Explorer and press on the Gear icon.
- Internet Options → Advanced tab.
- At the bottom, you will see a Reset button. Press that.
- In the window that appears, check the box that says Delete personal settings.
- Press Reset.
- Click OK to exit the window.
- Restart your browser.

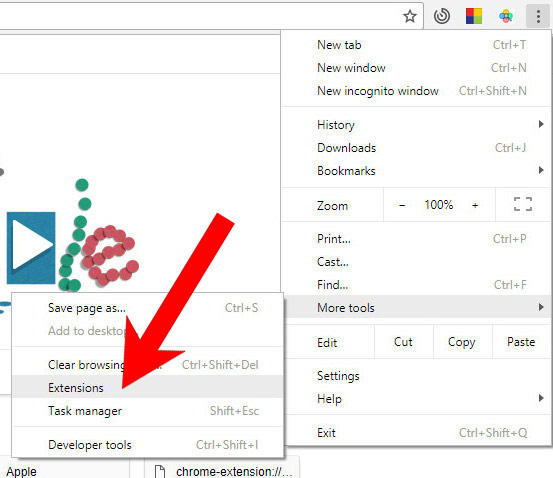
e) Remove Pro Power Save from Google Chrome
- Open Google Chrome and press the menu icon on the right, next to the URL field.
- Choose More tools and Extensions.
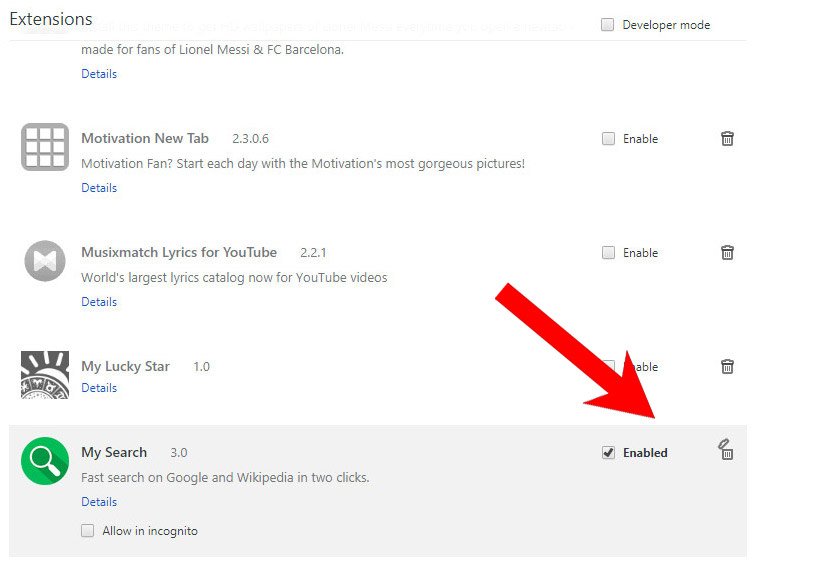
- Remove suspicious extensions by clicking the Trash icon next to them.
- If you are not certain about an extension, you can disable it by unchecking the box that says Enabled. If you later decide to keep it, simply check the box again.
f) Restore your homepage on Google Chrome
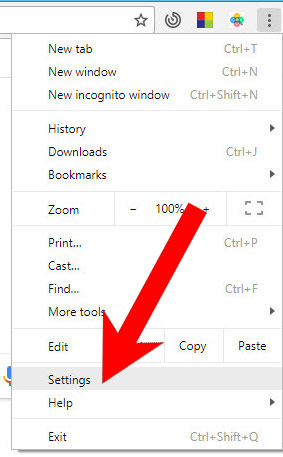
- Open Google Chrome and press the menu icon on the right, next to the URL field.
- Choose Settings.
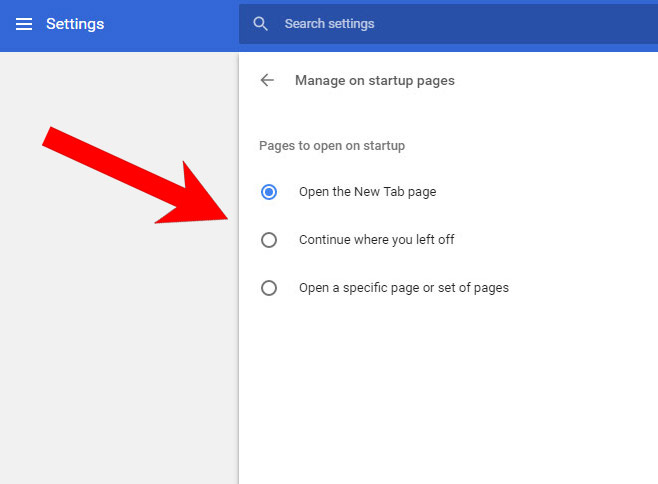
- In the window that appears, under On startup, there will be a Set pages option. Press on that.
- Remove the set website, and type in the one you prefer to be your homepage. Press OK.
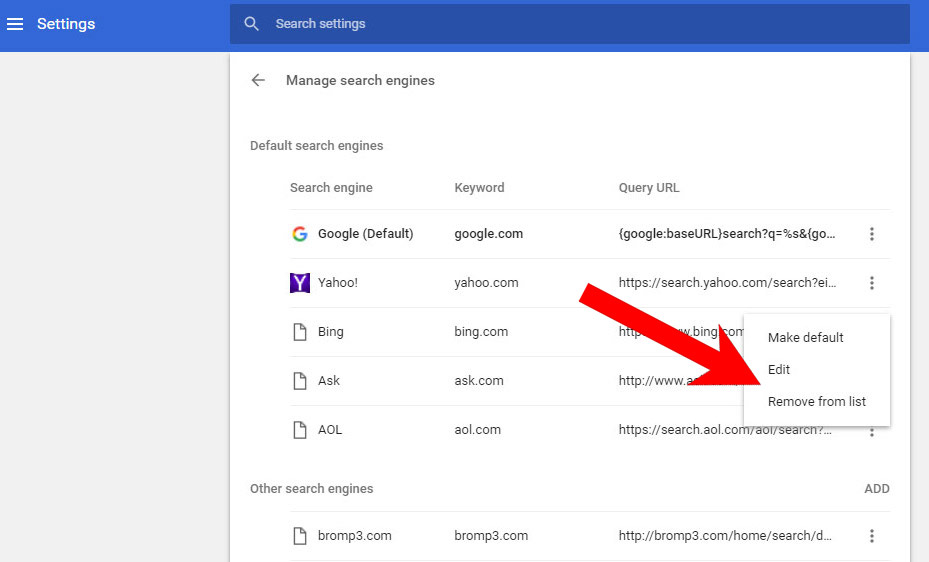
- In Settings, under Search, there is a Manage search engines option. Select that.
- Remove all search engines except the one you want to use. Click Done.
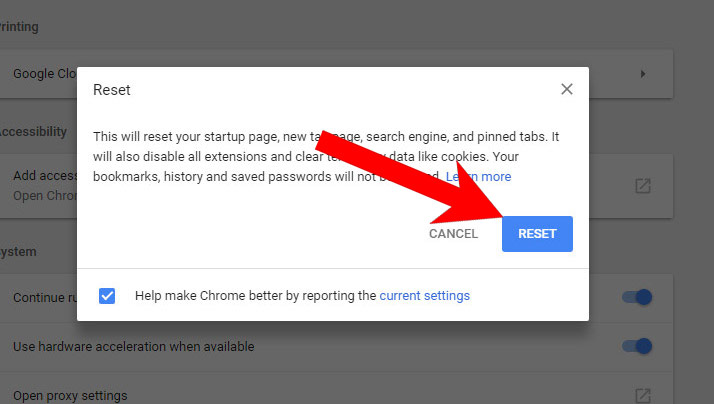
g) Reset Google Chrome
- Open Google Chrome and press the menu icon on the right, next to the URL field.
- Choose Settings.
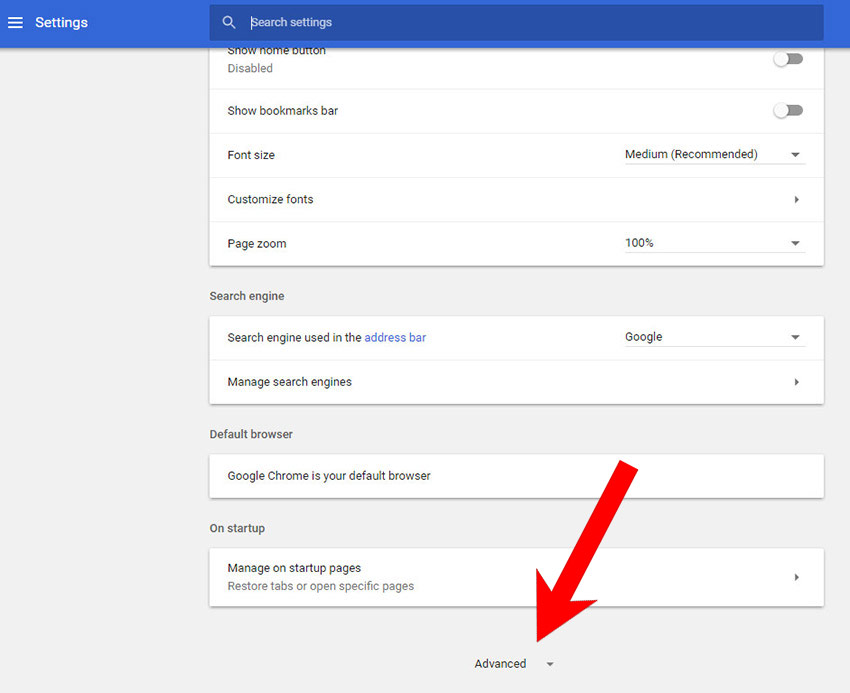
- Scroll down and press on Show advanced settings.
- Find and press the Reset button.
- In the confirmation window that appears, press Reset.
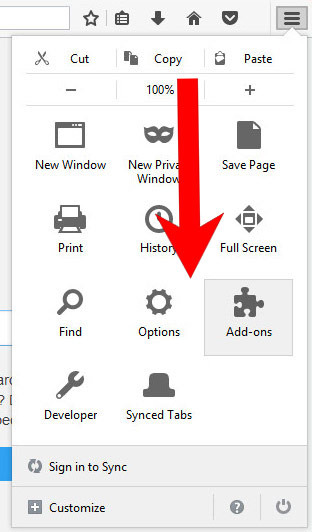
h) Remove Pro Power Save from Mozilla Firefox
- Open Mozilla Firefox and access the menu by clicking on the three bars on the right of the screen.
- Select Add-ons.
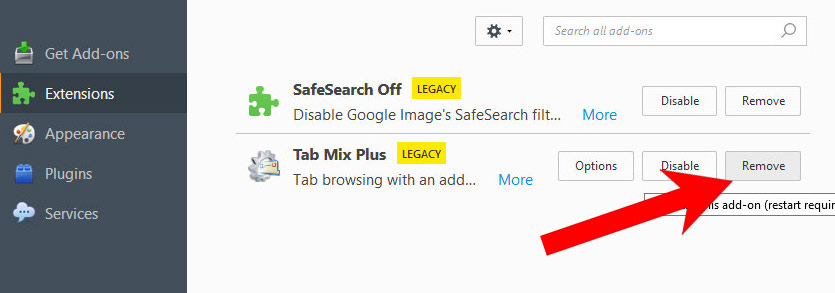
- Select the Extensions tab, and remove all questionable extensions.
- If you are not certain about an extension, you can disable it by clicking Disable. If you later decide to keep it, simply press Enable.
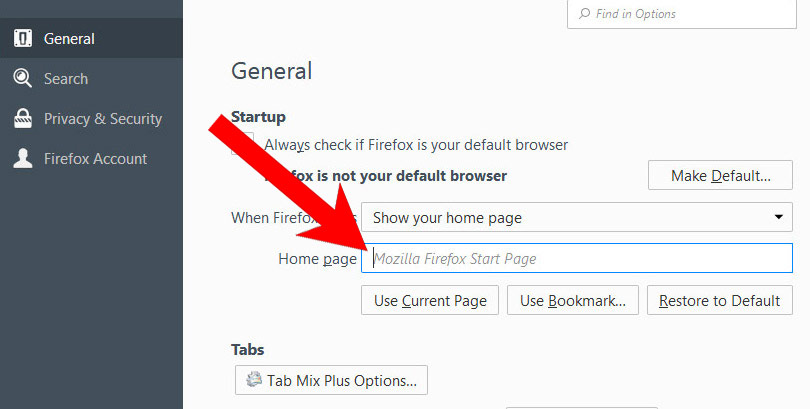
i) Restore your homepage on Mozilla Firefox
- Open Mozilla Firefox and access the menu by clicking on the three bars on the right side of the screen.
- Select Options.
- In General, click Restore to Default below the Home Page field.
j) Reset Mozilla Firefox
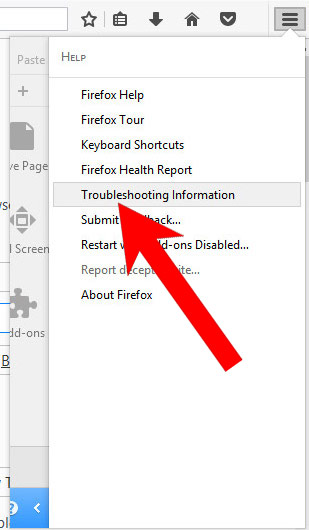
- Open Mozilla Firefox and access the menu by clicking on the three bars on the right of the screen.
- Press the question mark at the bottom of the menu.
- Select Troubleshooting Information.
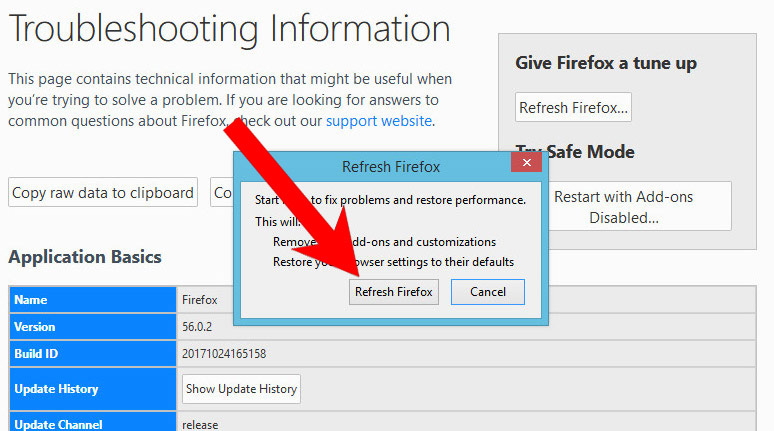
- Select the Refresh Firefox option.
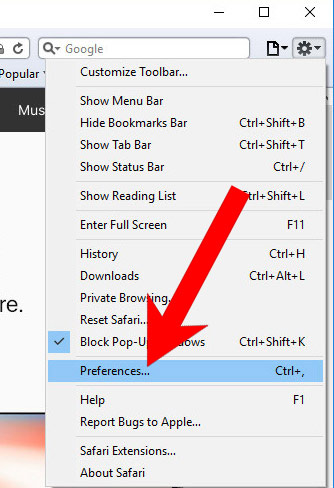
k) Remove Pro Power Save from Safari (for Mac)
- Open Safari.
- Select Preferences (can be accesses by pressing on Safari at the top of your screen).
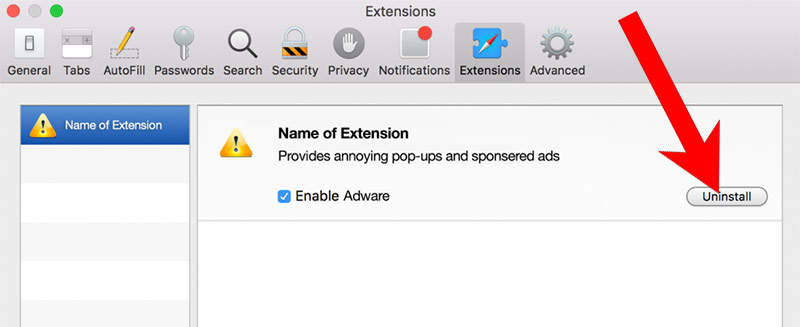
- Choose the Extensions tab.
- Uninstall all questionable extensions.
- If you are not certain about an extension, you can disable it by unchecking the box that says Enabled. If you later decide to keep it, simply check the box again.
l) Reset Safari
If you are using the Yosemite, El Capitan or the Sierra versions, the option to reset Safari with one click is not available. Thus you will have to clear the history and empty the caches in separate steps.- Open Safari.
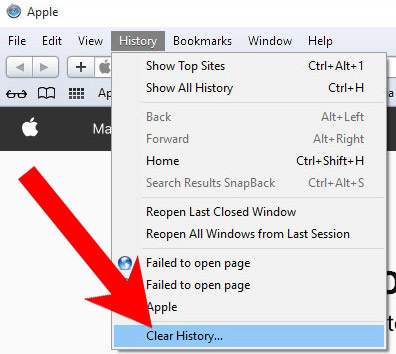
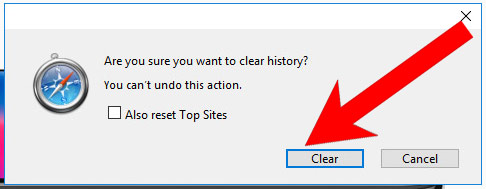
- Select Clear History (can be accesses by pressing on Safari at the top of your screen).
- Choose from what time you want the history deleted, and press Clear History.
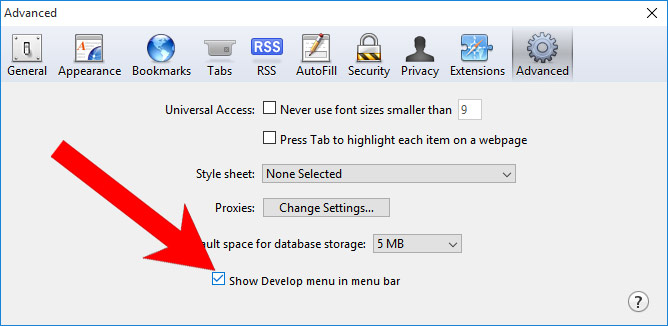
- Press on Safari at the top of the screen and select Preferences.
- Select the Advanced tab and check the box next to Show Develop menu in menu bar.
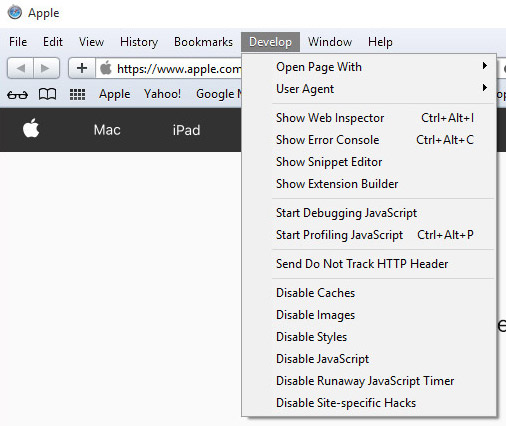
- Select Develop (from the menu bar at the top of the screen).
- Press Empty Caches.