What is PixelSee?
PixelSee functions like a digital chameleon, blending in and taking advantage of your device’s soft discovers. Its developers are sly, creating the malicious software appear like innocuous utilities updates or even the updated trending games. The minute you fall for it and PixelSee acquires a foothold, it’s like giving cyber thieves a VIP pass to your os. They can swipe valuable facts, oversee your internet moves, or stir up other issues. Remember, the internet’s a large place, and not each relate or download is your friend. Be watchful, specially if it’s a source you’ve never heard of. In bundles with approval and caution, you may lessen the hazards and assure the Trojan does not interrupt your digital life.
Is PixelSee a malware?
When you hear connected to Trojans and malicious software, it’s important to understand the differences between them. Trojan Horses like PixelSee aren’t your general device infections. Even though malicious software are like scares, barging in and causing chaos by increasing and latching into invaluable files, Trojans act etc. like secretive agents. They wear a cover up, showing on their own as beneficial or non-alarming utilities, patiently wavering for a user’s sneak-up. And despite the fact that malware can generate their arrival infamous pretty fast, Trojans like PixelSee, StopAbit or Pinaview play a longer game, surreptitiously tracking, accumulation your data, or making passages for other infections. It’s their one-of-a-kind, undercover origins that needs specialized security ploys. To avoid these kinds of sly dangers, a combo of solid digital hygiene and never-ending caution is key.
Download Removal Toolto remove PixelSeePixelSee Virus
Facing the PixelSee virus can feel like tackling a monster, but trust us, you’ve got this! One of those at the beginning things you have to do is to ensure your computer isn’t affiliated with the web or any other pc you may need. This prevents the malicious application from talking to its pals or slipping into other computers. Should you have a fantastic anti-malware program, then allow it to scan each nook and cranny of your machine. But double-analyze that it knows the up-to-date infections by updating its malicious software definitions at the start. In case the anti-spyware tool discovers the PixelSee malware troublemaker, it will maintain it ambushed in a quarantine. This guarantees the Trojan won’t begin any etc. concerns.
PixelSee app
Imagine a sneaky pickpocket. That’s what Trojans like the PixelSee app do—swiping your personal details and passwords. If you’re found up in this difficult situation, stage up your game and guarantee that you replace these passwords. Specially these kinds of to your email, income programs, and social media platforms. Also, assure every password is complex and not a backup of another. Keep all in your system fresh and updated—like its major tools and your trustworthy anti-malware program. Sometimes, the PixelSee app difficult situation could be too big. If that’s the case, it’s okay to request assist. Call a skillful computer user or use a licensed uninstallation tool. And do not forget, always remain sheltered: be fussy alongside emails, keep updating, and back up your photos, files, and etc..
Learn how to remove PixelSee from your computer
Step 1. PixelSee Removal from Windows
a) Windows 7/XP
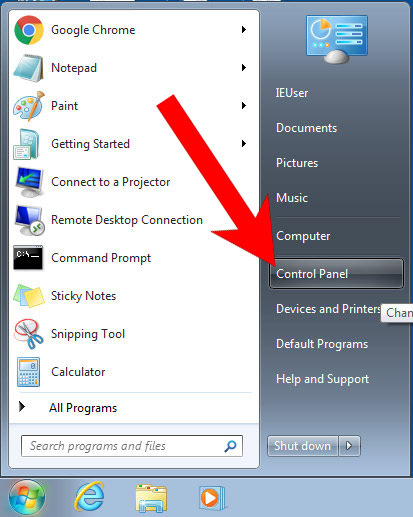
- Press on the Start icon.

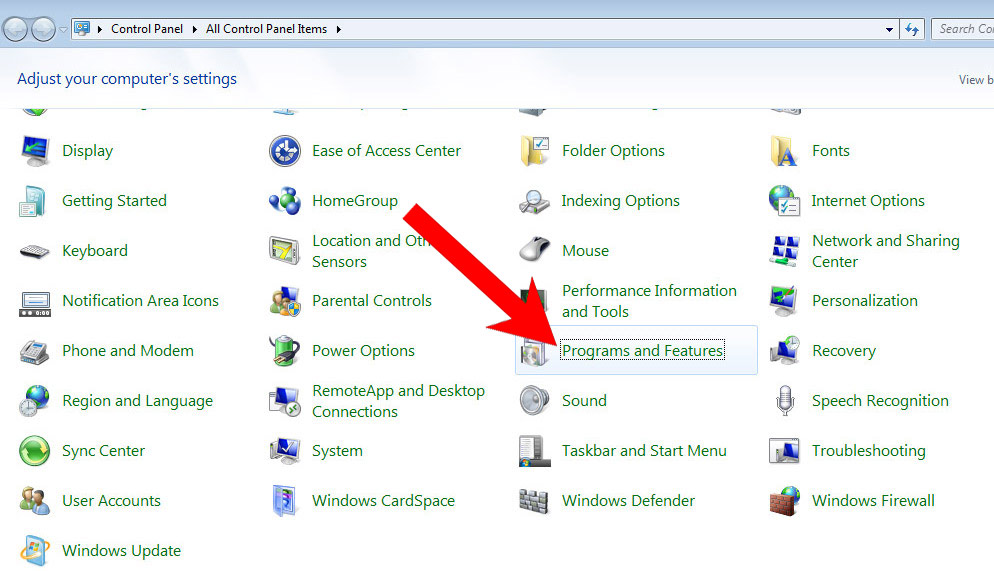
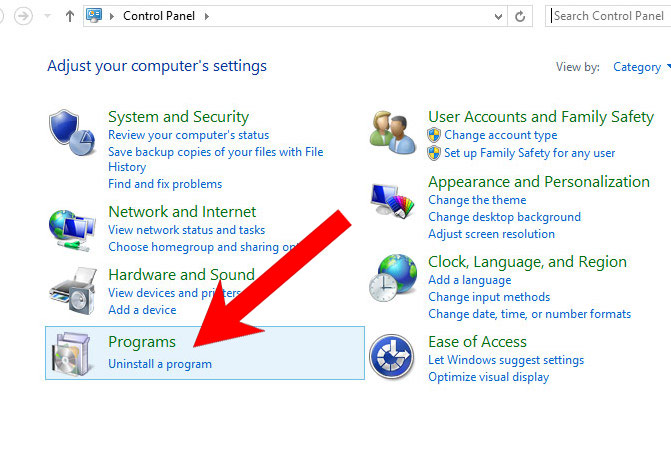
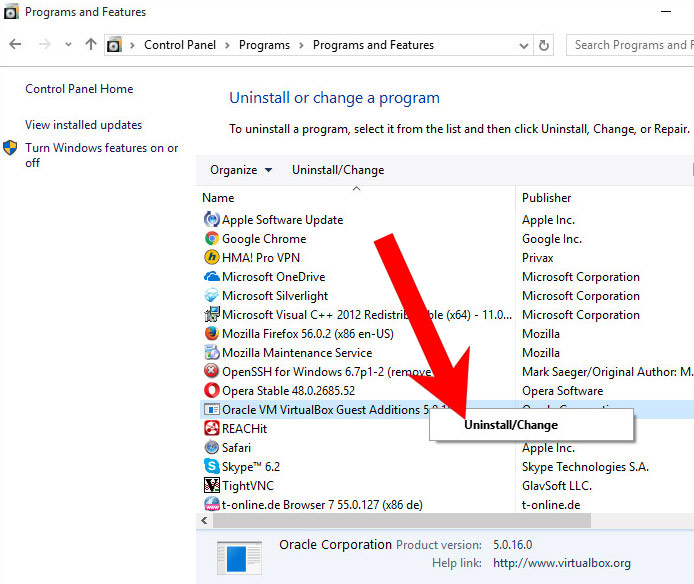
- Control Panel → Programs and Features.
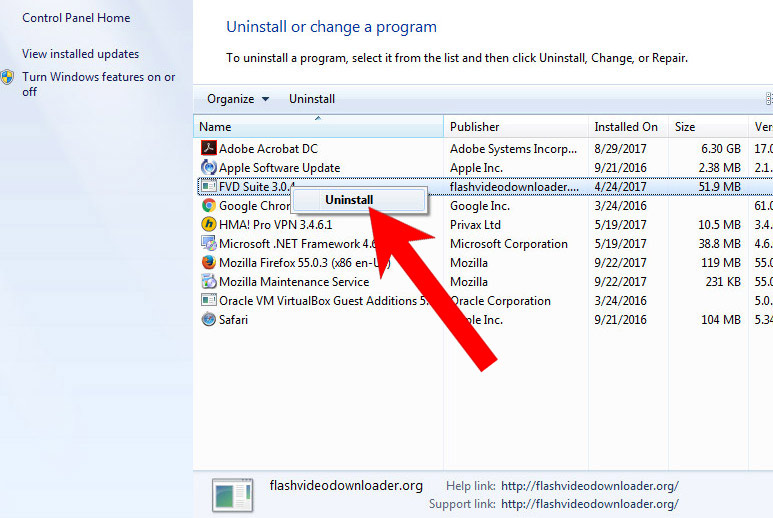
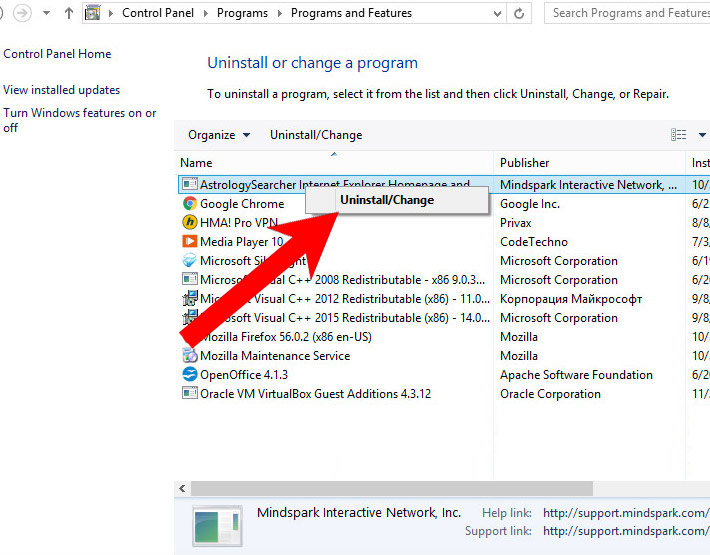
- Find the program you want to delete and press Uninstall.
b) Windows 8
- Right-click on the start icon (lower left corner).
- Select Control Panel.
- Click Programs and Features.
- Find and remove all unwanted programs.

c) Windows 10
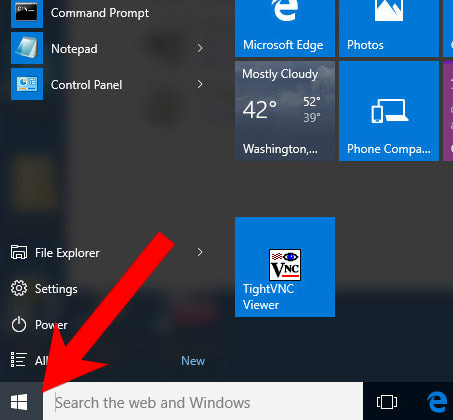
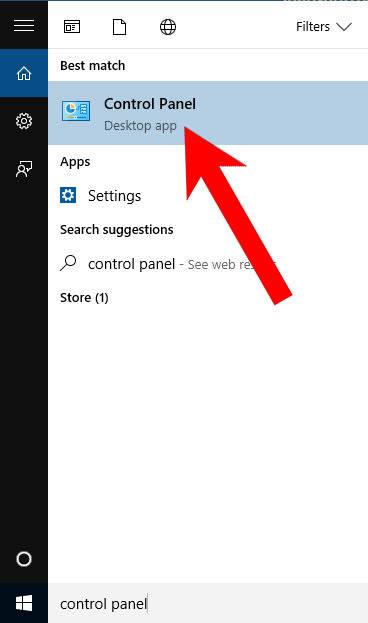
- Open Start menu and click on the magnifying glass (next to the shut down button).
- Type in Control Panel.
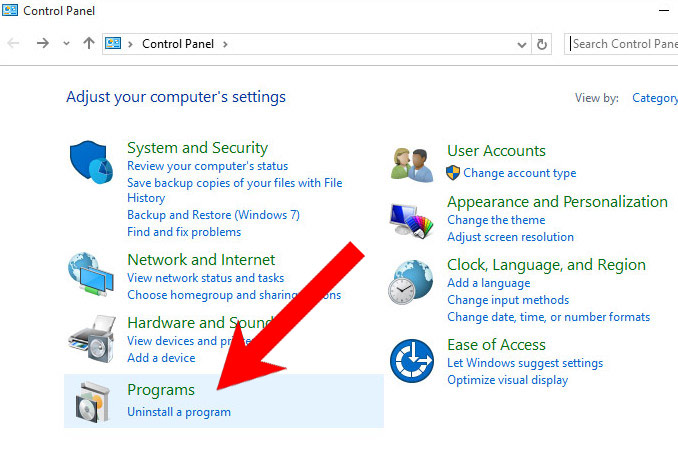
- Control Panel → Programs and Features.
- Find and remove all unwanted programs.
d) Mac OS X
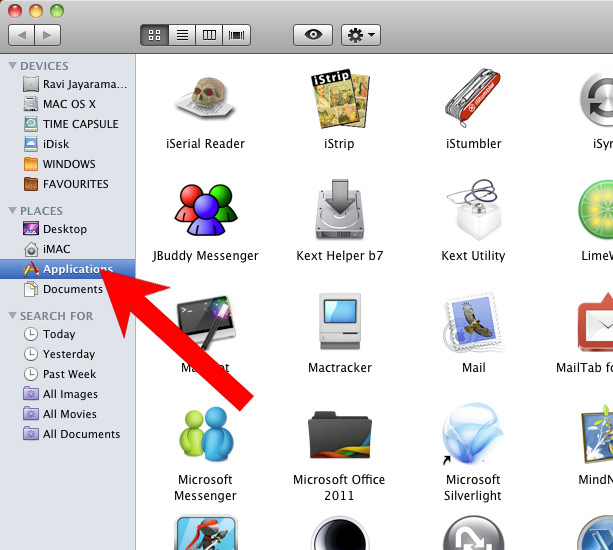
- Open Finder and press Applications.
- Check all suspicious programs you want to get rid of.
- Drag them to the trash icon in your dock (Alternatively, right-click on the program and press Move to Trash).
- After you move all the unwanted programs, right-click on the trash icon and select Empty Trash.

Step 2. Delete PixelSee from browsers
a) Remove PixelSee from Microsoft Edge
Reset Microsoft Edge (Method 1)
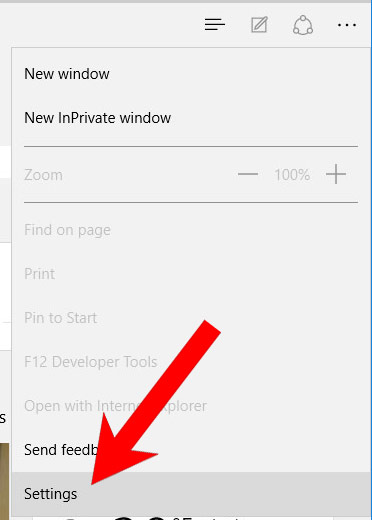
- Open Microsoft Edge.
- Press More located at the top right corner of the screen (the three dots).
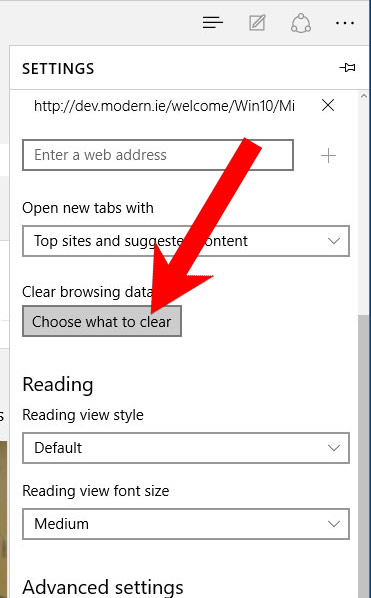
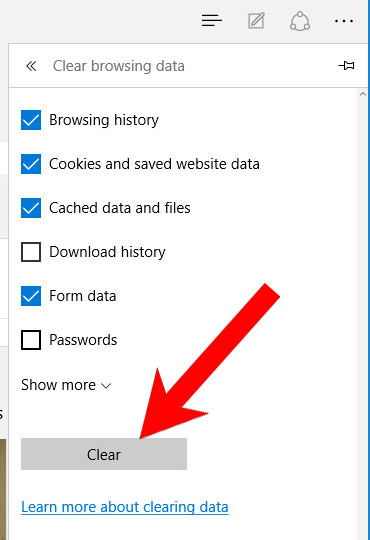
- Settings → Choose what to clear.
- Check the boxes of the items you want removed, and press Clear.
- Press Ctrl + Alt + Delete together.
- Choose Task Manager.
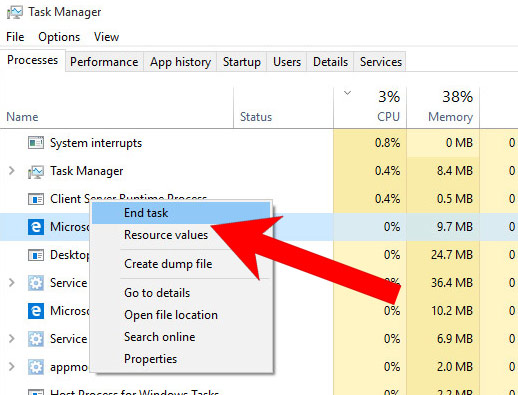
- In the Processes tab, find the Microsoft Edge process, right click on it, and press Go to details (or More details if Go to details is not available).
- Right-click on all Microsoft Edge processes, and choose End task.
(Method 2)
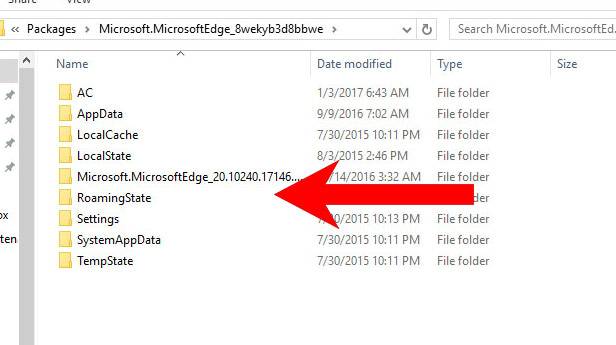
Before you proceed with this method, backup your data.- Go to C:\Users\%username%\AppData\Local\Packages\Microsoft.MicrosoftEdge_xxxxxxxxxx.
- Select all the folders, right-click on them and press Delete.
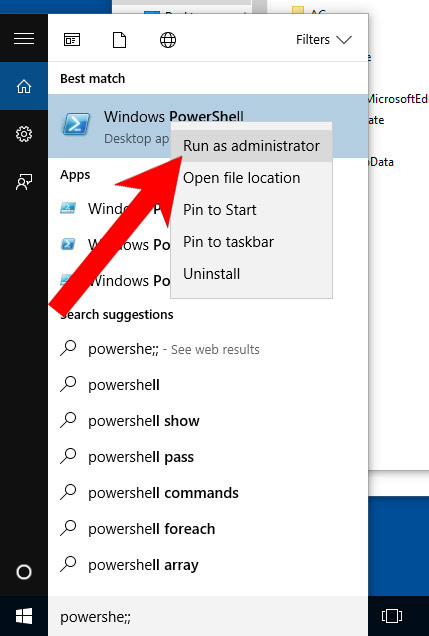
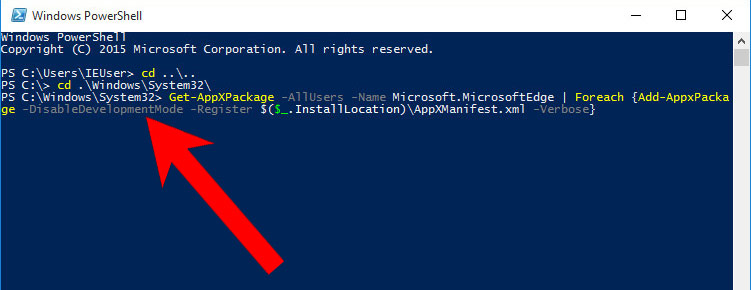
- Press the start button, and type in Windows PowerShell in the search box.
- Right-click on the result, and select Run as administrator.
- In Administrator: Windows PowerShell, paste
Get-AppXPackage -AllUsers -Name Microsoft.MicrosoftEdge | Foreach {Add-AppxPackage -DisableDevelopmentMode -Register $($_.InstallLocation)\AppXManifest.xml -Verbose}
under PS C:\WINDOWS\system32> and tap Enter.
- The issue should be gone now.
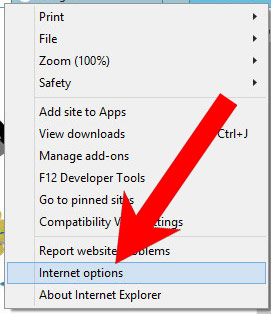
b) Remove PixelSee from Internet Explorer
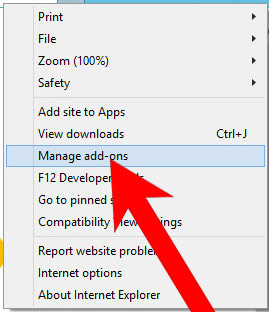
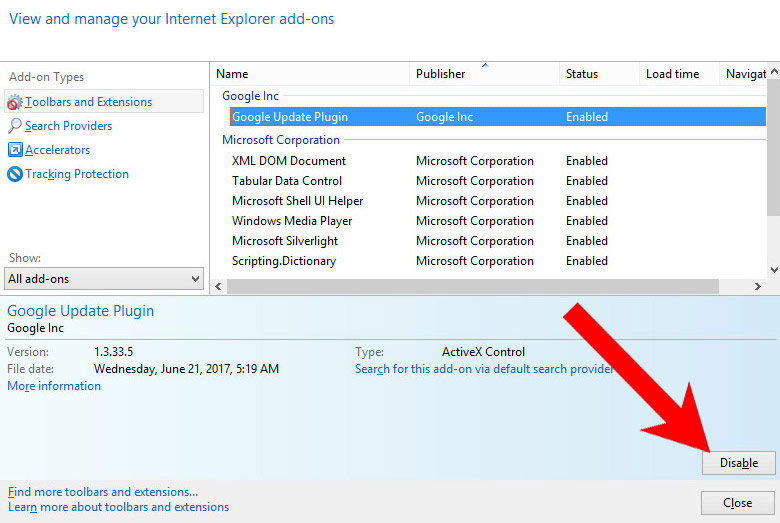
- Open Internet Explorer and press on the Gear icon.
- Select Manage add-ons, and then Toolbars and Extensions.
- Find and disable all suspicious extensions.
- Close the window.
c) Restore your homepage on Internet Explorer
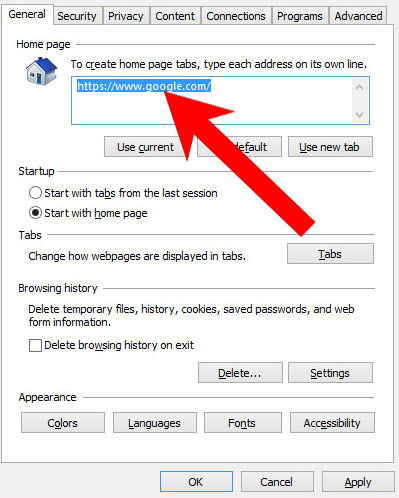
- Open Internet Explorer and press on the Gear icon.
- Internet Options → General tab. Delete the homepage URL and type in your preferred one.
- Press Apply.
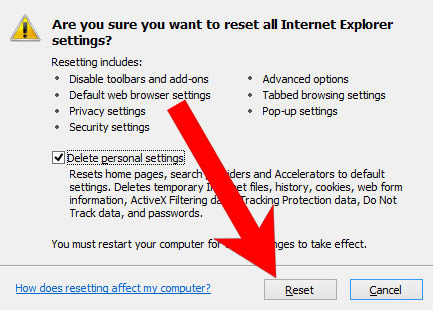
d) Reset Internet Explorer
- Open Internet Explorer and press on the Gear icon.
- Internet Options → Advanced tab.
- At the bottom, you will see a Reset button. Press that.
- In the window that appears, check the box that says Delete personal settings.
- Press Reset.
- Click OK to exit the window.
- Restart your browser.

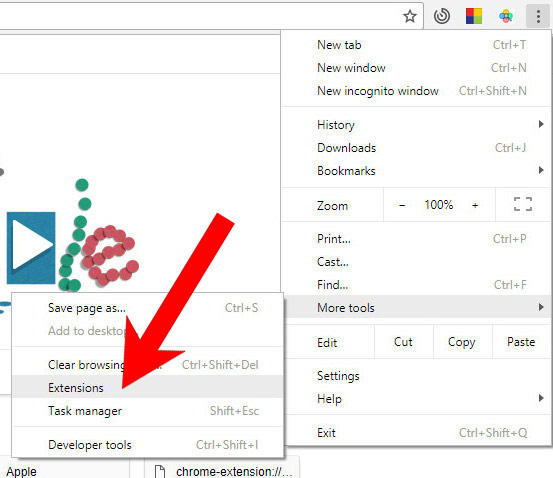
e) Remove PixelSee from Google Chrome
- Open Google Chrome and press the menu icon on the right, next to the URL field.
- Choose More tools and Extensions.
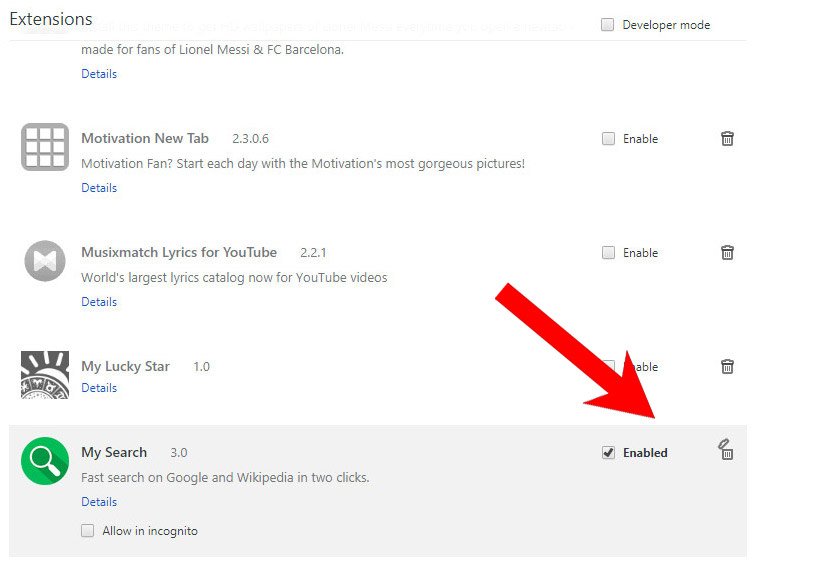
- Remove suspicious extensions by clicking the Trash icon next to them.
- If you are not certain about an extension, you can disable it by unchecking the box that says Enabled. If you later decide to keep it, simply check the box again.
f) Restore your homepage on Google Chrome
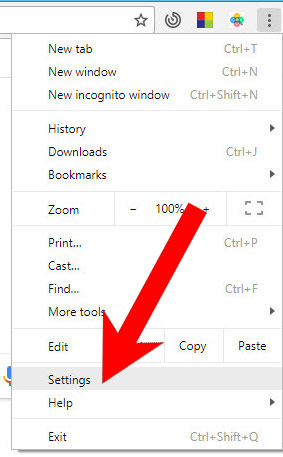
- Open Google Chrome and press the menu icon on the right, next to the URL field.
- Choose Settings.
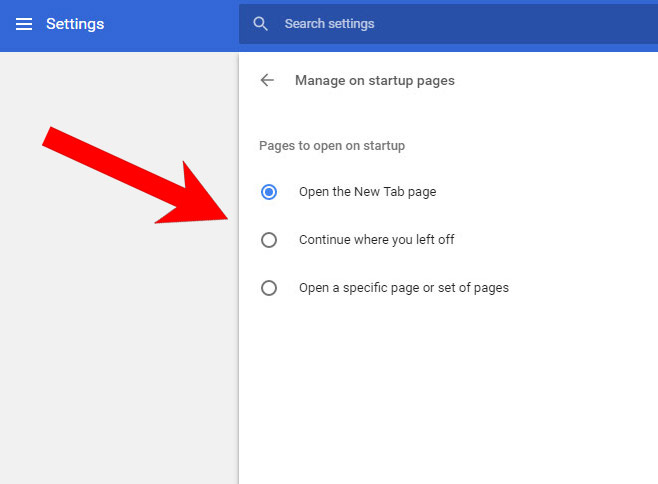
- In the window that appears, under On startup, there will be a Set pages option. Press on that.
- Remove the set website, and type in the one you prefer to be your homepage. Press OK.
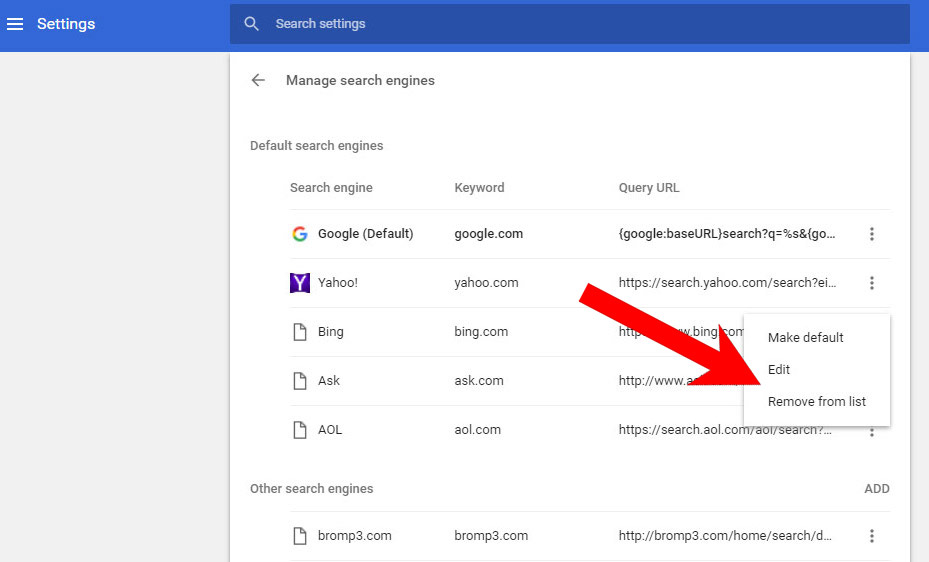
- In Settings, under Search, there is a Manage search engines option. Select that.
- Remove all search engines except the one you want to use. Click Done.
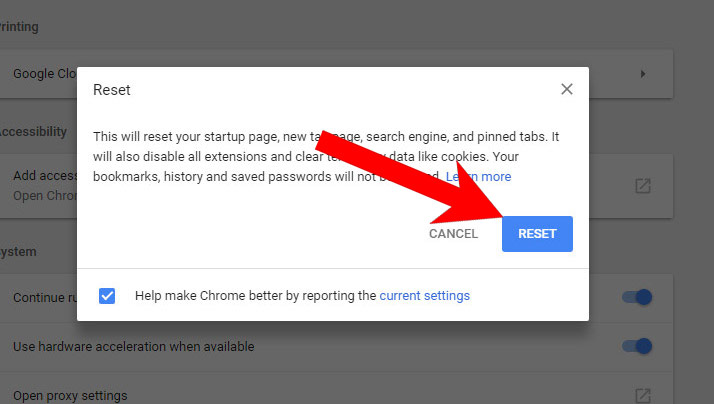
g) Reset Google Chrome
- Open Google Chrome and press the menu icon on the right, next to the URL field.
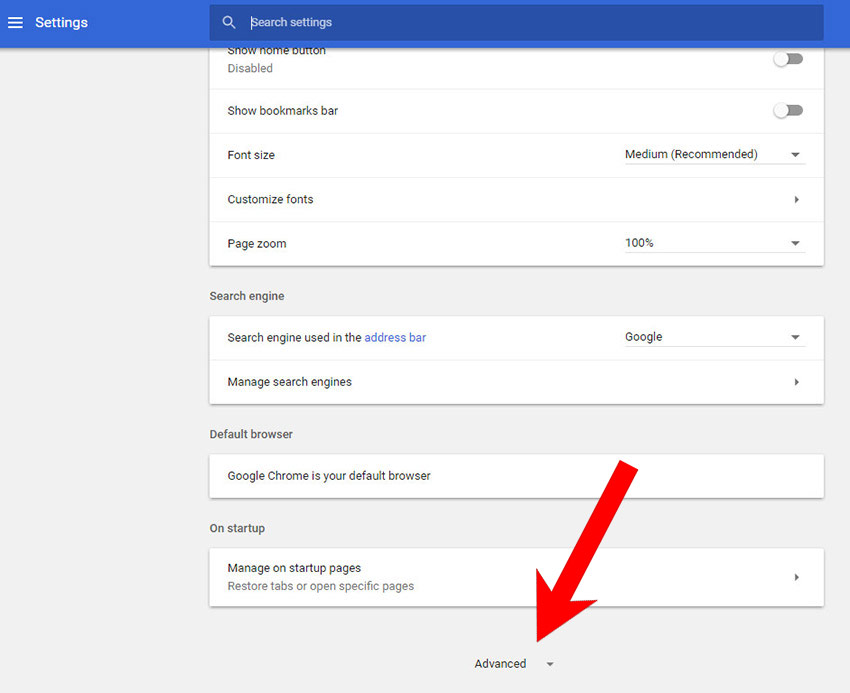
- Choose Settings.
- Scroll down and press on Show advanced settings.
- Find and press the Reset button.
- In the confirmation window that appears, press Reset.
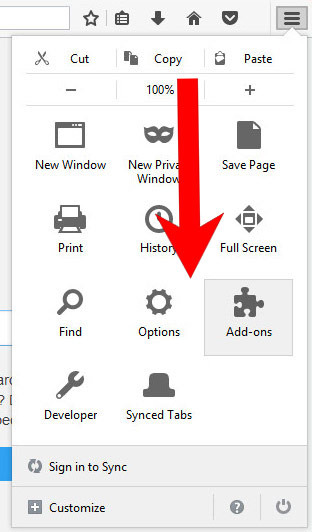
h) Remove PixelSee from Mozilla Firefox
- Open Mozilla Firefox and access the menu by clicking on the three bars on the right of the screen.
- Select Add-ons.
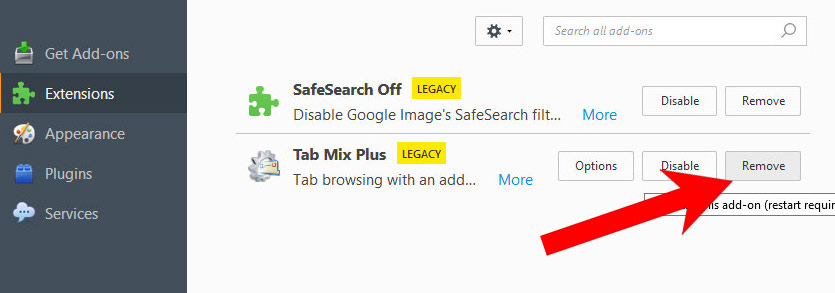
- Select the Extensions tab, and remove all questionable extensions.
- If you are not certain about an extension, you can disable it by clicking Disable. If you later decide to keep it, simply press Enable.
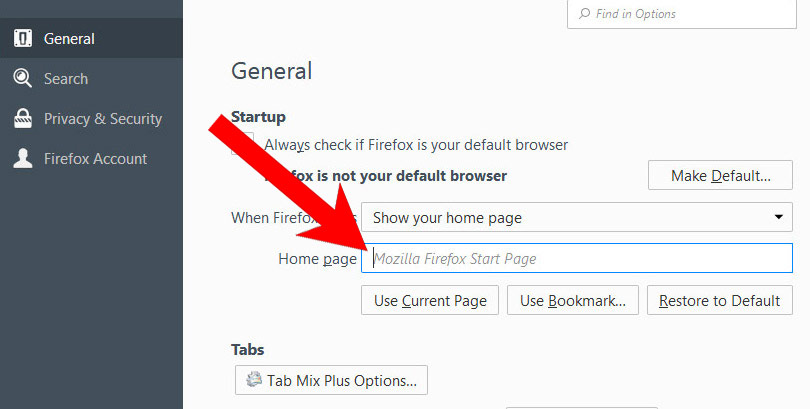
i) Restore your homepage on Mozilla Firefox
- Open Mozilla Firefox and access the menu by clicking on the three bars on the right side of the screen.
- Select Options.
- In General, click Restore to Default below the Home Page field.
j) Reset Mozilla Firefox
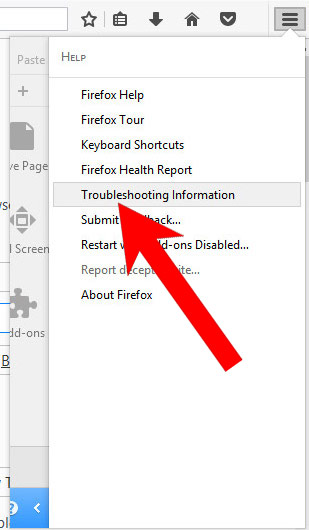
- Open Mozilla Firefox and access the menu by clicking on the three bars on the right of the screen.
- Press the question mark at the bottom of the menu.
- Select Troubleshooting Information.
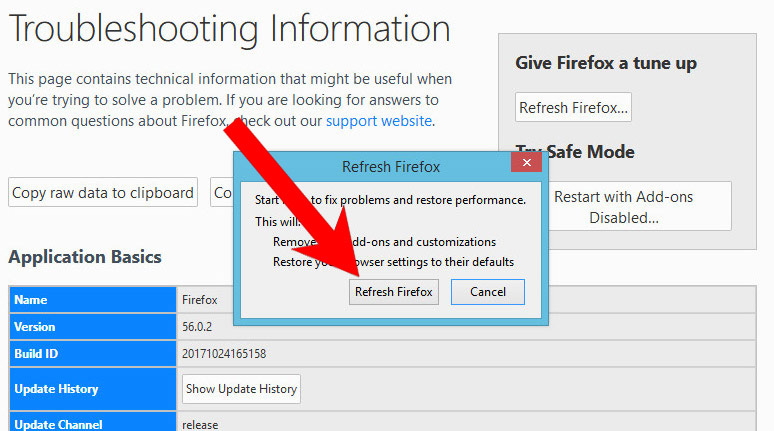
- Select the Refresh Firefox option.
k) Remove PixelSee from Safari (for Mac)
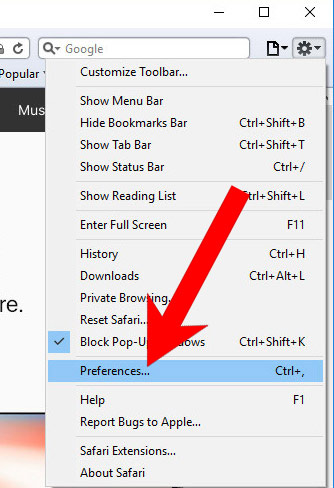
- Open Safari.
- Select Preferences (can be accesses by pressing on Safari at the top of your screen).
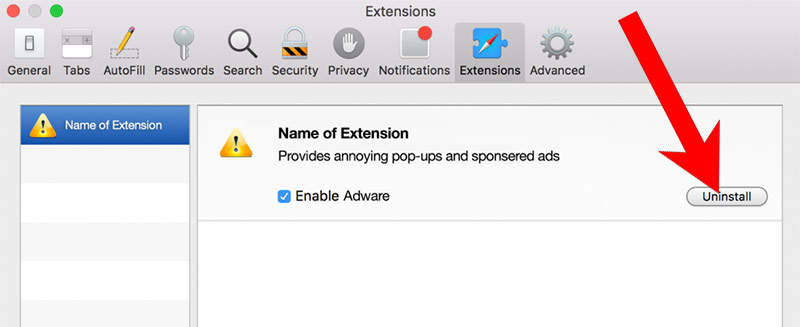
- Choose the Extensions tab.
- Uninstall all questionable extensions.
- If you are not certain about an extension, you can disable it by unchecking the box that says Enabled. If you later decide to keep it, simply check the box again.
l) Reset Safari
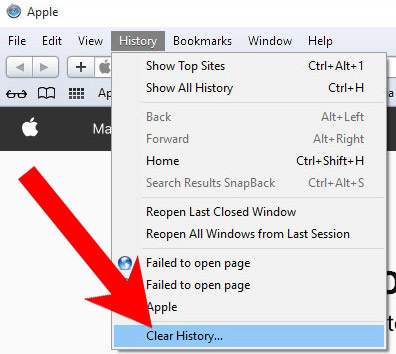
If you are using the Yosemite, El Capitan or the Sierra versions, the option to reset Safari with one click is not available. Thus you will have to clear the history and empty the caches in separate steps.- Open Safari.
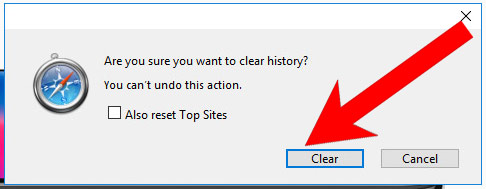
- Select Clear History (can be accesses by pressing on Safari at the top of your screen).
- Choose from what time you want the history deleted, and press Clear History.
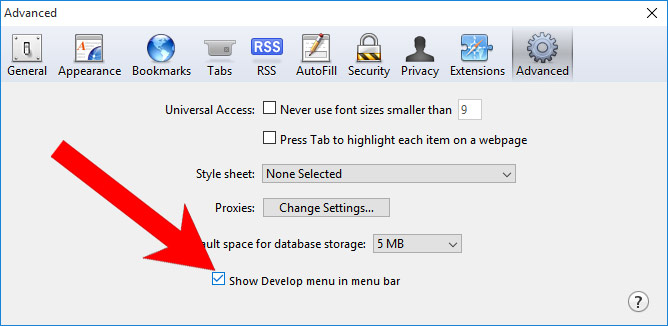
- Press on Safari at the top of the screen and select Preferences.
- Select the Advanced tab and check the box next to Show Develop menu in menu bar.
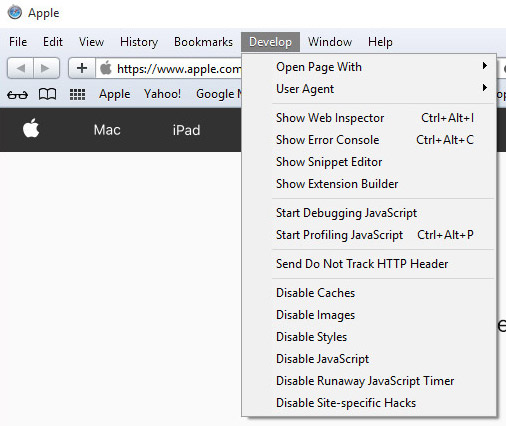
- Select Develop (from the menu bar at the top of the screen).
- Press Empty Caches.