We have newly gotten a bunch of queries connected to a certain parasite called Affairs Speedup. If you in addition to that are reading this because you’re guessing what Affairs Speedup is and what it might do, we ought to start by declaring that this is one of those the biggest part of dangerous threats that you can run into – a Trojan horse. Generally, the Trojan malware earn a very good percent of the full threat that might be bumped into on the internet and you have all the goals to be uneasy if one of their updated representatives is concealing inside your computer. Fortunately, there’s no ought to get panicked since we’ll share along with you all the ways you could successfully remove this issue and clear up your device. Just remain along with us until the end where you will discover a thorough deletion instruction and a good Affairs Speedup deletion utility.
AffairsSpeedup
Very often, the presence of a Trojan Horse such as AffairsSpeedup on your machine cannot be detected. This is due to AffairsSpeedup try to mask it remains so to initiate their criminal motions in secretive.
Download Removal Toolto remove Affairs SpeedupYet, at times, the malware can be shown by unanticipated os crashes or alarming process on your screen. For example, you may encounter some interesting process together with the mouse cursor on the screen if that the Trojan has added remote entry to your os to a cyber crook. Or you could find that some files have been removed from your complex drive or some folders and files have been shifted to multiple directories without your interaction. This might be a clue of an unlawful entry to your os. Sadly, there can be no apparent signs at all.
In almost all of the instances, an parasite like Affairs Speedup or Walliant can shadow you silently and collect info relating to your internet and offline actions, containing your passwords, credit and debit card amounts, internet financial entry, and etc.. in addition, such a Trojan may forge shortcomings inside your pc and let Ransomware or other malware to undetected crawl into it. That’s why it would be better to uninstall the malware promptly to terminate the jeopardize of even harsher malicious software.
How to clear the threat from the operating system?
Clearing your system from a cyber infection such as Affairs Speedup may require all of your attention. We need to alert you about that because it might not be uncomplicated to handle this Trojan and you might not be capable of terminating it from from the at the beginning time, especially if you don’t have authentic security programs. This is because just as each Trojan, this one knows how to disguise well and could even mirror some normal computer procedures or files so as to trick you. That’s why, we highly advise you to follow our guide in the uninstallation instructions beneath really sensibly or smarter, use them in a mix alongside the good Affairs Speedup deletion program. This way, you will be forced a stronger endanger to catch the factual Trojan-akin files and erase them without the possibility of getting rid of something else by fault. You could also inspect the entire computer for other malicious software and uninstall them as well.
Download Removal Toolto remove Affairs SpeedupSUMMARY:
Learn how to remove Affairs Speedup from your computer
Step 1. Affairs Speedup Removal from Windows
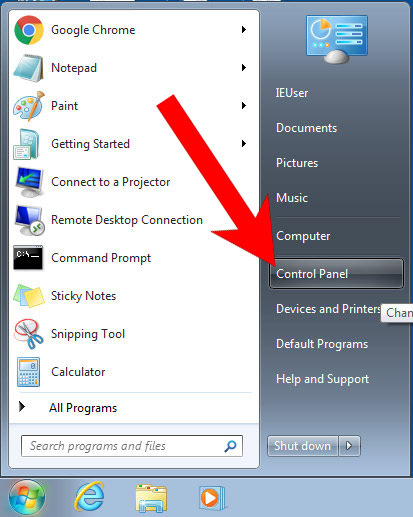
a) Windows 7/XP
- Press on the Start icon.

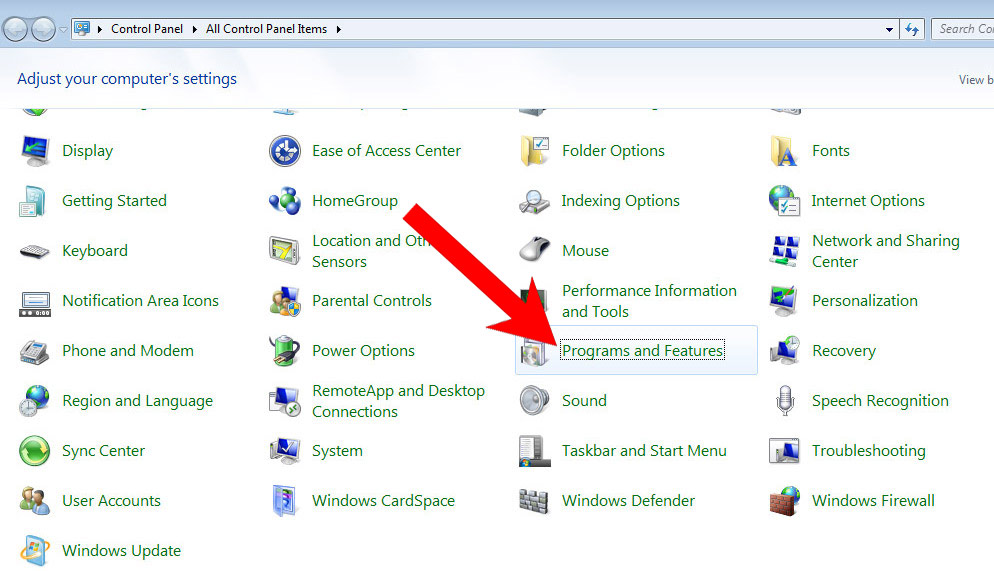
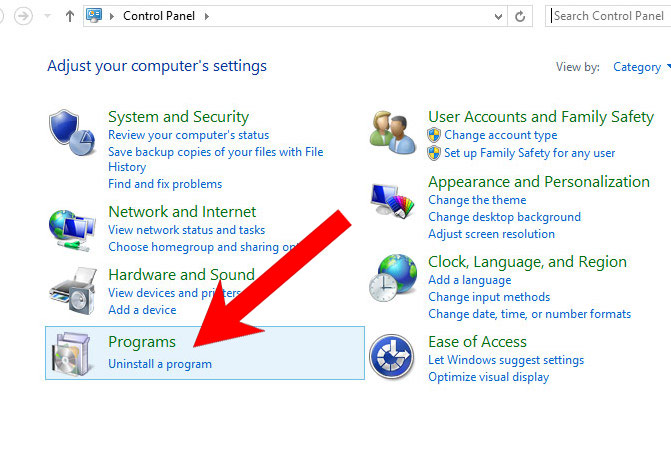
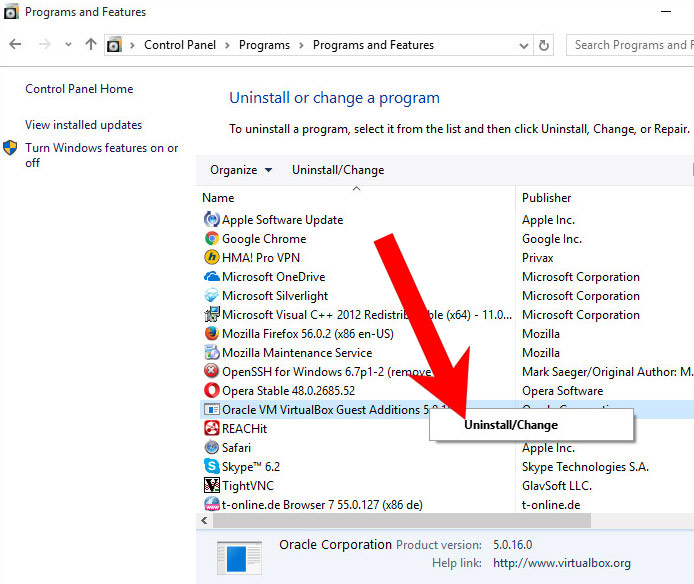
- Control Panel → Programs and Features.
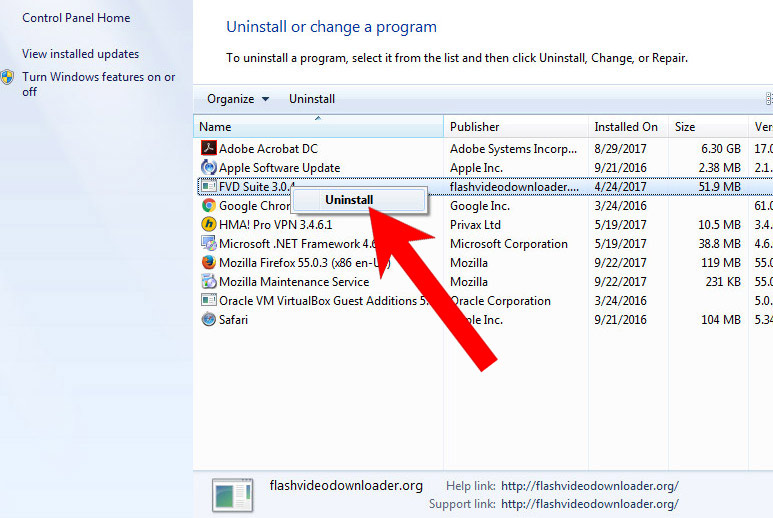
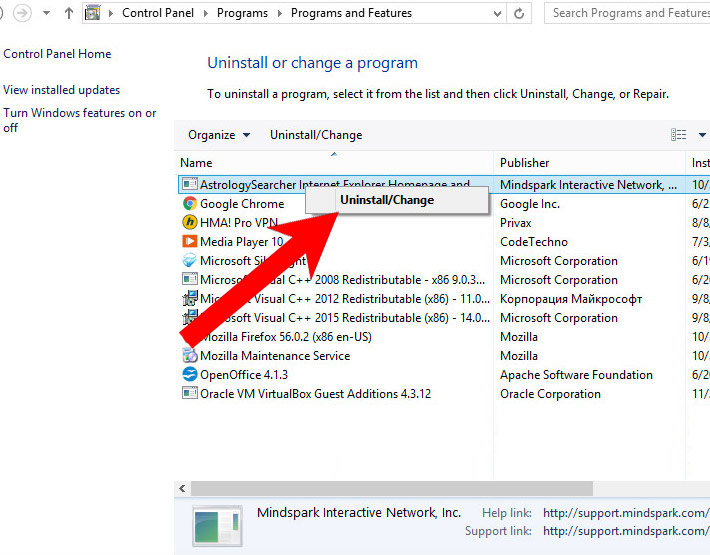
- Find the program you want to delete and press Uninstall.
b) Windows 8
- Right-click on the start icon (lower left corner).
- Select Control Panel.
- Click Programs and Features.
- Find and remove all unwanted programs.
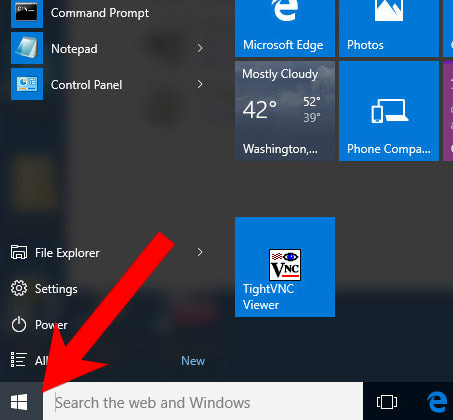

c) Windows 10
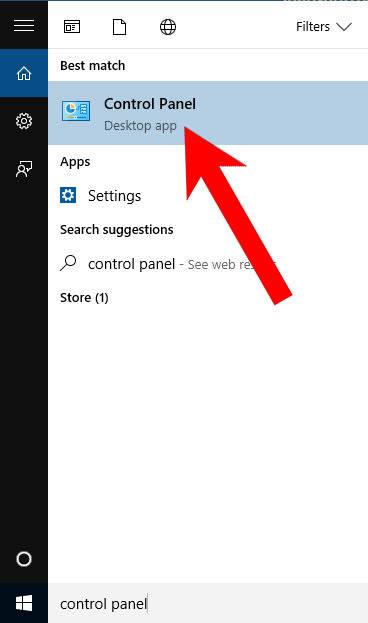
- Open Start menu and click on the magnifying glass (next to the shut down button).
- Type in Control Panel.
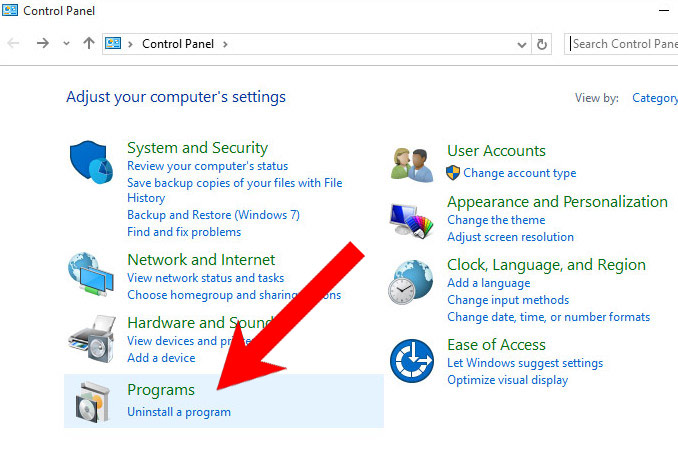
- Control Panel → Programs and Features.
- Find and remove all unwanted programs.
d) Mac OS X
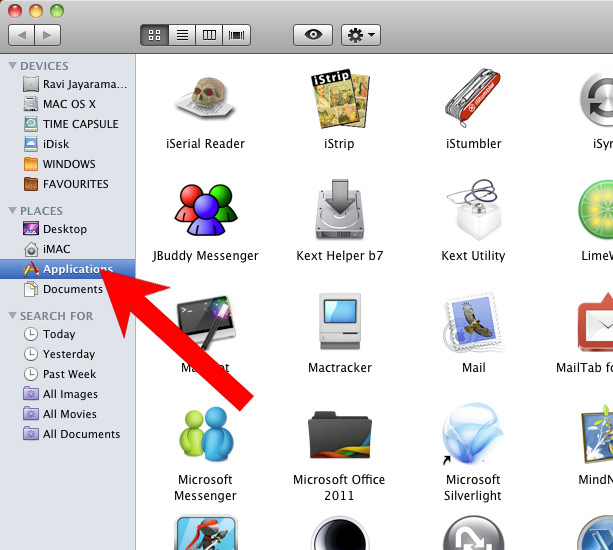
- Open Finder and press Applications.
- Check all suspicious programs you want to get rid of.
- Drag them to the trash icon in your dock (Alternatively, right-click on the program and press Move to Trash).
- After you move all the unwanted programs, right-click on the trash icon and select Empty Trash.

Step 2. Delete Affairs Speedup from browsers
a) Remove Affairs Speedup from Microsoft Edge
Reset Microsoft Edge (Method 1)
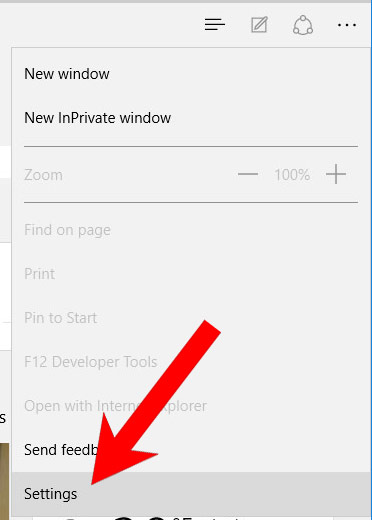
- Open Microsoft Edge.
- Press More located at the top right corner of the screen (the three dots).
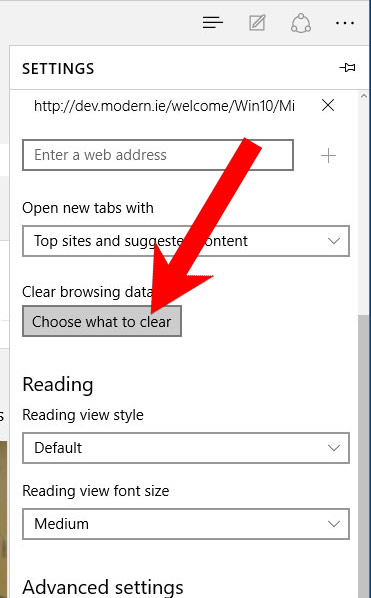
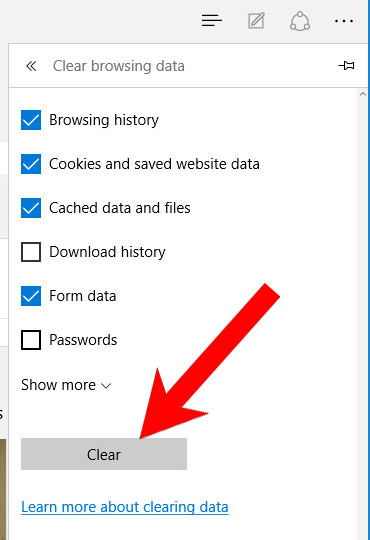
- Settings → Choose what to clear.
- Check the boxes of the items you want removed, and press Clear.
- Press Ctrl + Alt + Delete together.
- Choose Task Manager.
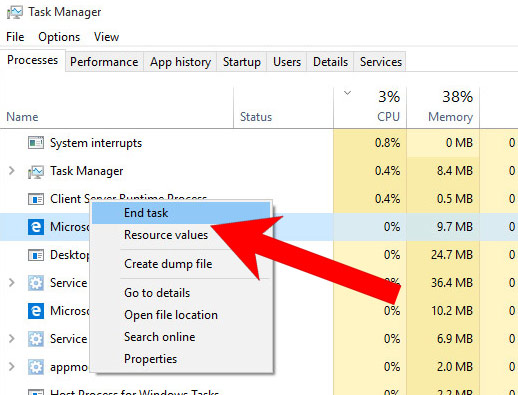
- In the Processes tab, find the Microsoft Edge process, right click on it, and press Go to details (or More details if Go to details is not available).
- Right-click on all Microsoft Edge processes, and choose End task.
(Method 2)
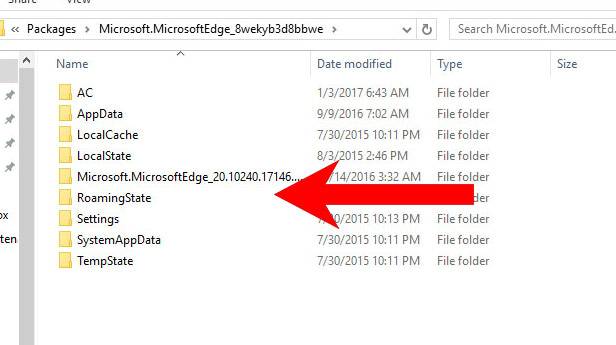
Before you proceed with this method, backup your data.- Go to C:\Users\%username%\AppData\Local\Packages\Microsoft.MicrosoftEdge_xxxxxxxxxx.
- Select all the folders, right-click on them and press Delete.
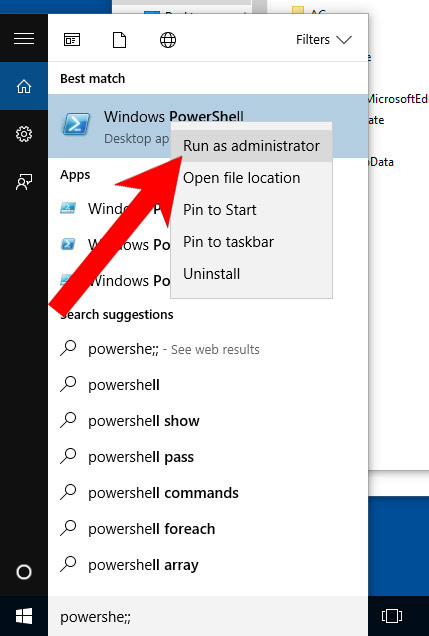
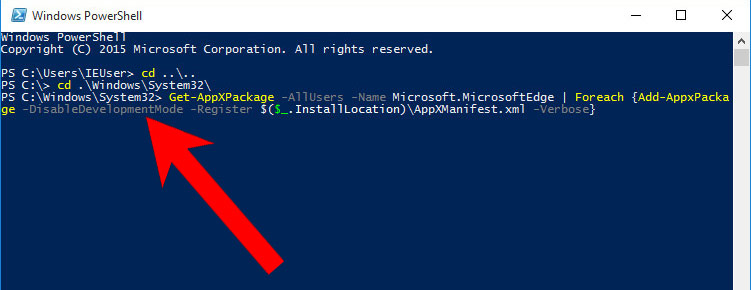
- Press the start button, and type in Windows PowerShell in the search box.
- Right-click on the result, and select Run as administrator.
- In Administrator: Windows PowerShell, paste
Get-AppXPackage -AllUsers -Name Microsoft.MicrosoftEdge | Foreach {Add-AppxPackage -DisableDevelopmentMode -Register $($_.InstallLocation)\AppXManifest.xml -Verbose}
under PS C:\WINDOWS\system32> and tap Enter.
- The issue should be gone now.
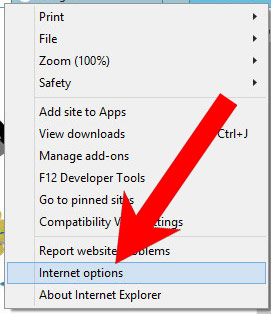
b) Remove Affairs Speedup from Internet Explorer
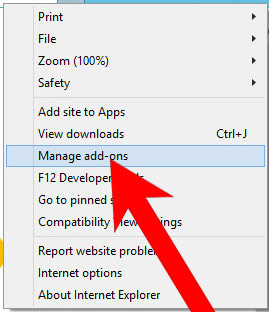
- Open Internet Explorer and press on the Gear icon.
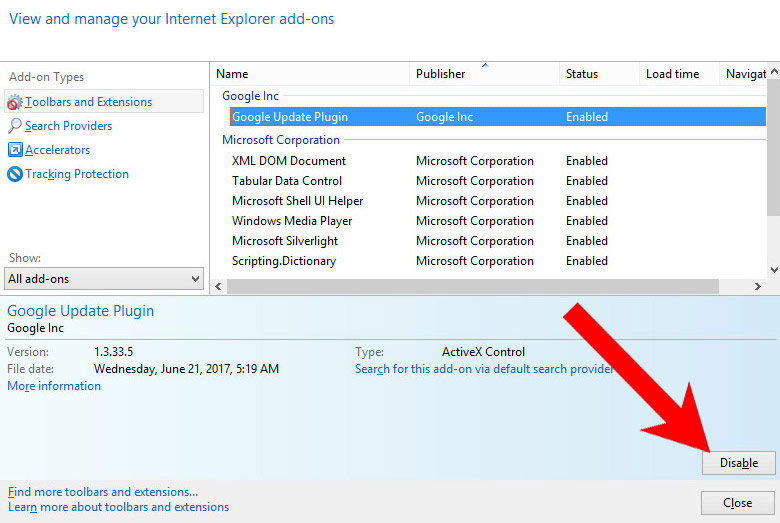
- Select Manage add-ons, and then Toolbars and Extensions.
- Find and disable all suspicious extensions.
- Close the window.
c) Restore your homepage on Internet Explorer
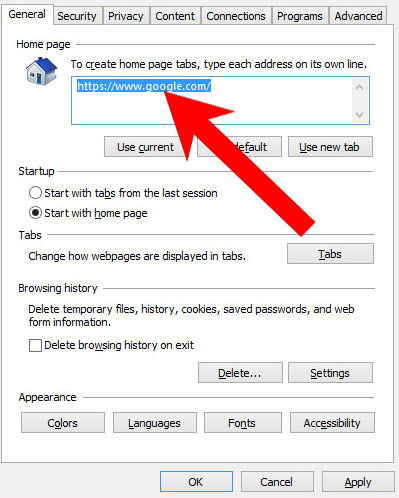
- Open Internet Explorer and press on the Gear icon.
- Internet Options → General tab. Delete the homepage URL and type in your preferred one.
- Press Apply.
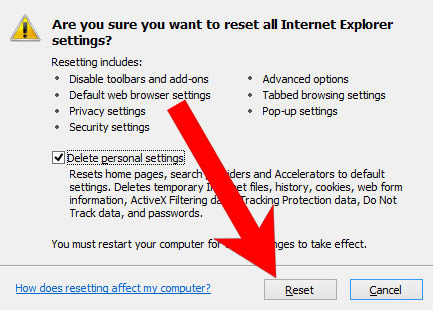
d) Reset Internet Explorer
- Open Internet Explorer and press on the Gear icon.
- Internet Options → Advanced tab.
- At the bottom, you will see a Reset button. Press that.
- In the window that appears, check the box that says Delete personal settings.
- Press Reset.
- Click OK to exit the window.
- Restart your browser.

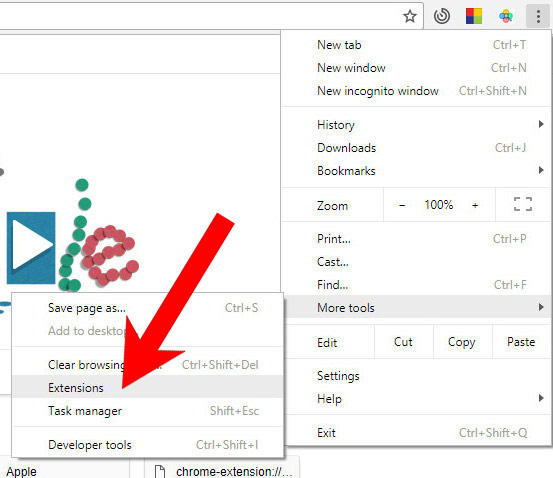
e) Remove Affairs Speedup from Google Chrome
- Open Google Chrome and press the menu icon on the right, next to the URL field.
- Choose More tools and Extensions.
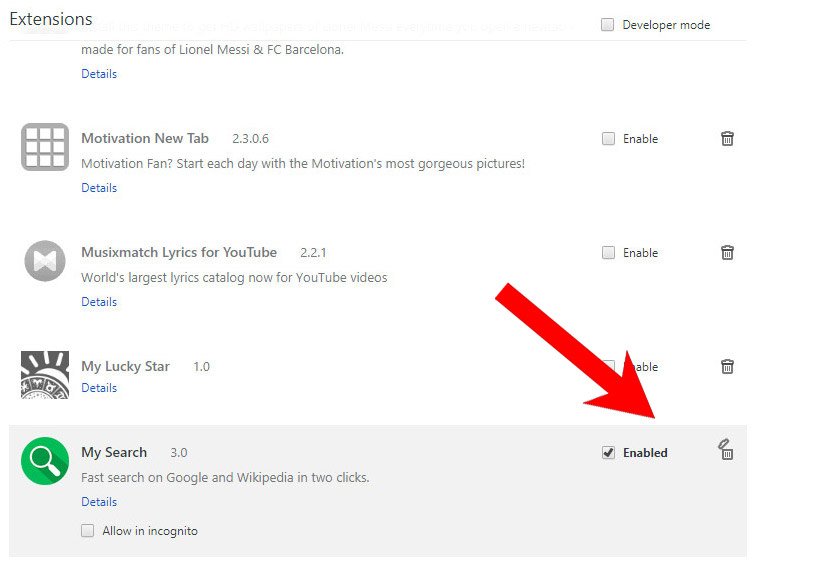
- Remove suspicious extensions by clicking the Trash icon next to them.
- If you are not certain about an extension, you can disable it by unchecking the box that says Enabled. If you later decide to keep it, simply check the box again.
f) Restore your homepage on Google Chrome
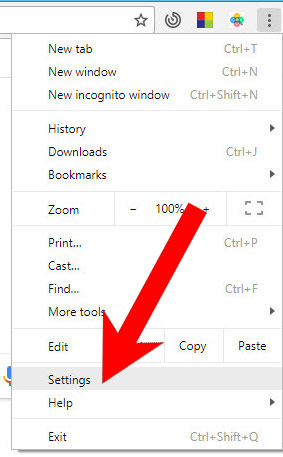
- Open Google Chrome and press the menu icon on the right, next to the URL field.
- Choose Settings.
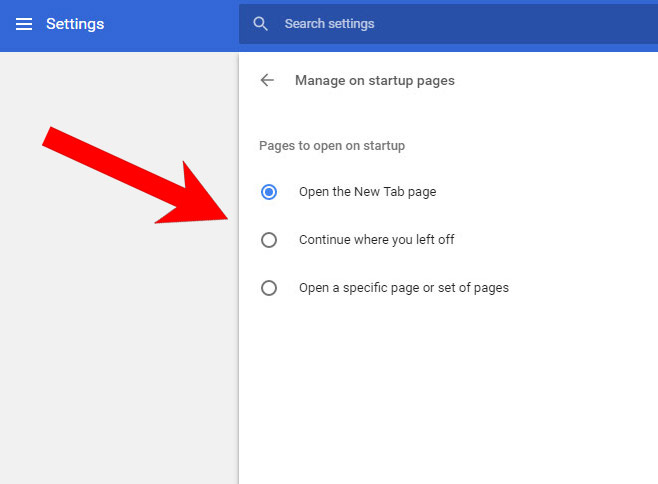
- In the window that appears, under On startup, there will be a Set pages option. Press on that.
- Remove the set website, and type in the one you prefer to be your homepage. Press OK.
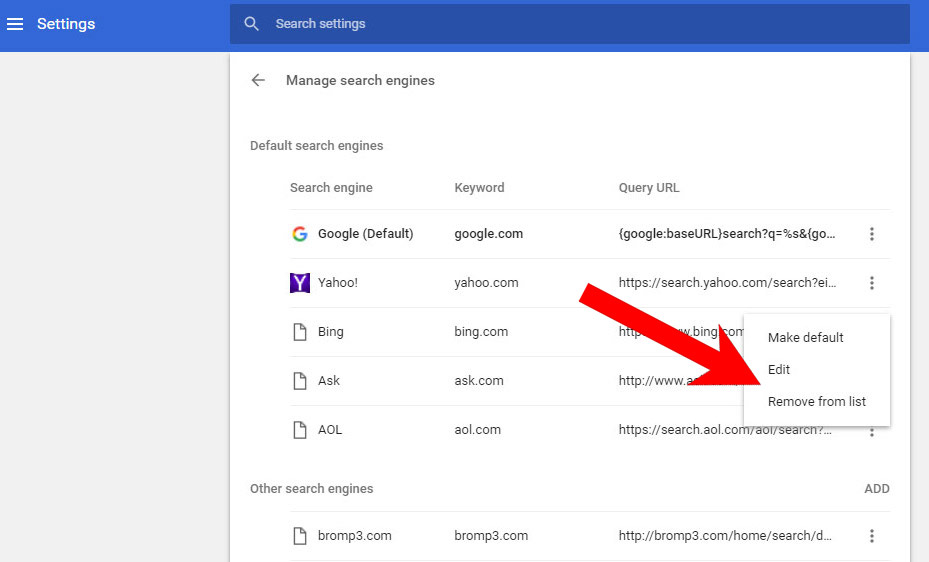
- In Settings, under Search, there is a Manage search engines option. Select that.
- Remove all search engines except the one you want to use. Click Done.
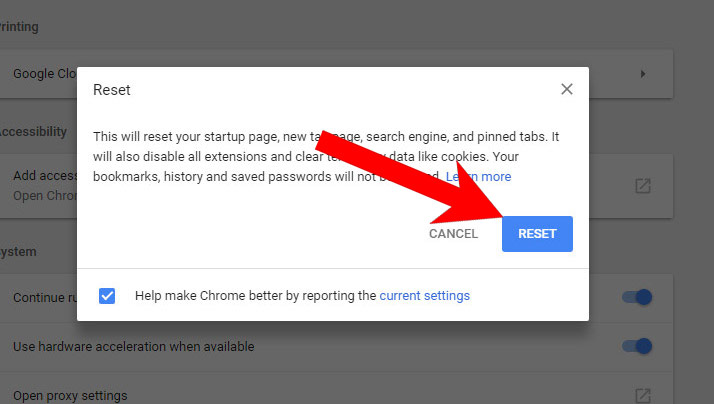
g) Reset Google Chrome
- Open Google Chrome and press the menu icon on the right, next to the URL field.
- Choose Settings.
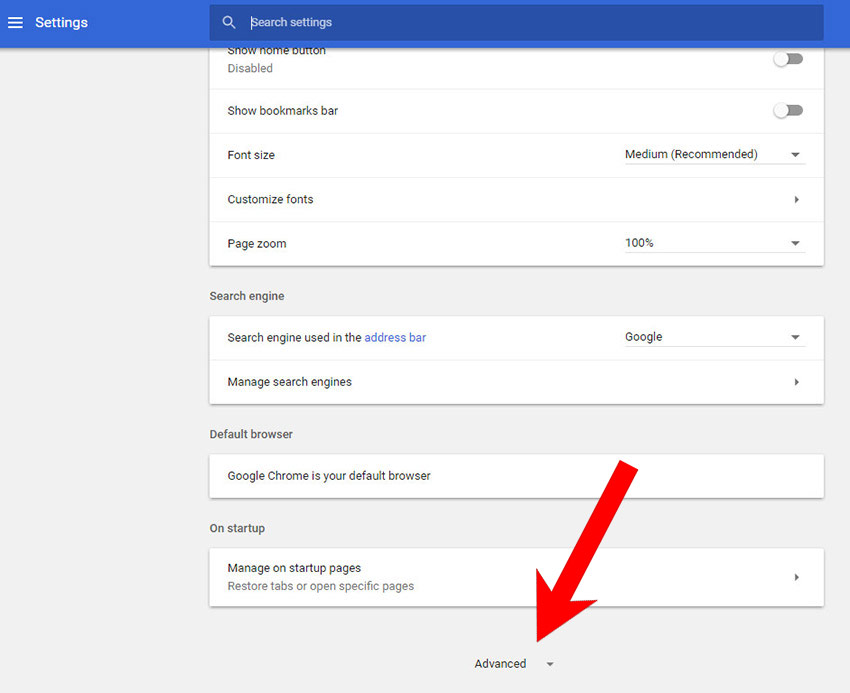
- Scroll down and press on Show advanced settings.
- Find and press the Reset button.
- In the confirmation window that appears, press Reset.
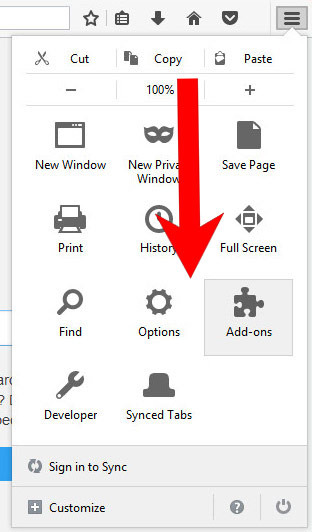
h) Remove Affairs Speedup from Mozilla Firefox
- Open Mozilla Firefox and access the menu by clicking on the three bars on the right of the screen.
- Select Add-ons.
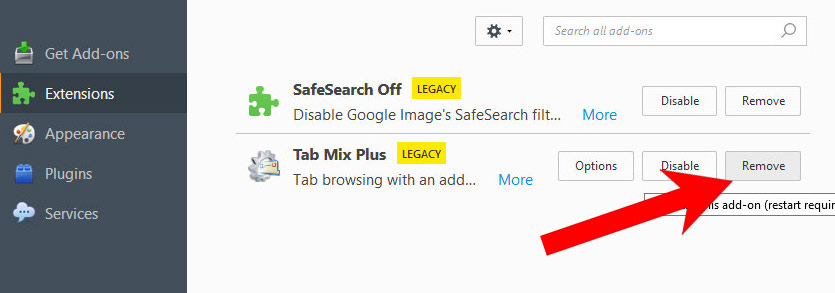
- Select the Extensions tab, and remove all questionable extensions.
- If you are not certain about an extension, you can disable it by clicking Disable. If you later decide to keep it, simply press Enable.
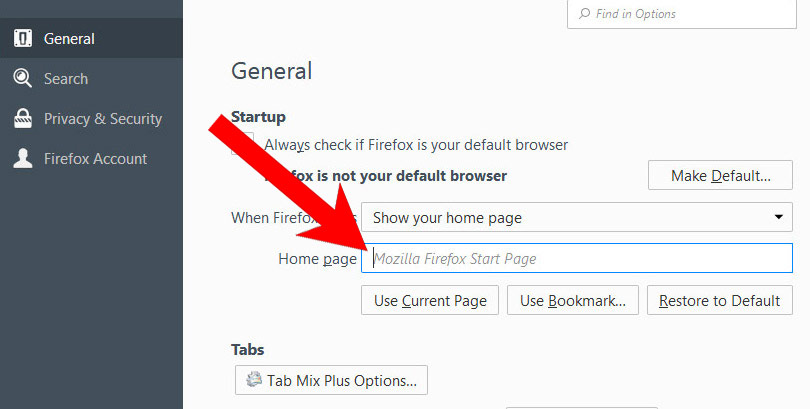
i) Restore your homepage on Mozilla Firefox
- Open Mozilla Firefox and access the menu by clicking on the three bars on the right side of the screen.
- Select Options.
- In General, click Restore to Default below the Home Page field.
j) Reset Mozilla Firefox
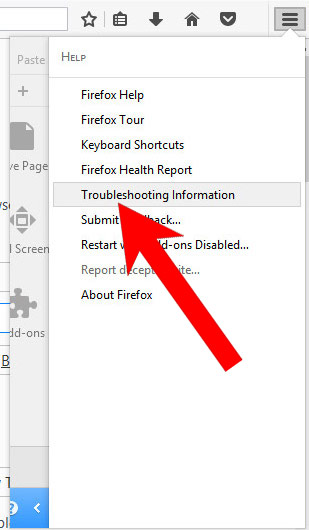
- Open Mozilla Firefox and access the menu by clicking on the three bars on the right of the screen.
- Press the question mark at the bottom of the menu.
- Select Troubleshooting Information.
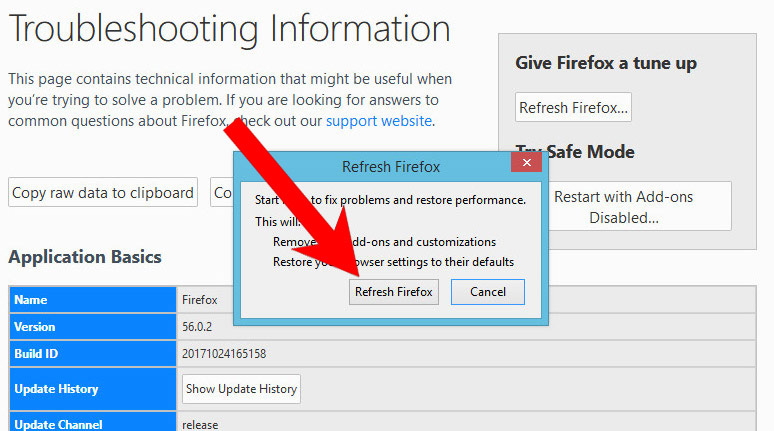
- Select the Refresh Firefox option.
k) Remove Affairs Speedup from Safari (for Mac)
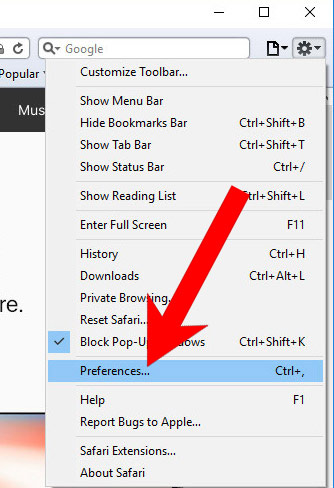
- Open Safari.
- Select Preferences (can be accesses by pressing on Safari at the top of your screen).
- Choose the Extensions tab.
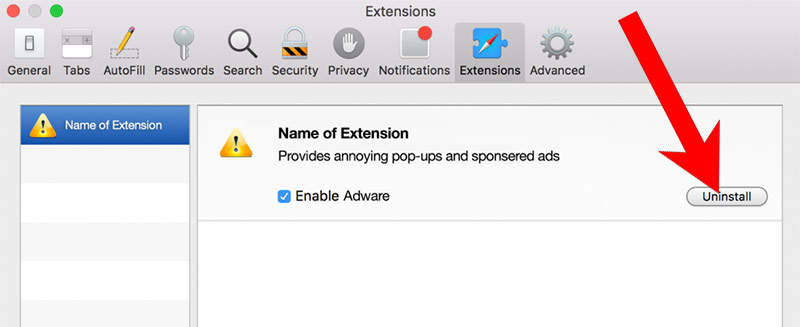
- Uninstall all questionable extensions.
- If you are not certain about an extension, you can disable it by unchecking the box that says Enabled. If you later decide to keep it, simply check the box again.
l) Reset Safari
If you are using the Yosemite, El Capitan or the Sierra versions, the option to reset Safari with one click is not available. Thus you will have to clear the history and empty the caches in separate steps.- Open Safari.
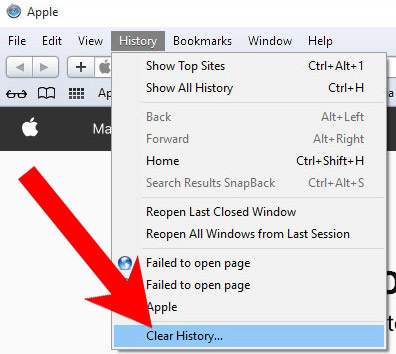
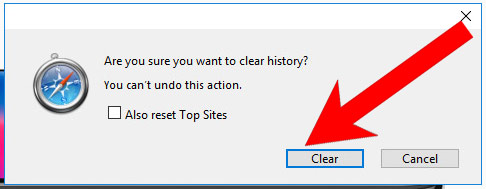
- Select Clear History (can be accesses by pressing on Safari at the top of your screen).
- Choose from what time you want the history deleted, and press Clear History.
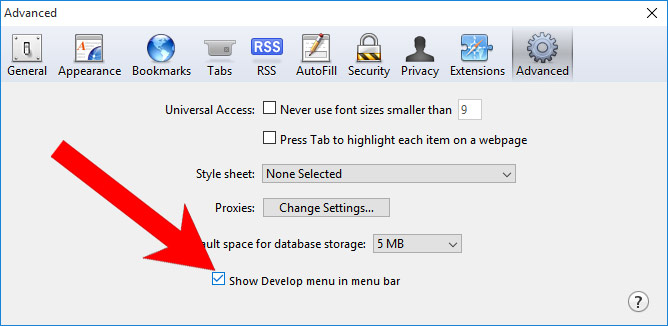
- Press on Safari at the top of the screen and select Preferences.
- Select the Advanced tab and check the box next to Show Develop menu in menu bar.
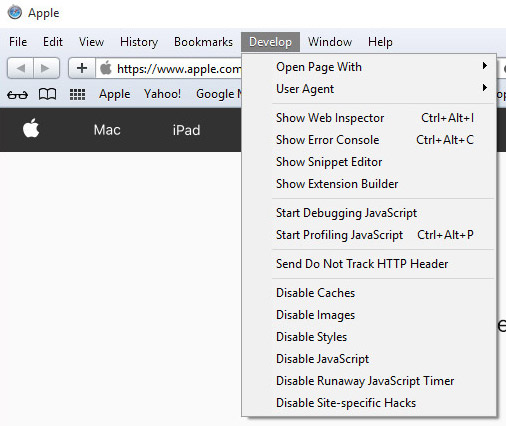
- Select Develop (from the menu bar at the top of the screen).
- Press Empty Caches.