The argument why it is called a hijacker is that the moment it becomes included onto your machine, it will right away on top of that add itself in the major browser and beginning meddling in bundles with its mode. Hence, you might start understanding reasonably harsh modifications to your prime web browser’s interface. For instance, Pushnott may add a new toolbar or other factors to it. But the biggest part of notably, it shall feasible introduce a new home web page and rather perhaps additionally a new default search generator. What we ought to on top of that highlight is that you won’t be exhibited probability to adjust these kinds of modes back either. Whilst Pushnott exists on your machine, you will have to stand for its configurations of your surfing application.
But if you would like to swap that and not need to deal with plenty of streams of popups, banner commercials, other commercial advertisements and even automatic web page reroutes, you’ll then should eliminate Pushnott from your machine utterly. But as the makers of such programs have no interest in that taking place, they don’t are apt to contain an blatant termination choice in applications like Pushnott. Hence, why we have put in a package termination instructions for this specific software. By following its guide you ought to be able to promptly and in addition toout greatly work delete Pushnott together with all of its elements from your device. And afterwards, you shall have the opportunity to rearrange your browser to your liking.
Download Removal Toolto remove PushnottWhat goal does Pushnott serve?
You might be intrigued to see which the truth of browser attackers is, as they don’t hugely sake you in any way. Well, they good anyone – and that anyone is generally their authors. Namely, they produce revenue for them based on the amount of clicks or views on the presented popups and banner adverts that we noted.
This is on top of that the reasoning why the adverts presented by browser attackers like Pushnott and iStart are generally positioned in a very threatening fashion, so that you’re often dropped in packages with no other option but to communicate with them.
This is moreover the same logic why users are generally led to assume that they might have contracted some adverse malicious software or fraudulent software. And specially after knowing that removing the application in question isn’t the most simple thing to implement, it’s really probable to offer onto worry and regard the most unfortunate.
Luckily, regardless, Pushnott is not malware tool and it shall not damage your device in any way. That does not suggest you should let your shield down just yet, though. Browser redirect viruses are regardless categorized as potentially unwanted applications, relatively due to them being related to the chances of random leak to malicious software and viruses. For instance, you might end up being directed to a web page that’s been threatened by cyber criminals and is utilized as a scattered hub for ransomware and other types of fraudulent code.
Learn how to remove Pushnott from your computer
Step 1. Pushnott Removal from Windows
a) Windows 7/XP
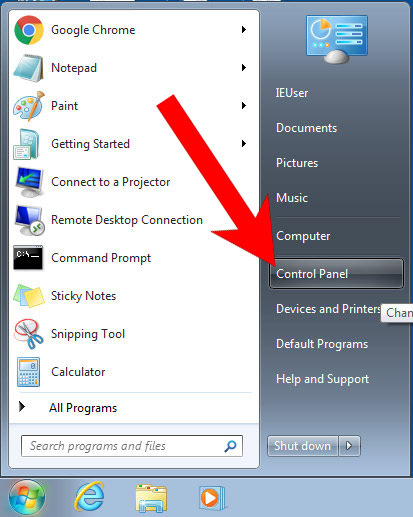
- Press on the Start icon.

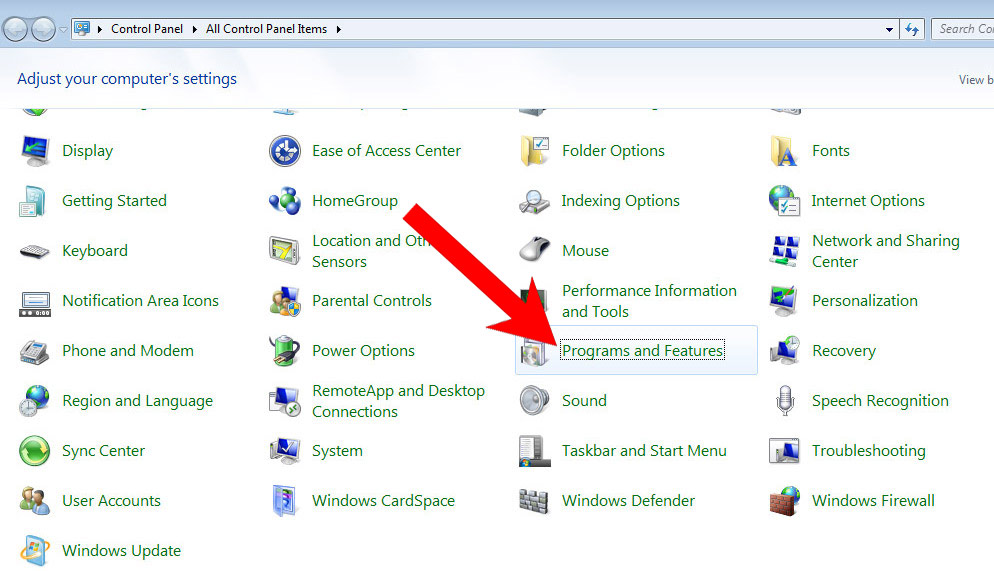
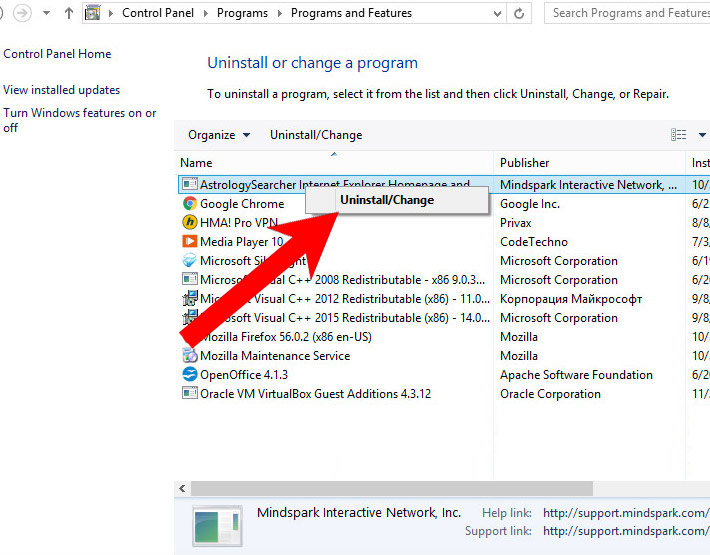
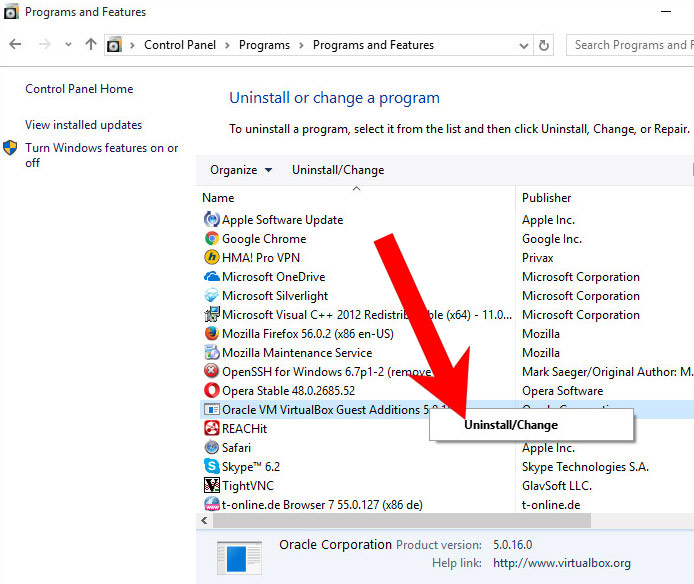
- Control Panel → Programs and Features.
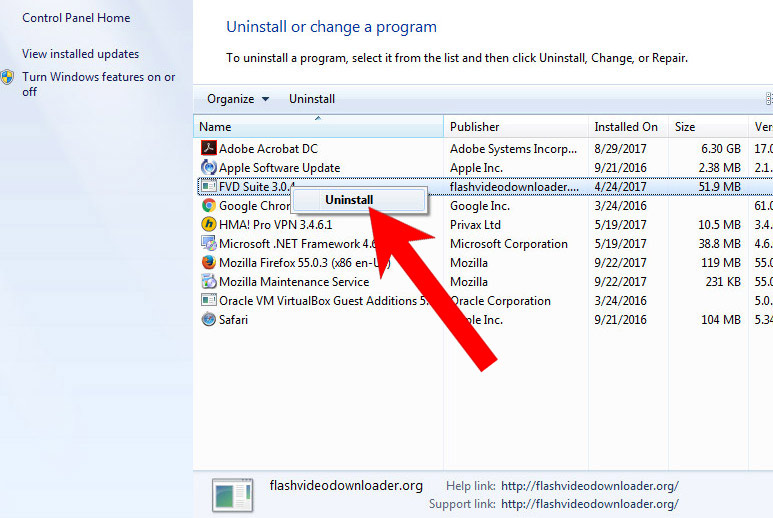
- Find the program you want to delete and press Uninstall.
b) Windows 8
- Right-click on the start icon (lower left corner).
- Select Control Panel.
- Click Programs and Features.
- Find and remove all unwanted programs.
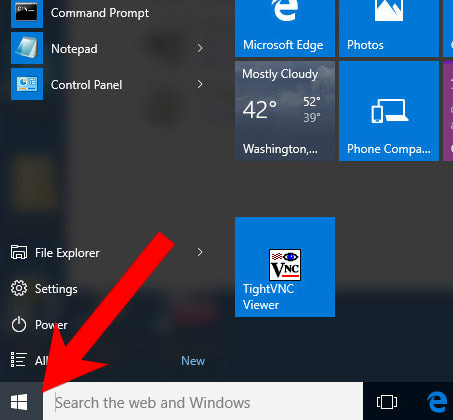

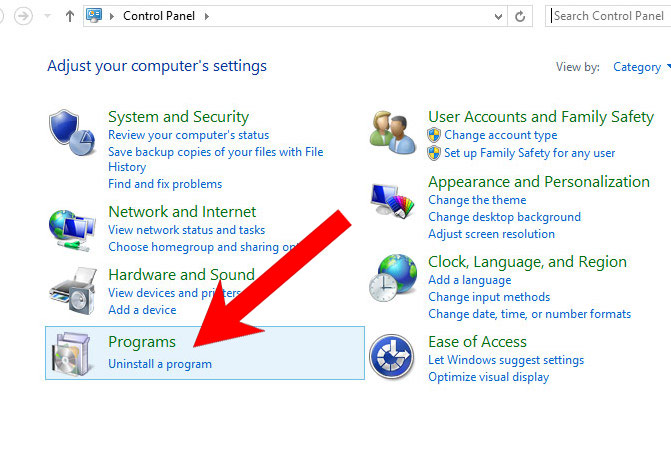
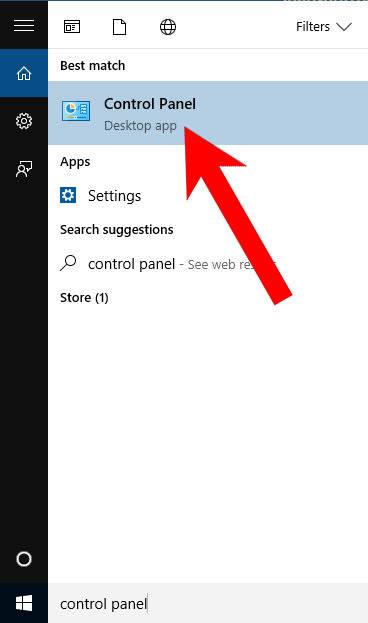
c) Windows 10
- Open Start menu and click on the magnifying glass (next to the shut down button).
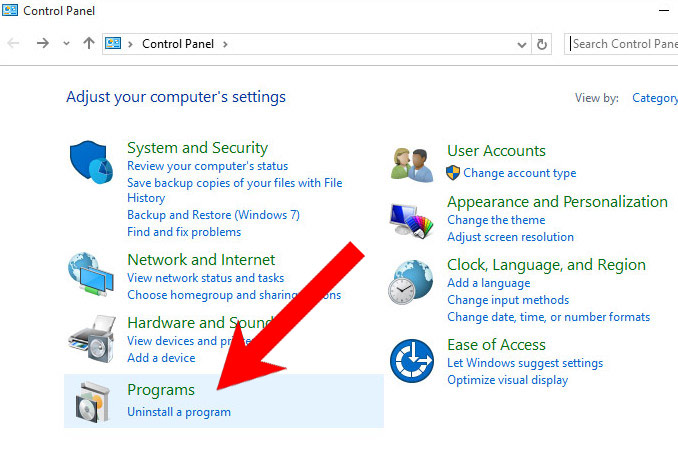
- Type in Control Panel.
- Control Panel → Programs and Features.
- Find and remove all unwanted programs.
d) Mac OS X
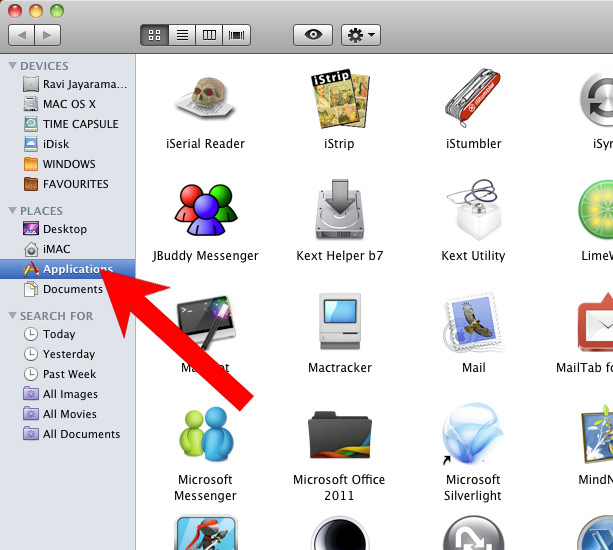
- Open Finder and press Applications.
- Check all suspicious programs you want to get rid of.
- Drag them to the trash icon in your dock (Alternatively, right-click on the program and press Move to Trash).
- After you move all the unwanted programs, right-click on the trash icon and select Empty Trash.

Step 2. Delete Pushnott from browsers
a) Remove Pushnott from Microsoft Edge
Reset Microsoft Edge (Method 1)
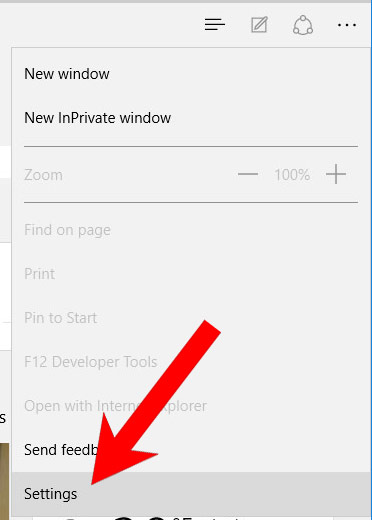
- Open Microsoft Edge.
- Press More located at the top right corner of the screen (the three dots).
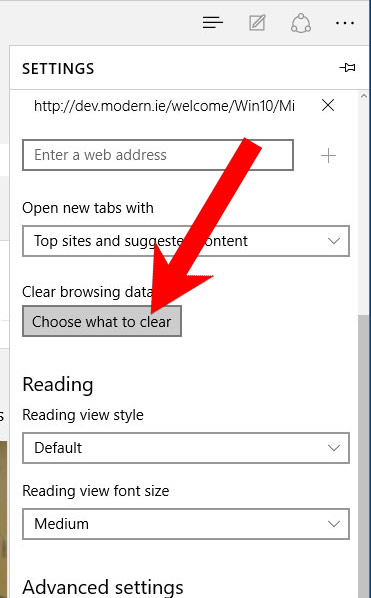
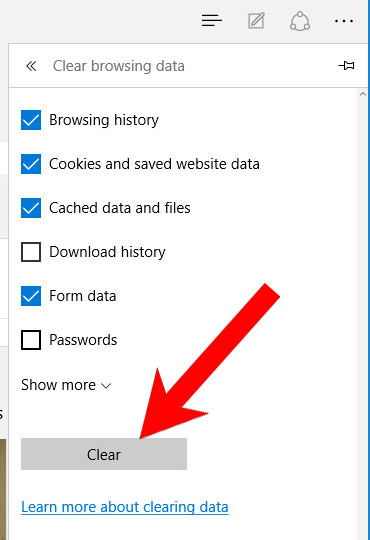
- Settings → Choose what to clear.
- Check the boxes of the items you want removed, and press Clear.
- Press Ctrl + Alt + Delete together.
- Choose Task Manager.
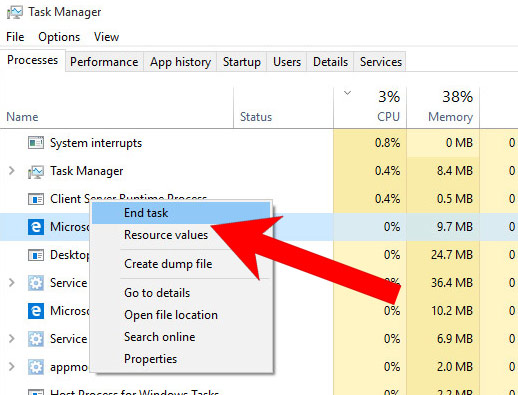
- In the Processes tab, find the Microsoft Edge process, right click on it, and press Go to details (or More details if Go to details is not available).
- Right-click on all Microsoft Edge processes, and choose End task.
(Method 2)
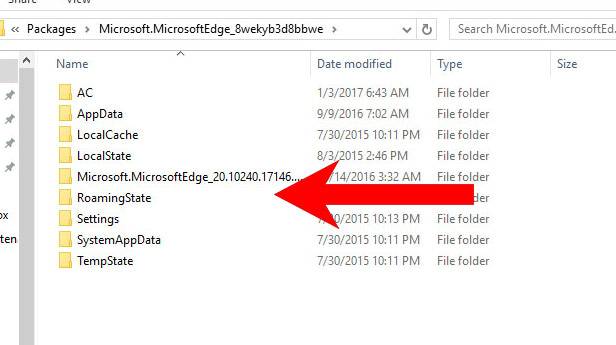
Before you proceed with this method, backup your data.- Go to C:\Users\%username%\AppData\Local\Packages\Microsoft.MicrosoftEdge_xxxxxxxxxx.
- Select all the folders, right-click on them and press Delete.
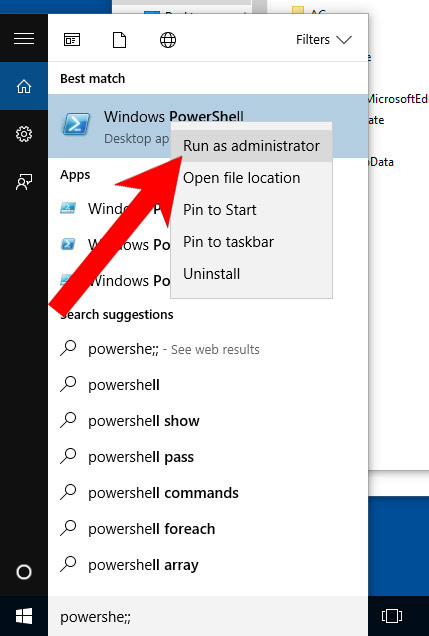
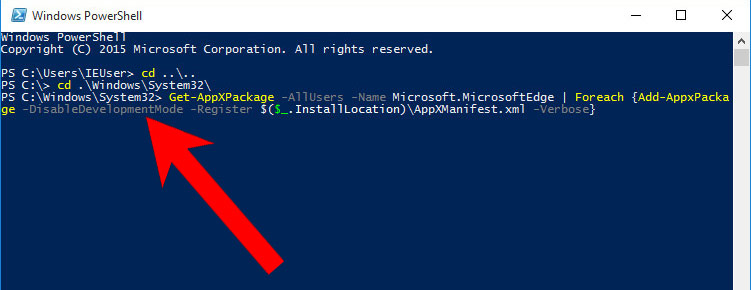
- Press the start button, and type in Windows PowerShell in the search box.
- Right-click on the result, and select Run as administrator.
- In Administrator: Windows PowerShell, paste
Get-AppXPackage -AllUsers -Name Microsoft.MicrosoftEdge | Foreach {Add-AppxPackage -DisableDevelopmentMode -Register $($_.InstallLocation)\AppXManifest.xml -Verbose}
under PS C:\WINDOWS\system32> and tap Enter.
- The issue should be gone now.
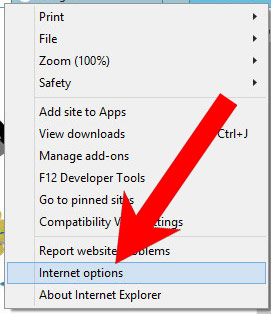
b) Remove Pushnott from Internet Explorer
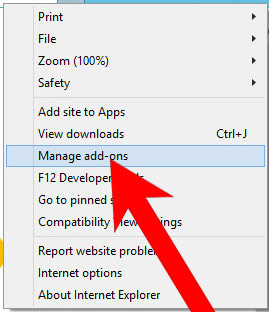
- Open Internet Explorer and press on the Gear icon.
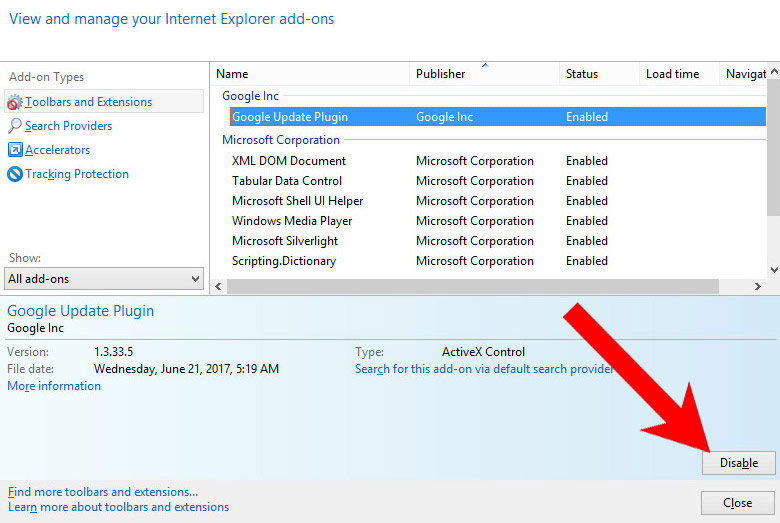
- Select Manage add-ons, and then Toolbars and Extensions.
- Find and disable all suspicious extensions.
- Close the window.
c) Restore your homepage on Internet Explorer
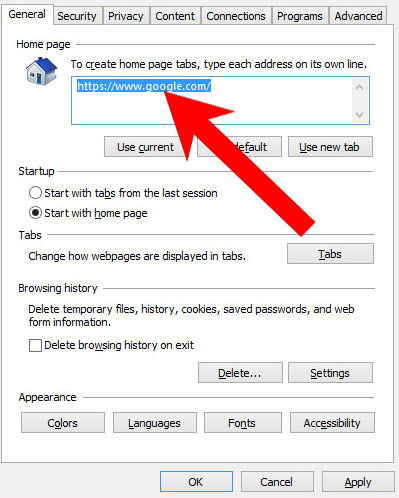
- Open Internet Explorer and press on the Gear icon.
- Internet Options → General tab. Delete the homepage URL and type in your preferred one.
- Press Apply.
d) Reset Internet Explorer
- Open Internet Explorer and press on the Gear icon.
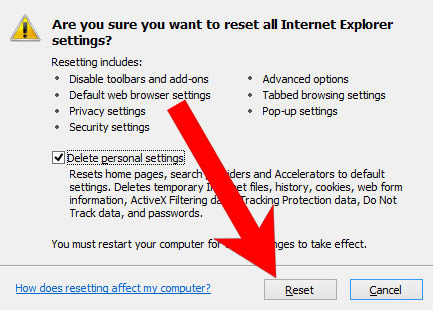
- Internet Options → Advanced tab.
- At the bottom, you will see a Reset button. Press that.
- In the window that appears, check the box that says Delete personal settings.
- Press Reset.
- Click OK to exit the window.
- Restart your browser.

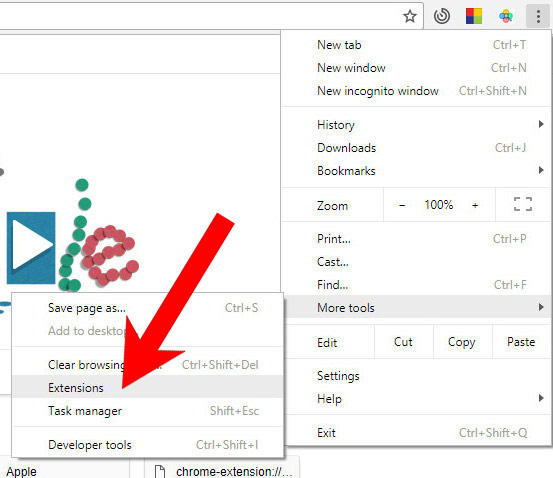
e) Remove Pushnott from Google Chrome
- Open Google Chrome and press the menu icon on the right, next to the URL field.
- Choose More tools and Extensions.
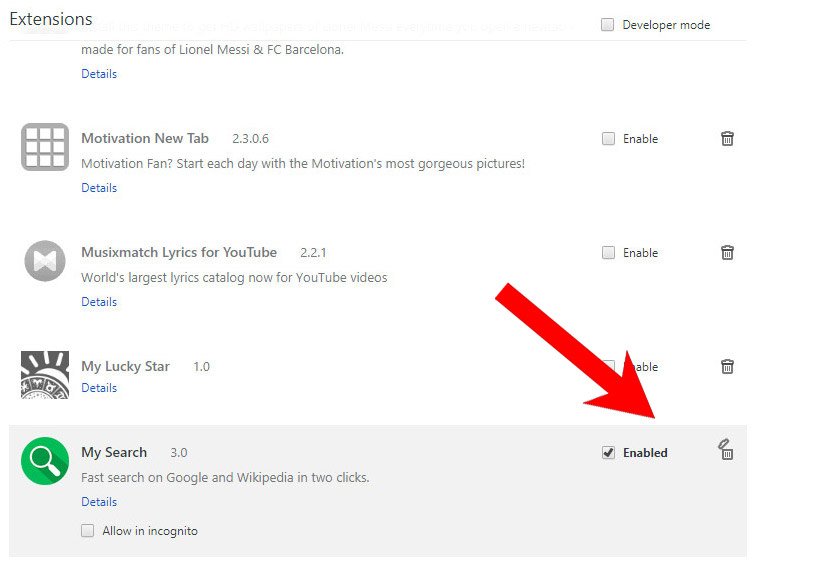
- Remove suspicious extensions by clicking the Trash icon next to them.
- If you are not certain about an extension, you can disable it by unchecking the box that says Enabled. If you later decide to keep it, simply check the box again.
f) Restore your homepage on Google Chrome
- Open Google Chrome and press the menu icon on the right, next to the URL field.
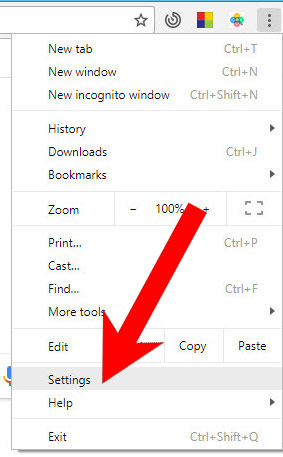
- Choose Settings.
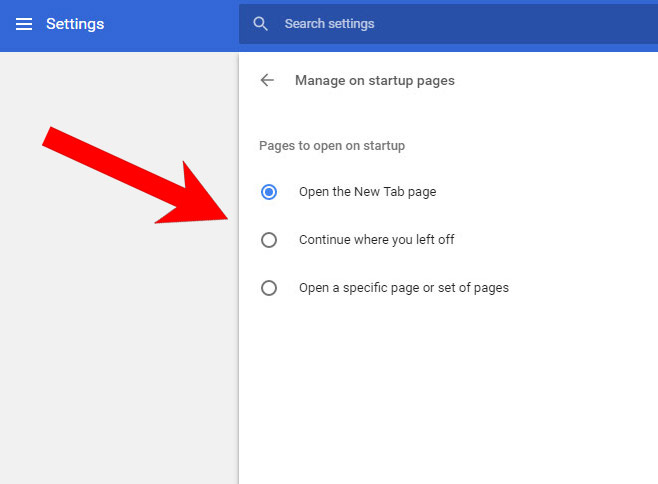
- In the window that appears, under On startup, there will be a Set pages option. Press on that.
- Remove the set website, and type in the one you prefer to be your homepage. Press OK.
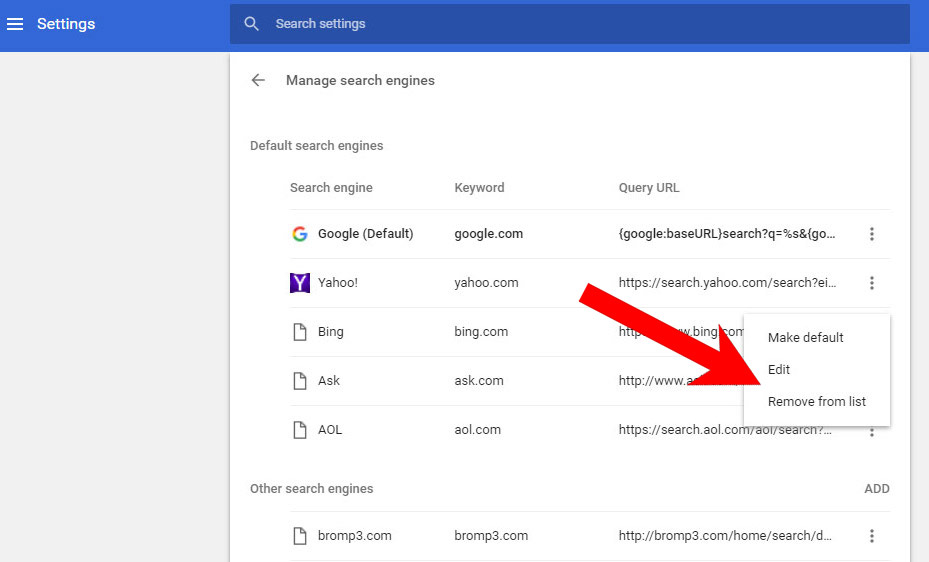
- In Settings, under Search, there is a Manage search engines option. Select that.
- Remove all search engines except the one you want to use. Click Done.
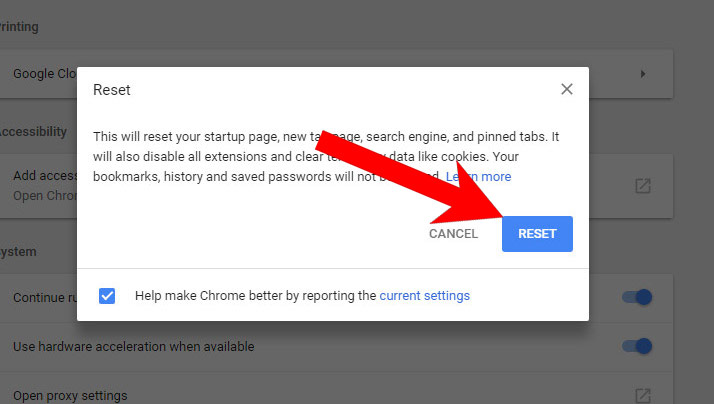
g) Reset Google Chrome
- Open Google Chrome and press the menu icon on the right, next to the URL field.
- Choose Settings.
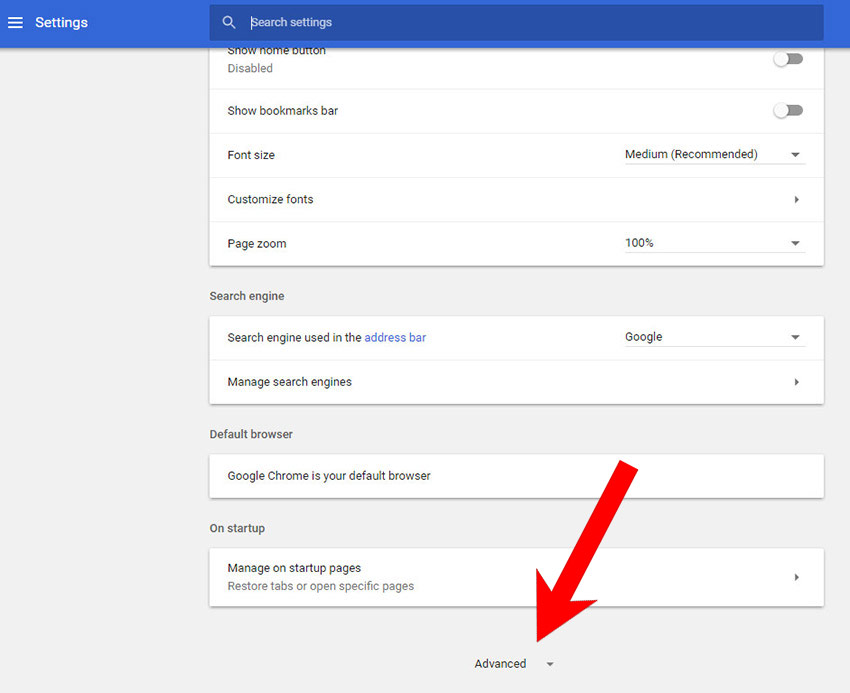
- Scroll down and press on Show advanced settings.
- Find and press the Reset button.
- In the confirmation window that appears, press Reset.
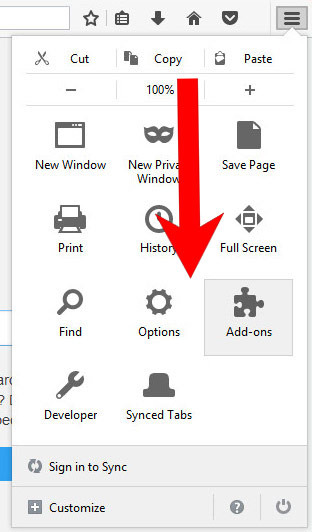
h) Remove Pushnott from Mozilla Firefox
- Open Mozilla Firefox and access the menu by clicking on the three bars on the right of the screen.
- Select Add-ons.
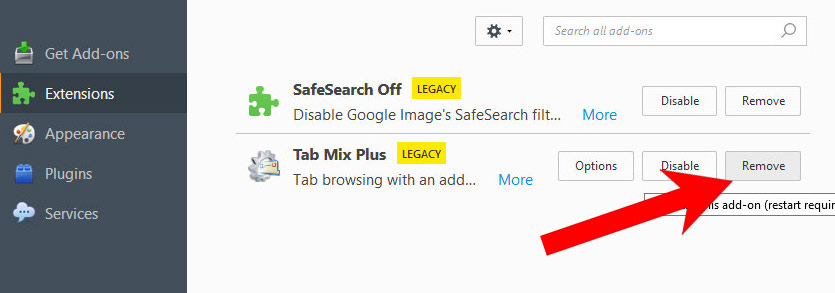
- Select the Extensions tab, and remove all questionable extensions.
- If you are not certain about an extension, you can disable it by clicking Disable. If you later decide to keep it, simply press Enable.
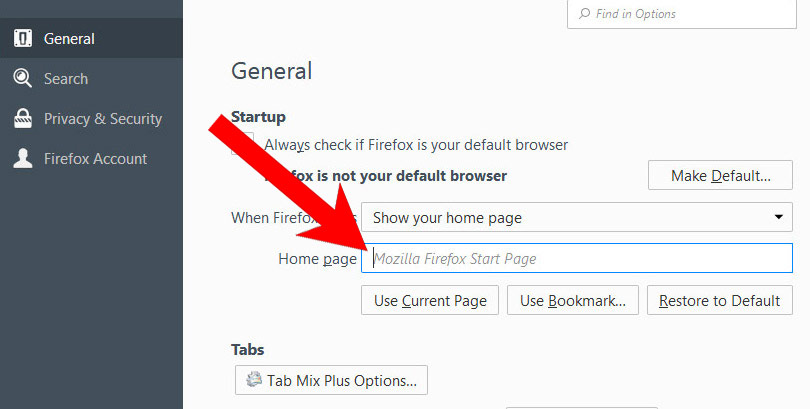
i) Restore your homepage on Mozilla Firefox
- Open Mozilla Firefox and access the menu by clicking on the three bars on the right side of the screen.
- Select Options.
- In General, click Restore to Default below the Home Page field.
j) Reset Mozilla Firefox
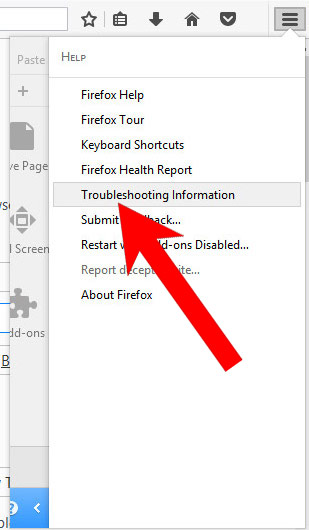
- Open Mozilla Firefox and access the menu by clicking on the three bars on the right of the screen.
- Press the question mark at the bottom of the menu.
- Select Troubleshooting Information.
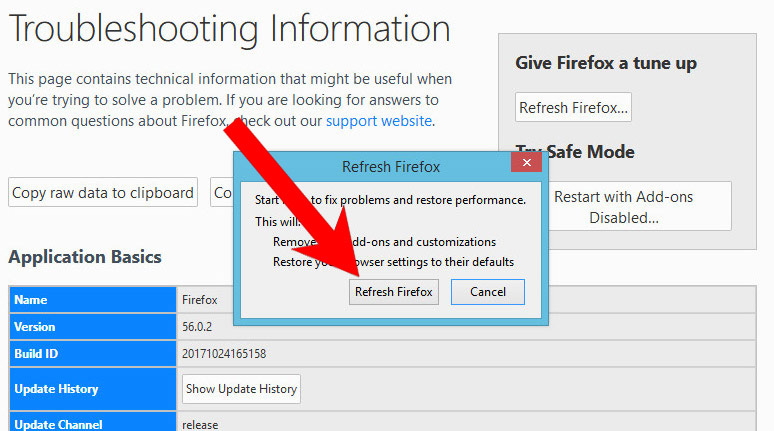
- Select the Refresh Firefox option.
k) Remove Pushnott from Safari (for Mac)
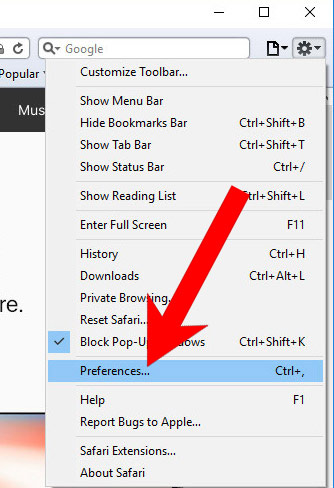
- Open Safari.
- Select Preferences (can be accesses by pressing on Safari at the top of your screen).
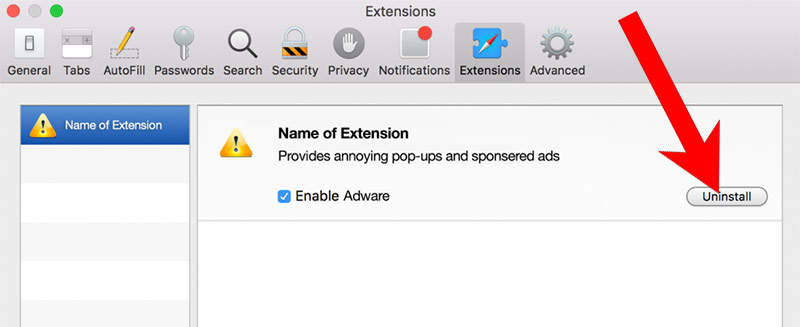
- Choose the Extensions tab.
- Uninstall all questionable extensions.
- If you are not certain about an extension, you can disable it by unchecking the box that says Enabled. If you later decide to keep it, simply check the box again.
l) Reset Safari
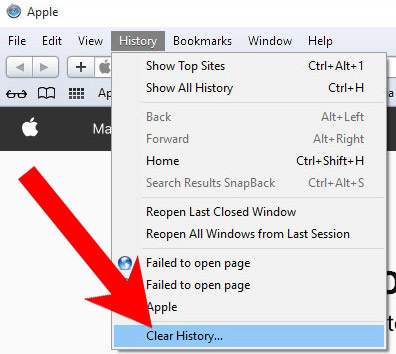
If you are using the Yosemite, El Capitan or the Sierra versions, the option to reset Safari with one click is not available. Thus you will have to clear the history and empty the caches in separate steps.- Open Safari.
- Select Clear History (can be accesses by pressing on Safari at the top of your screen).
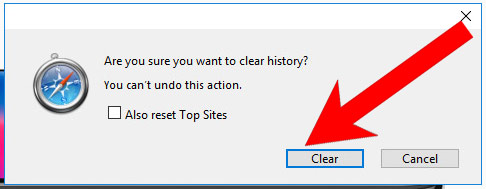
- Choose from what time you want the history deleted, and press Clear History.
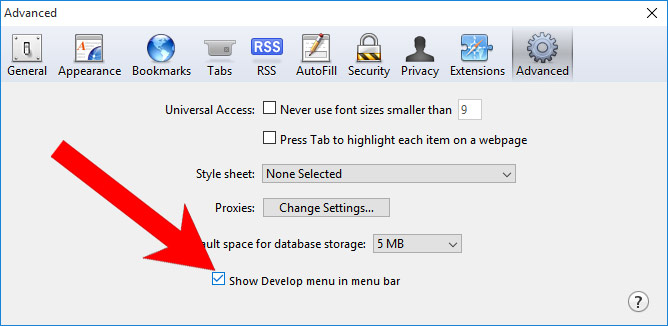
- Press on Safari at the top of the screen and select Preferences.
- Select the Advanced tab and check the box next to Show Develop menu in menu bar.
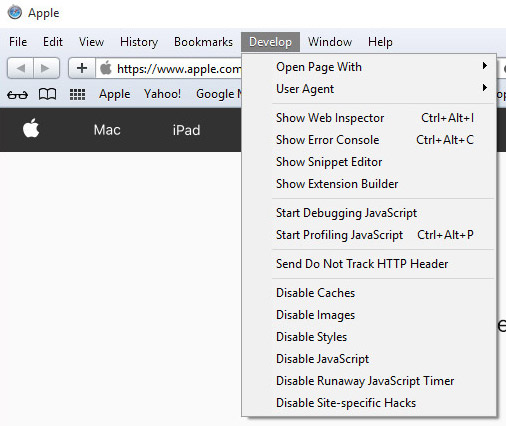
- Select Develop (from the menu bar at the top of the screen).
- Press Empty Caches.