The unnecessary leakage to several intimidating ads (for example pop-ups, portal-redirects, banner adverts, ads, new tabs, reroute connections, etc.) can be immensely irritating and has the possible to destroy your general web surfing endure, particularly when it is induced by an advertising-supported software application like Power Blocker or Wave Browser. These types of a utility is far fewer damaging than genuine system risks for instance malicious software, Trojans and Ransomware but it might regardless be reasonably nasty having it on your pc. Unfortunately, ad-supported software can be chanced upon all over the net, largely in the order of a bonus or added piece added to a different freeware or an application packets. Many computer users end up in bundles with it when they conduct a hasty process of installing some games, add-ons, updates or free-of-charge instruments. If that your internet surfing has newly been collecting affected by “ads produced by Power Blocker” and your Chrome, Firefox or Explorer browser has began to spam your screen alongside complicated-to-erase promoted alerts, then we advise you stay on this site and study on the details that trails. In the following lines, you will see a exclusive removal guidelines which hides a set of guidelines and screenshots that can distinguish to you how to terminate Power Blocker and uninstall its annoying ads from any browser. If you monitor the guidelines carefully, you ought to have no inconvenience removing the adware from your pc, specially if you fuse them together with the analyst help of the offered uninstallation program. After you finalize together with the phases, regardless, keep in mind to study the rest of the report to get a deeper grasping of the most frequent characteristics of the advertising-supported applications and their roots as well as the possible threats that they may bring about if you allow them work for too lengthy.
Download Removal Toolto remove Power Blocker
Is it highly bad should you have ad-supported software on your machine?
Hesitant about the origins and the aim of each new and suspiciously-searching software which you identify on your system is necessary if you wish to avoid corrupt malware and nasty pieces of programs (for instance Rootkits, malware, Ransomware, etc.) from getting into your pc. That’s why it is fully standard to be anxious about the existence of advertising-supported software programs like Power Blocker whilst they need the malicious characteristics of an actual pc malicious software. In truth, in most cases, the users who come across such an application may , at first, glitch it for quite some malware because of its intrusive ads generation and automatic portal-reroutes that it can begin. But this is mainly because of a do not have of perception connected to the valid origin of the advertisement-supported application reasonably than some actual maliciousness. The prime reason Power Blocker attempts to flood your detect together with adverts is that it wishes you to tap on them and to enter some pre-characterized domains which have paid for collecting endorsed by the advertising-supported program. Similarly to other ad-boosting and website-leading apps, the advertising-supported program makes income for its authors via the taps on its commercial advertisements on a pay-per-click basis. There is nothing criminal in this ad-supported scheme but if you catch that your stable surfing has been collecting influenced by it, you may utilize the removal guidelines on this site to forever eliminate its source.
Learn how to remove Power Blocker from your computer
Step 1. Power Blocker Removal from Windows
a) Windows 7/XP
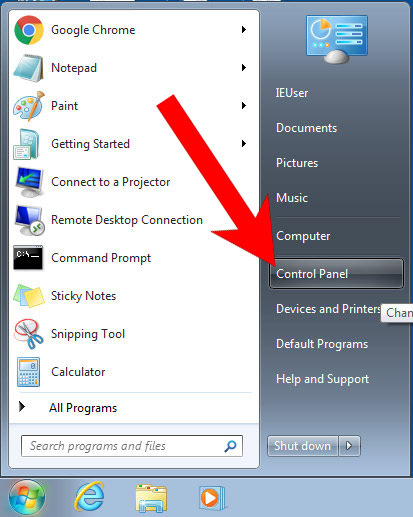
- Press on the Start icon.

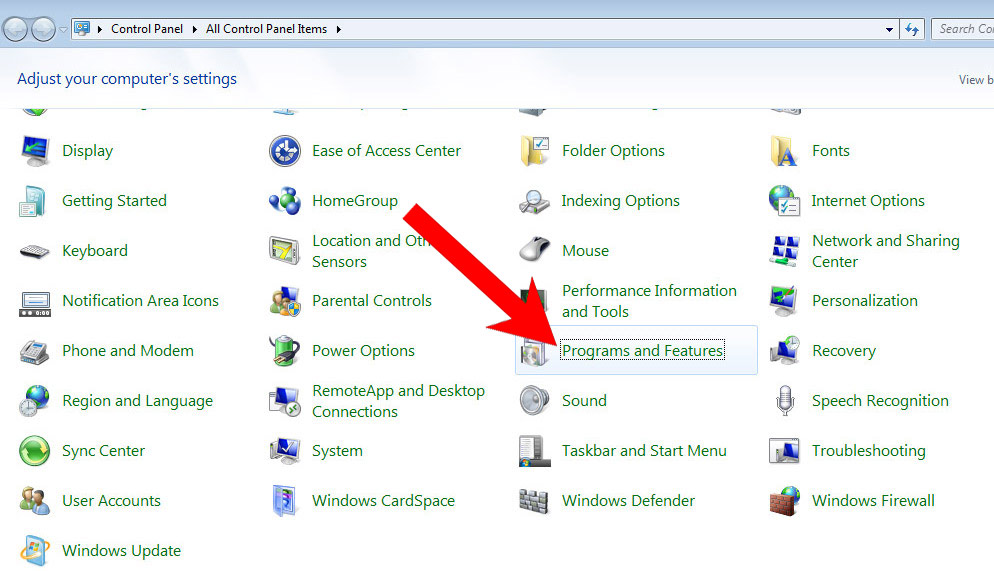
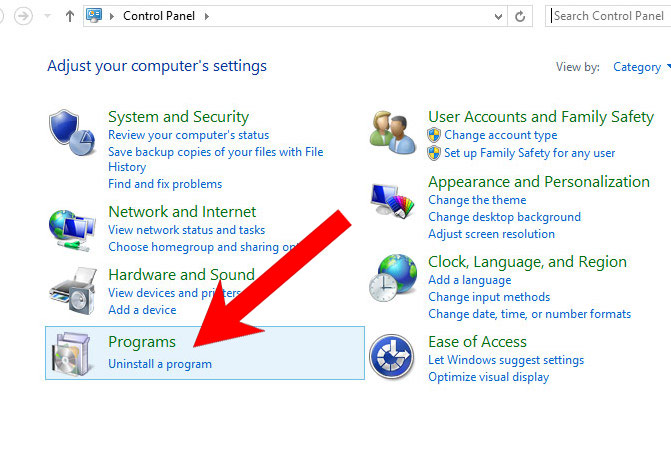
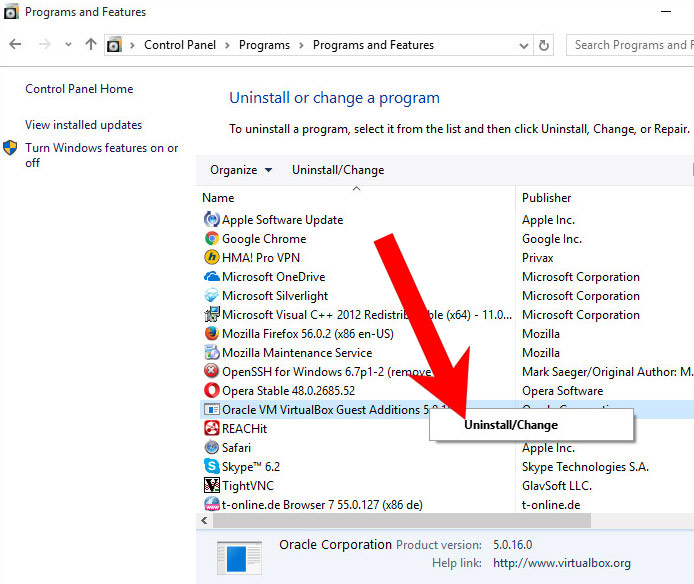
- Control Panel → Programs and Features.
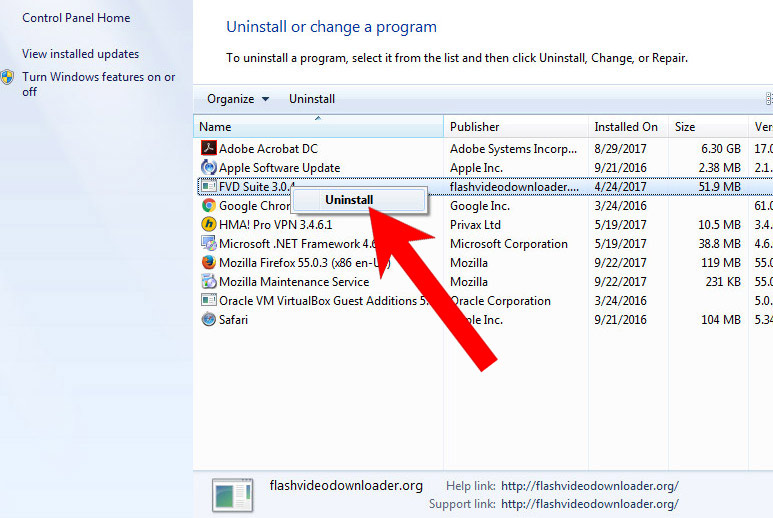
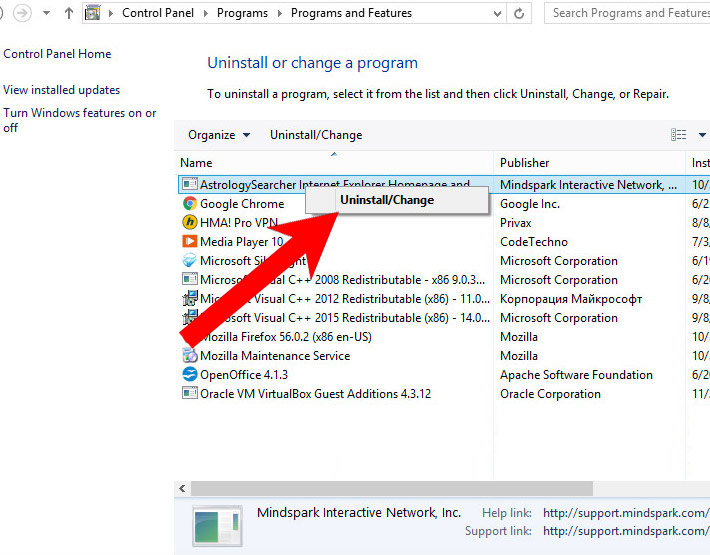
- Find the program you want to delete and press Uninstall.
b) Windows 8
- Right-click on the start icon (lower left corner).
- Select Control Panel.
- Click Programs and Features.
- Find and remove all unwanted programs.

c) Windows 10
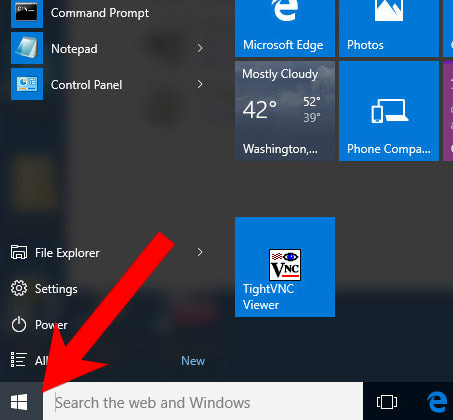
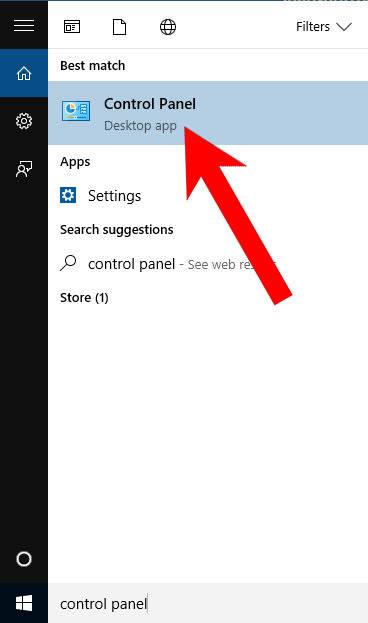
- Open Start menu and click on the magnifying glass (next to the shut down button).
- Type in Control Panel.
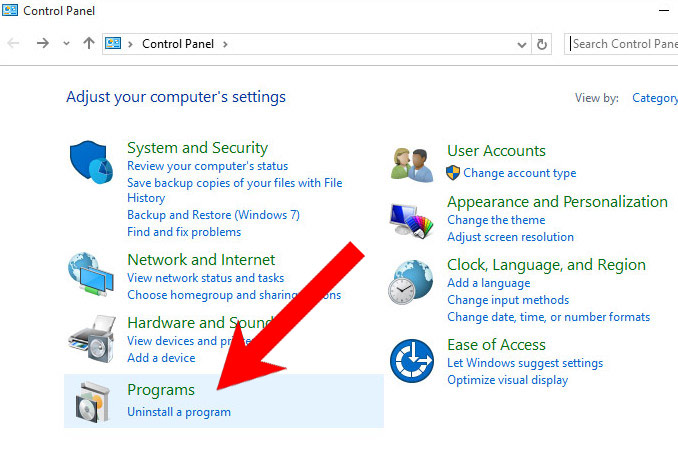
- Control Panel → Programs and Features.
- Find and remove all unwanted programs.
d) Mac OS X
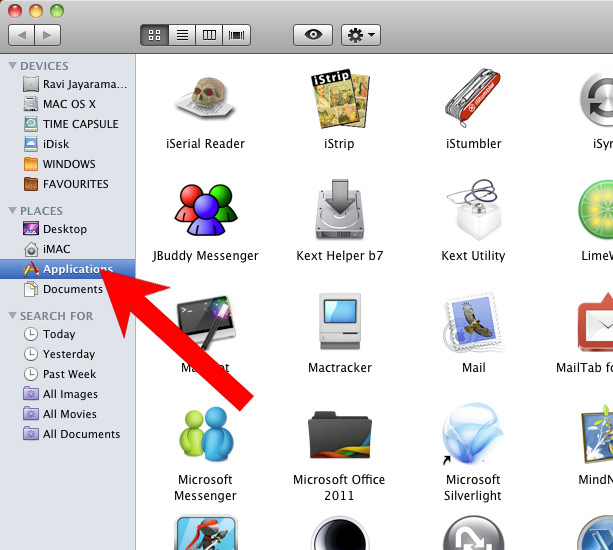
- Open Finder and press Applications.
- Check all suspicious programs you want to get rid of.
- Drag them to the trash icon in your dock (Alternatively, right-click on the program and press Move to Trash).
- After you move all the unwanted programs, right-click on the trash icon and select Empty Trash.

Step 2. Delete Power Blocker from browsers
a) Remove Power Blocker from Microsoft Edge
Reset Microsoft Edge (Method 1)
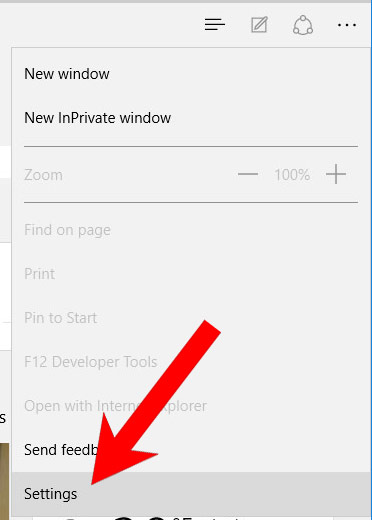
- Open Microsoft Edge.
- Press More located at the top right corner of the screen (the three dots).
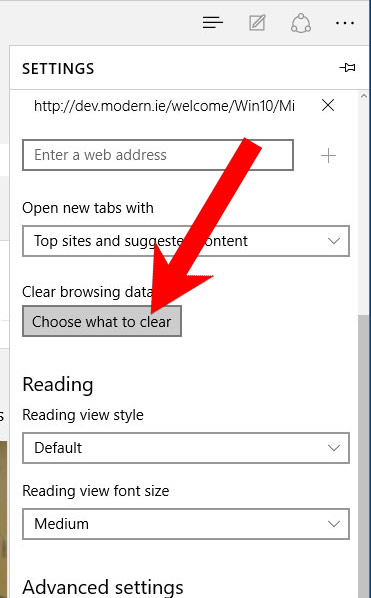
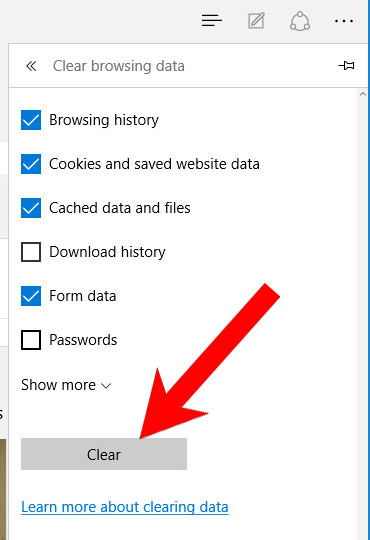
- Settings → Choose what to clear.
- Check the boxes of the items you want removed, and press Clear.
- Press Ctrl + Alt + Delete together.
- Choose Task Manager.
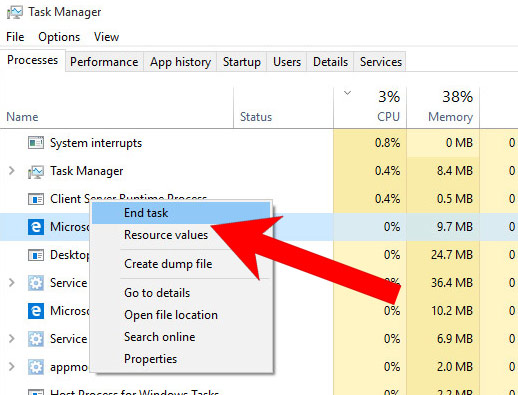
- In the Processes tab, find the Microsoft Edge process, right click on it, and press Go to details (or More details if Go to details is not available).
- Right-click on all Microsoft Edge processes, and choose End task.
(Method 2)
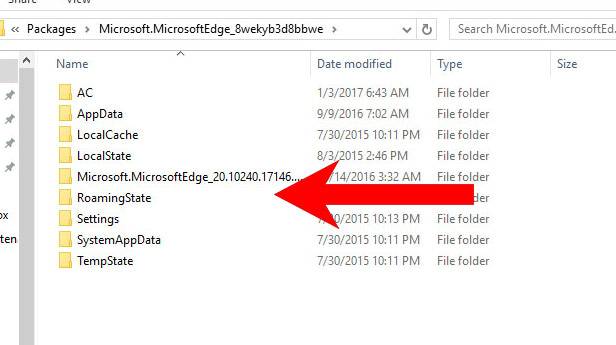
Before you proceed with this method, backup your data.- Go to C:\Users\%username%\AppData\Local\Packages\Microsoft.MicrosoftEdge_xxxxxxxxxx.
- Select all the folders, right-click on them and press Delete.
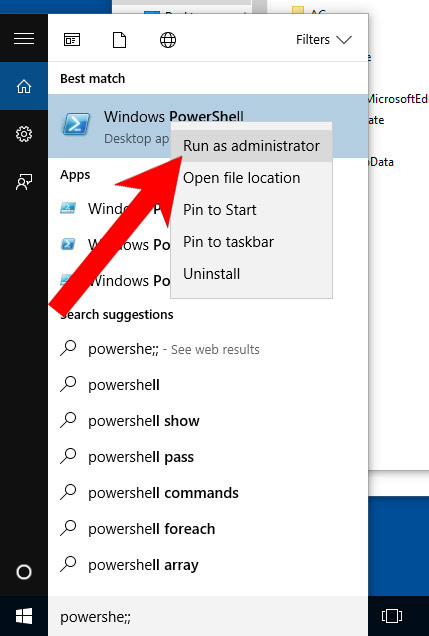
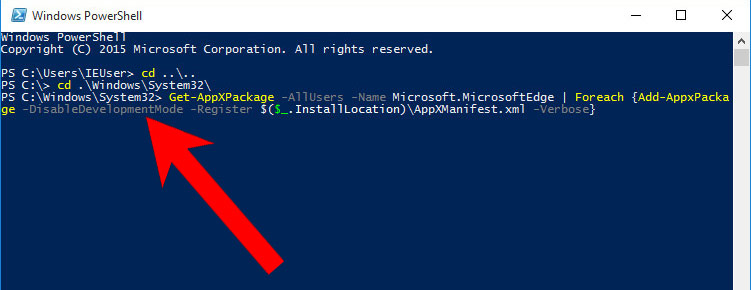
- Press the start button, and type in Windows PowerShell in the search box.
- Right-click on the result, and select Run as administrator.
- In Administrator: Windows PowerShell, paste
Get-AppXPackage -AllUsers -Name Microsoft.MicrosoftEdge | Foreach {Add-AppxPackage -DisableDevelopmentMode -Register $($_.InstallLocation)\AppXManifest.xml -Verbose}
under PS C:\WINDOWS\system32> and tap Enter.
- The issue should be gone now.
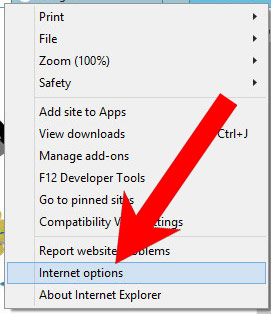
b) Remove Power Blocker from Internet Explorer
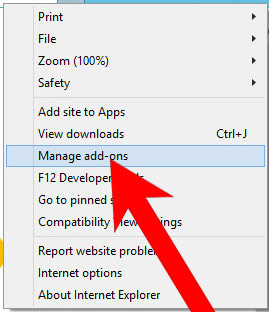
- Open Internet Explorer and press on the Gear icon.
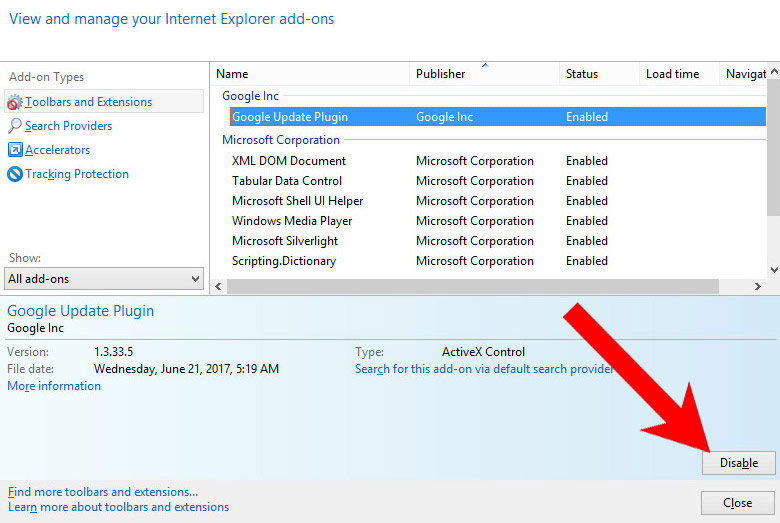
- Select Manage add-ons, and then Toolbars and Extensions.
- Find and disable all suspicious extensions.
- Close the window.
c) Restore your homepage on Internet Explorer
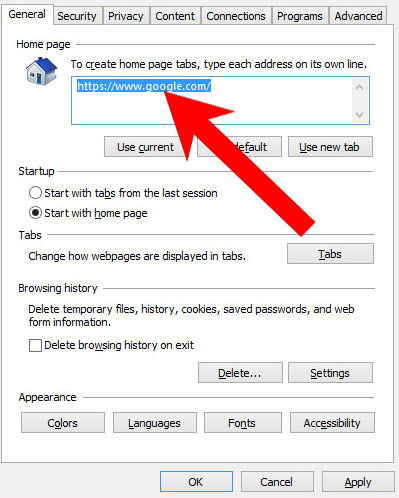
- Open Internet Explorer and press on the Gear icon.
- Internet Options → General tab. Delete the homepage URL and type in your preferred one.
- Press Apply.
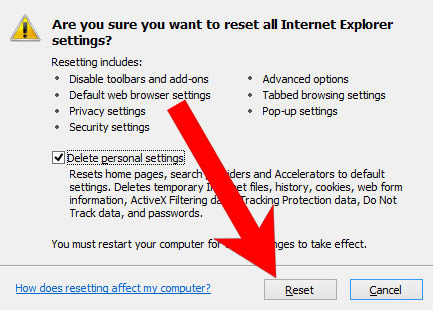
d) Reset Internet Explorer
- Open Internet Explorer and press on the Gear icon.
- Internet Options → Advanced tab.
- At the bottom, you will see a Reset button. Press that.
- In the window that appears, check the box that says Delete personal settings.
- Press Reset.
- Click OK to exit the window.
- Restart your browser.

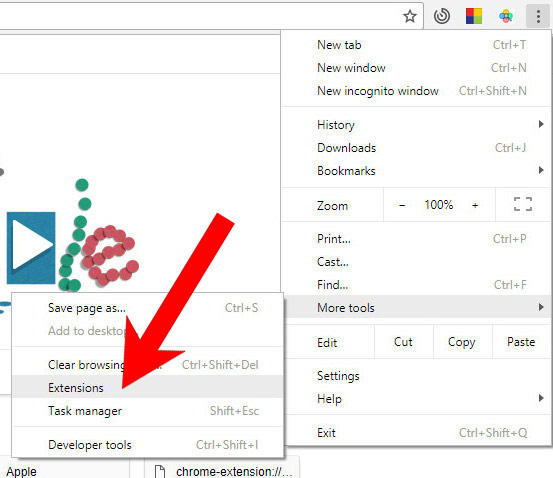
e) Remove Power Blocker from Google Chrome
- Open Google Chrome and press the menu icon on the right, next to the URL field.
- Choose More tools and Extensions.
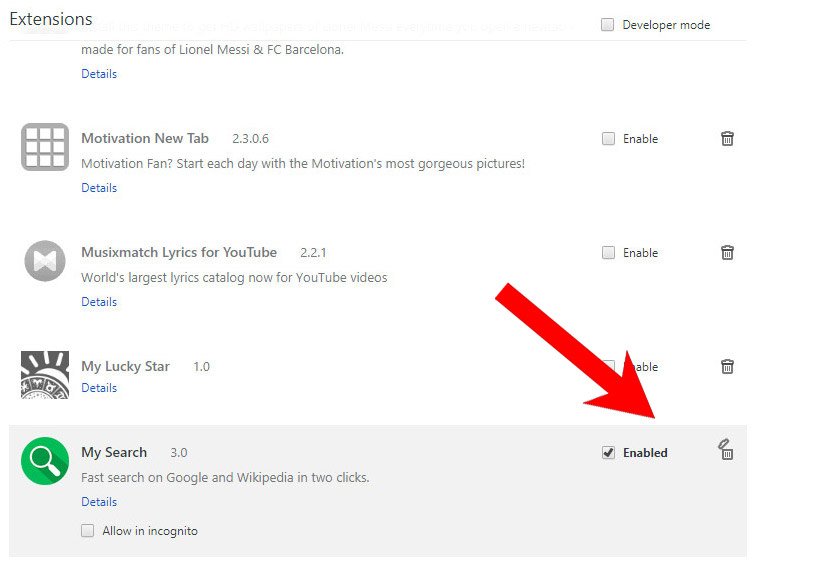
- Remove suspicious extensions by clicking the Trash icon next to them.
- If you are not certain about an extension, you can disable it by unchecking the box that says Enabled. If you later decide to keep it, simply check the box again.
f) Restore your homepage on Google Chrome
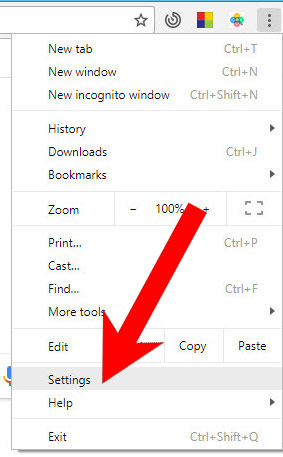
- Open Google Chrome and press the menu icon on the right, next to the URL field.
- Choose Settings.
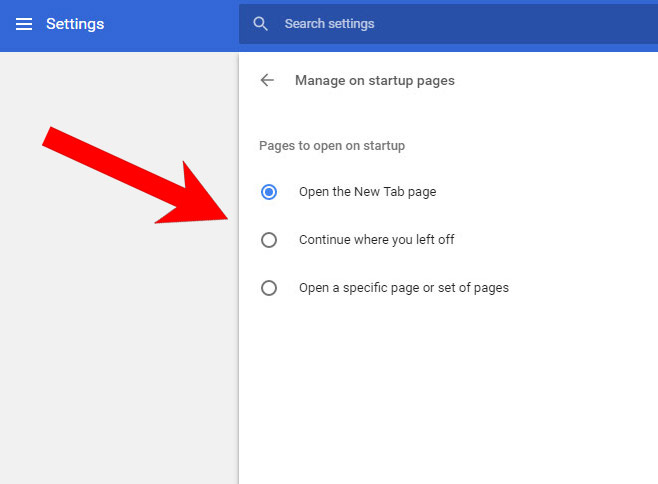
- In the window that appears, under On startup, there will be a Set pages option. Press on that.
- Remove the set website, and type in the one you prefer to be your homepage. Press OK.
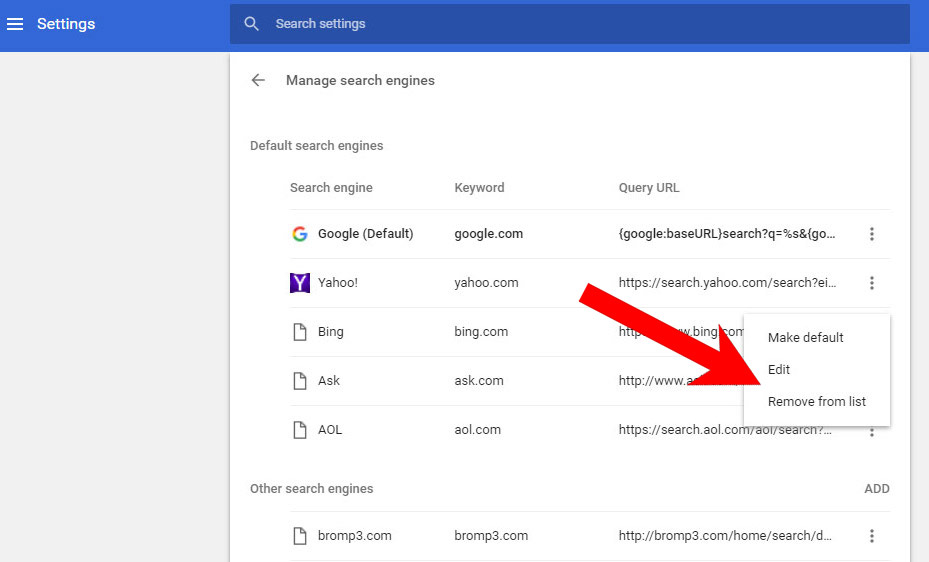
- In Settings, under Search, there is a Manage search engines option. Select that.
- Remove all search engines except the one you want to use. Click Done.
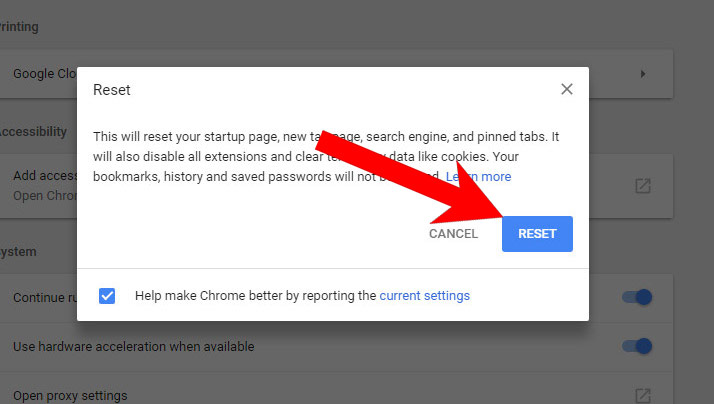
g) Reset Google Chrome
- Open Google Chrome and press the menu icon on the right, next to the URL field.
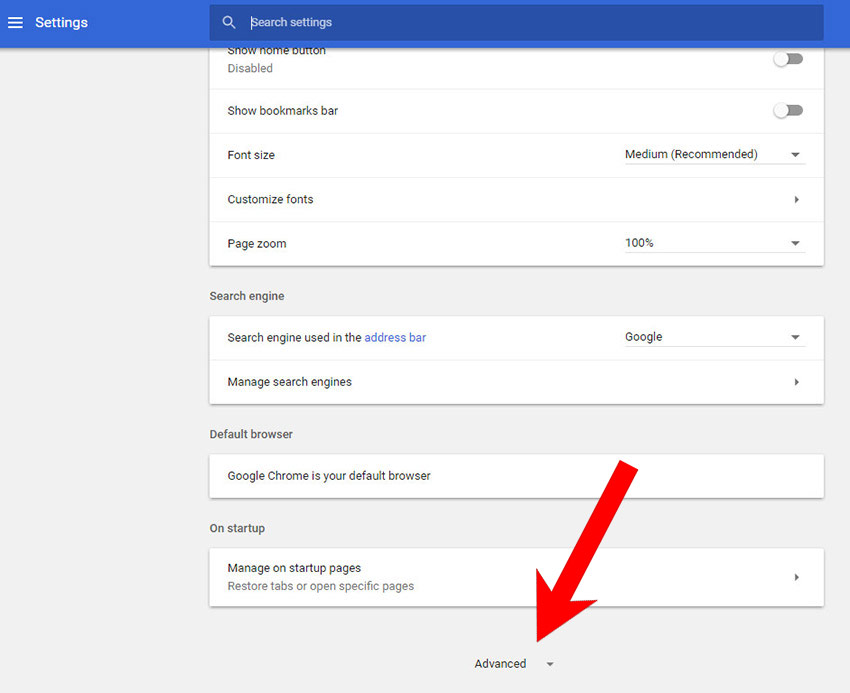
- Choose Settings.
- Scroll down and press on Show advanced settings.
- Find and press the Reset button.
- In the confirmation window that appears, press Reset.
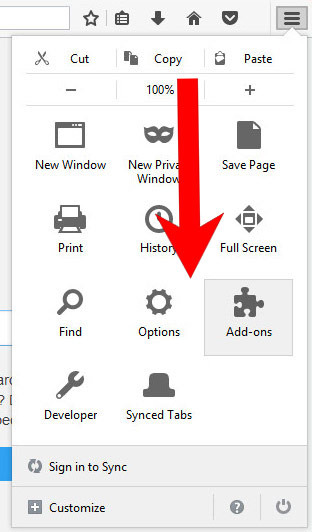
h) Remove Power Blocker from Mozilla Firefox
- Open Mozilla Firefox and access the menu by clicking on the three bars on the right of the screen.
- Select Add-ons.
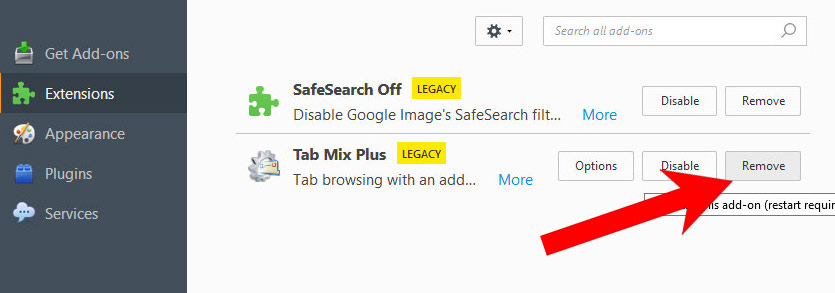
- Select the Extensions tab, and remove all questionable extensions.
- If you are not certain about an extension, you can disable it by clicking Disable. If you later decide to keep it, simply press Enable.
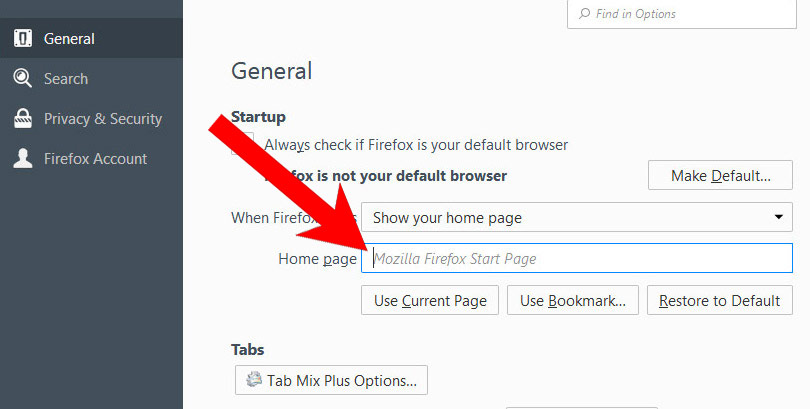
i) Restore your homepage on Mozilla Firefox
- Open Mozilla Firefox and access the menu by clicking on the three bars on the right side of the screen.
- Select Options.
- In General, click Restore to Default below the Home Page field.
j) Reset Mozilla Firefox
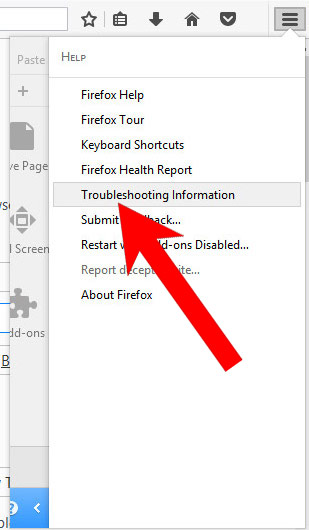
- Open Mozilla Firefox and access the menu by clicking on the three bars on the right of the screen.
- Press the question mark at the bottom of the menu.
- Select Troubleshooting Information.
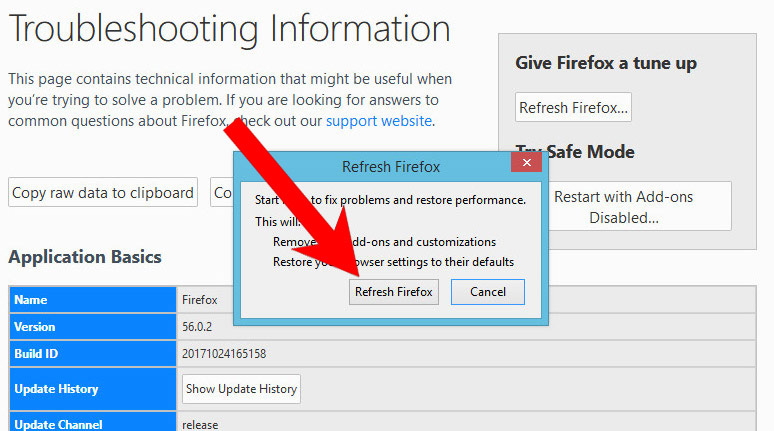
- Select the Refresh Firefox option.
k) Remove Power Blocker from Safari (for Mac)
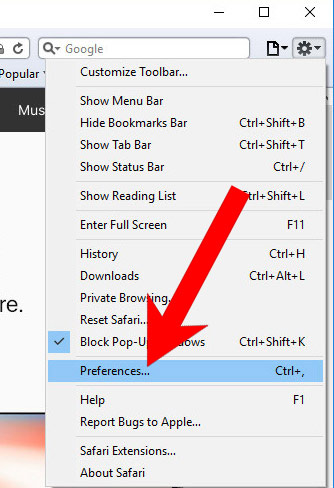
- Open Safari.
- Select Preferences (can be accesses by pressing on Safari at the top of your screen).
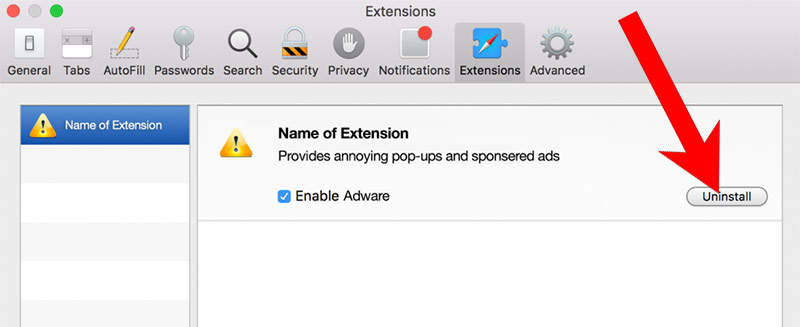
- Choose the Extensions tab.
- Uninstall all questionable extensions.
- If you are not certain about an extension, you can disable it by unchecking the box that says Enabled. If you later decide to keep it, simply check the box again.
l) Reset Safari
If you are using the Yosemite, El Capitan or the Sierra versions, the option to reset Safari with one click is not available. Thus you will have to clear the history and empty the caches in separate steps.- Open Safari.
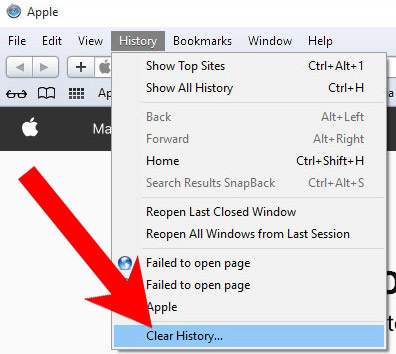
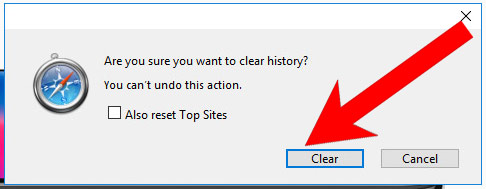
- Select Clear History (can be accesses by pressing on Safari at the top of your screen).
- Choose from what time you want the history deleted, and press Clear History.
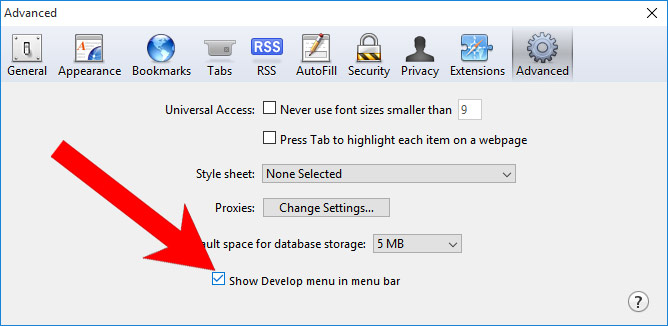
- Press on Safari at the top of the screen and select Preferences.
- Select the Advanced tab and check the box next to Show Develop menu in menu bar.
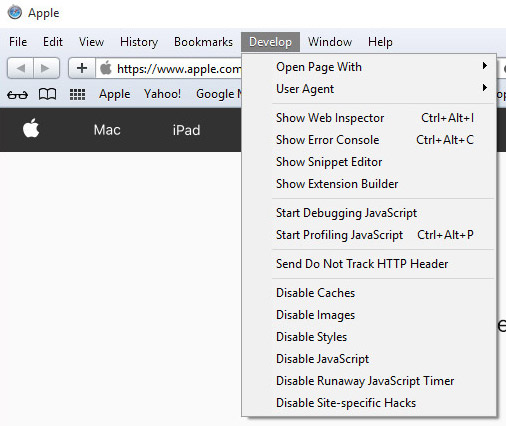
- Select Develop (from the menu bar at the top of the screen).
- Press Empty Caches.