McAfee Invoice
Threats like McAfee Invoice scam can secretly insert nasty viruses like ransomware, spyware and other harmful code inside your PC without any visible symptoms. But like other Trojans, McAfee Invoice sacm is capable of carrying out a wide variety of other corrupt functions. Thousands of users all over the internet have been earning spammed with this type of McAfee Invoice deception emails
If that you have freshly gotten McAfee Invoice trick and criminals as transmit you a phony bill along with a phone portion to call relating to your arrangement and when you call you speak to a trick call focus, then you most likely have become a victim of a viral McAfee Invoice email scam.
Thousands of users all over the net have been earning spammed with this type of McAfee Invoice scam emails in their mailbox and a great many of of them have been invited to pay profits to the self-advertised cyber criminal who is behind the plan. According to security specialists in the cyber community, such emails are much more probable to be little but a trick trying to mislead horrified web people onto sending income to the cyber criminals. However, the truth that you have gotten such an email can also argue that you could have some unpleasant infections inside your os. That’s why it won’t debilitate to conduct a complete analyze of your device with a professional defense tool program (including the one on this website) and utterly exclude the chances of truly having been hacked and unidentified tracked via your webcam and mic.
Download Removal Toolto remove McAfee InvoiceThe reasoning why we recommend you to determine your computer is as freshly, there have been some especially fraudulent dangers out there, e.g the insidious McAfee Invoice hoax and McAfee malicious software popup, which can actually observe you without you realizing it and then use your private details against you. That’s why we have accumulated a complete removal guidelines devoted to the quickly and efficient removal of McAfee Invoice sacm from your pc. Do not wait to utilize the guidelines and the support of the decent McAfee Invoice hoax deletion utility incorporated there to entirely eradicate this corrupt Trojan-based malicious software as you will without doubt shame it if you don’t eliminate it on time.
The McAfee Invoice Scam
If you leave a Trojan such as the McAfee Invoice Scam on your computer or fail to correctly detect and remove it, the results for your system could be fatal. You might lose each of your numbers and applications and could require to reinstall the device in sequence to have an opportunity to operate your PC again.
And that’s not all. Trojans, complete, are notorious for their versatility and that’s why you could never know what type of a harm to anticipate. Oftentimes, such bits of viruses are implemented to severely endanger your virtual privacy and to steal private details from you so to further use it in blackmailing tactics, various deceits, financial scam and monetary deception.
If you don’t erase the Trojan, you could also end up having to face even etc. terrible malware that will put your whole device in jeopardy. That’s why we suggest you to thoroughly scan your machine with a professional defense utility and use its assistance and the guidance earlier to handle any potential malicious software.
Learn how to remove McAfee Invoice from your computer
Step 1. McAfee Invoice Removal from Windows
a) Windows 7/XP
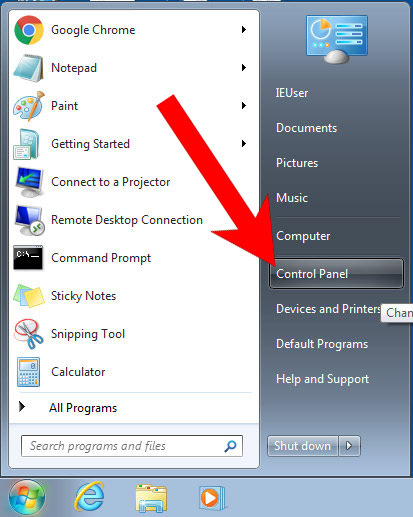
- Press on the Start icon.

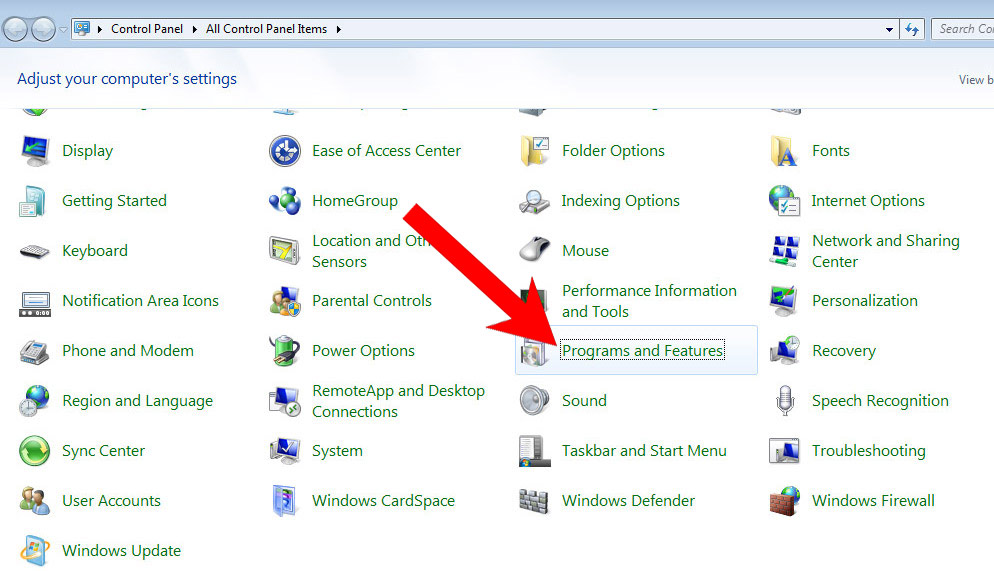
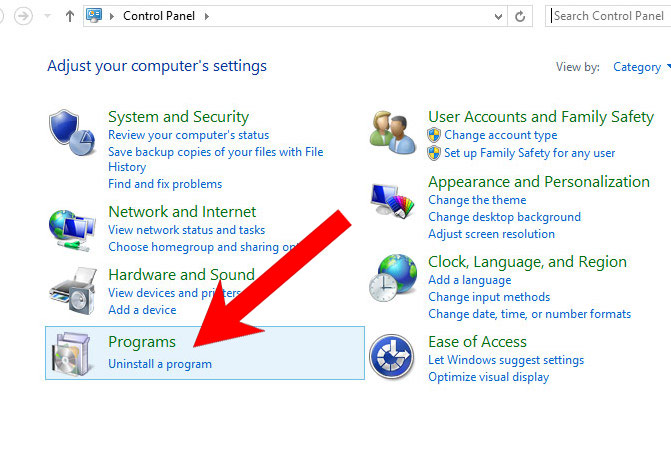
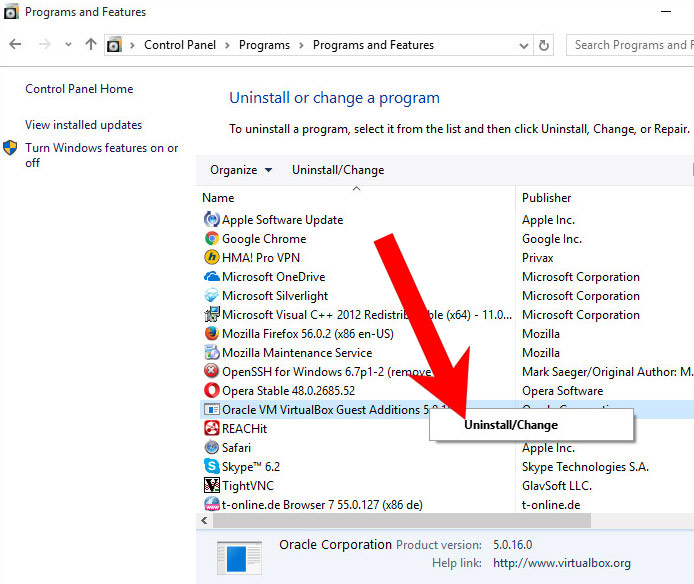
- Control Panel → Programs and Features.
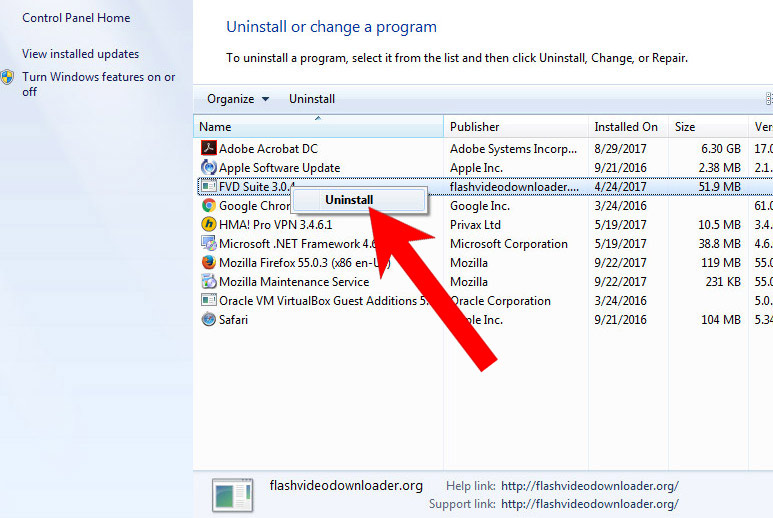
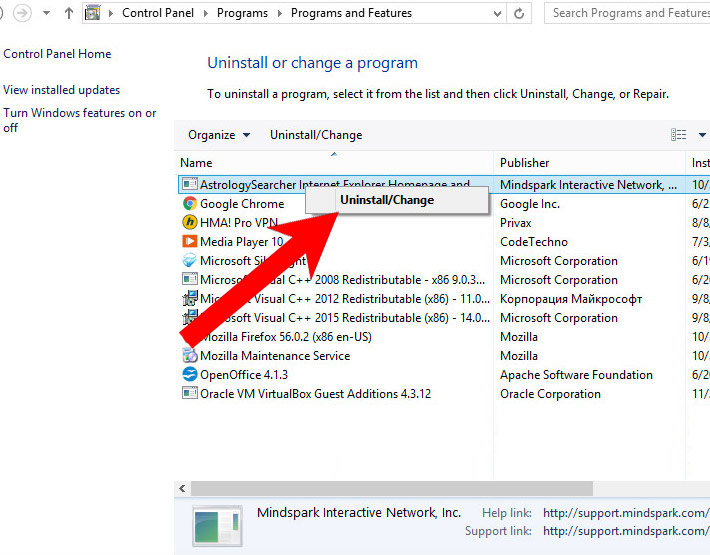
- Find the program you want to delete and press Uninstall.
b) Windows 8
- Right-click on the start icon (lower left corner).
- Select Control Panel.
- Click Programs and Features.
- Find and remove all unwanted programs.

c) Windows 10
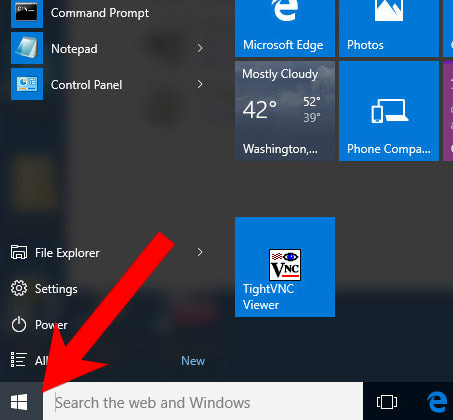
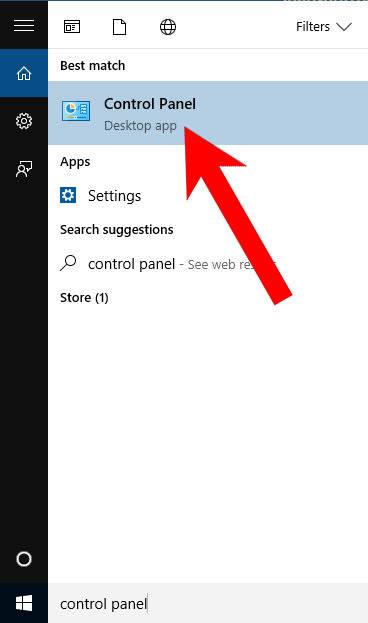
- Open Start menu and click on the magnifying glass (next to the shut down button).
- Type in Control Panel.
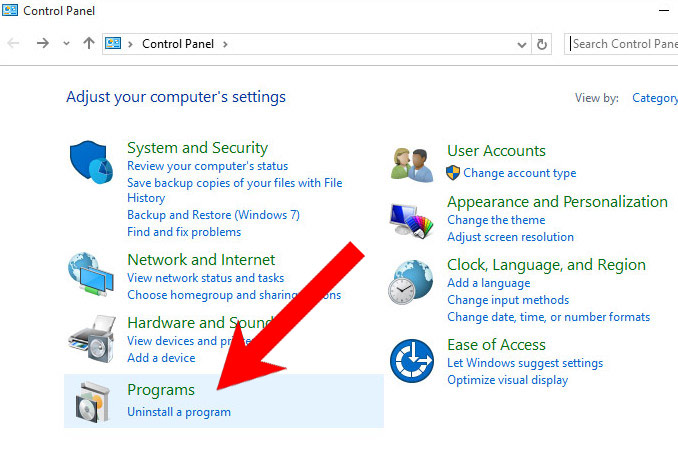
- Control Panel → Programs and Features.
- Find and remove all unwanted programs.
d) Mac OS X
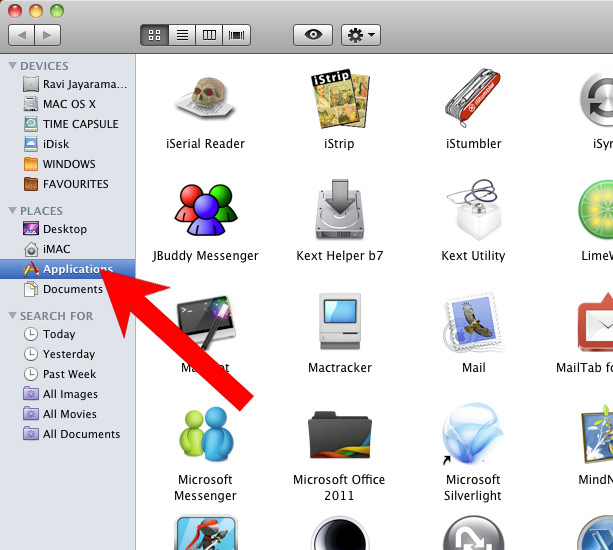
- Open Finder and press Applications.
- Check all suspicious programs you want to get rid of.
- Drag them to the trash icon in your dock (Alternatively, right-click on the program and press Move to Trash).
- After you move all the unwanted programs, right-click on the trash icon and select Empty Trash.

Step 2. Delete McAfee Invoice from browsers
a) Remove McAfee Invoice from Microsoft Edge
Reset Microsoft Edge (Method 1)
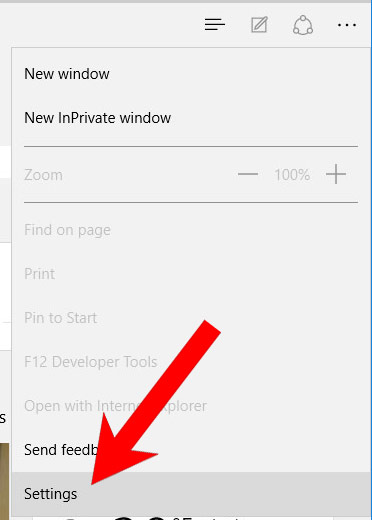
- Open Microsoft Edge.
- Press More located at the top right corner of the screen (the three dots).
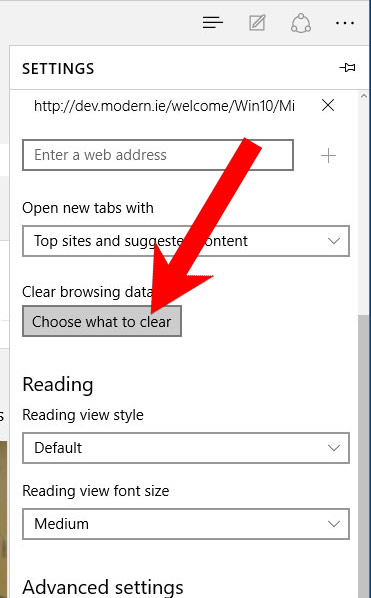
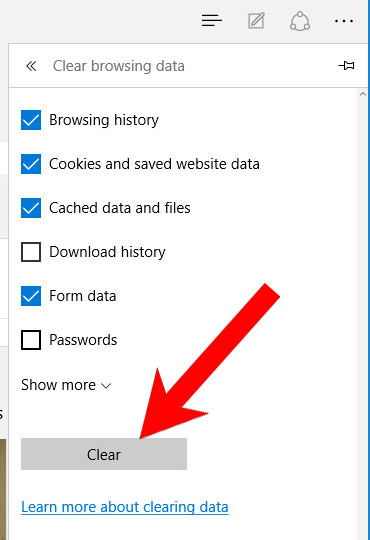
- Settings → Choose what to clear.
- Check the boxes of the items you want removed, and press Clear.
- Press Ctrl + Alt + Delete together.
- Choose Task Manager.
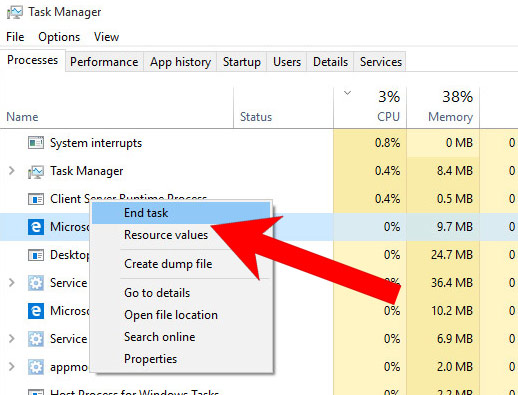
- In the Processes tab, find the Microsoft Edge process, right click on it, and press Go to details (or More details if Go to details is not available).
- Right-click on all Microsoft Edge processes, and choose End task.
(Method 2)
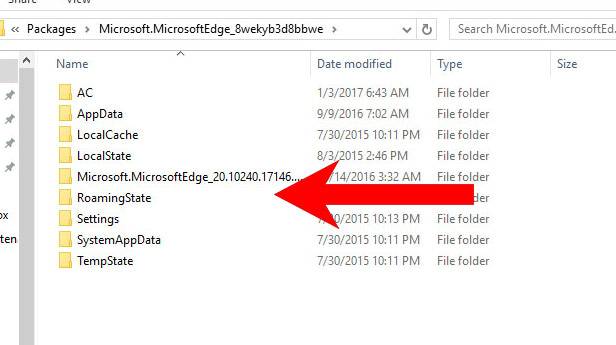
Before you proceed with this method, backup your data.- Go to C:\Users\%username%\AppData\Local\Packages\Microsoft.MicrosoftEdge_xxxxxxxxxx.
- Select all the folders, right-click on them and press Delete.
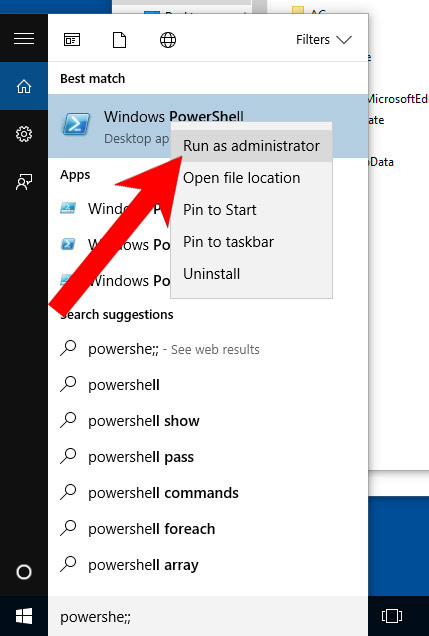
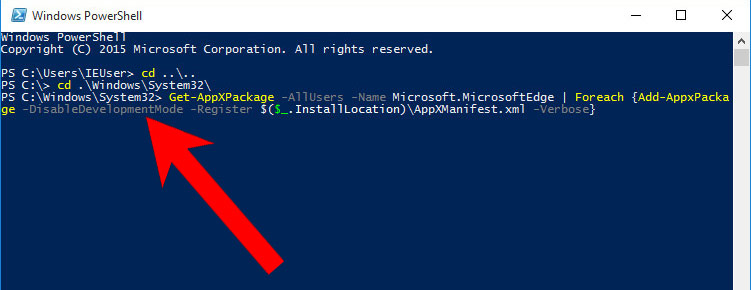
- Press the start button, and type in Windows PowerShell in the search box.
- Right-click on the result, and select Run as administrator.
- In Administrator: Windows PowerShell, paste
Get-AppXPackage -AllUsers -Name Microsoft.MicrosoftEdge | Foreach {Add-AppxPackage -DisableDevelopmentMode -Register $($_.InstallLocation)\AppXManifest.xml -Verbose}
under PS C:\WINDOWS\system32> and tap Enter.
- The issue should be gone now.
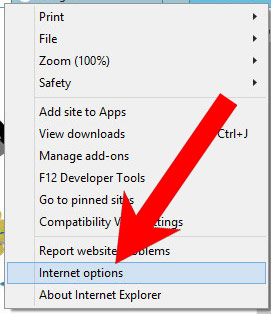
b) Remove McAfee Invoice from Internet Explorer
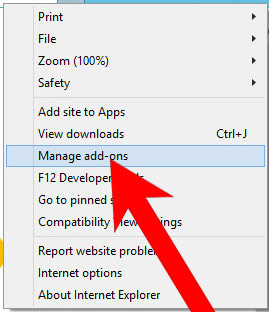
- Open Internet Explorer and press on the Gear icon.
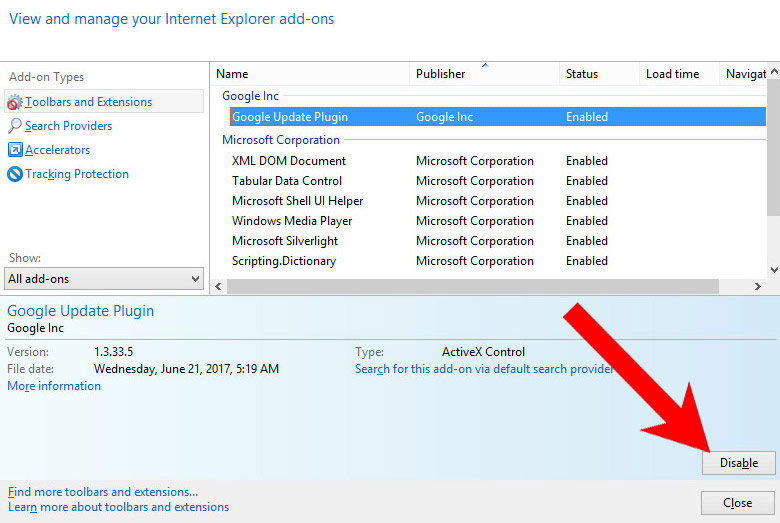
- Select Manage add-ons, and then Toolbars and Extensions.
- Find and disable all suspicious extensions.
- Close the window.
c) Restore your homepage on Internet Explorer
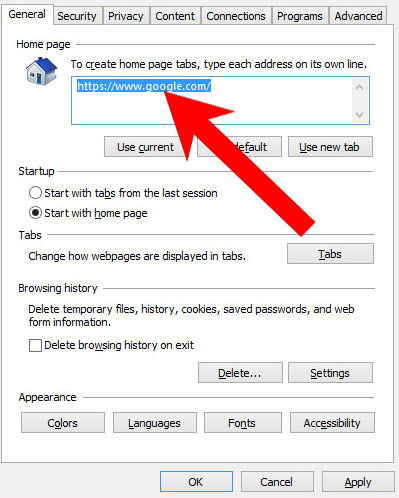
- Open Internet Explorer and press on the Gear icon.
- Internet Options → General tab. Delete the homepage URL and type in your preferred one.
- Press Apply.
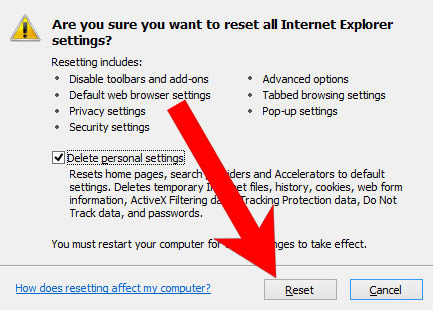
d) Reset Internet Explorer
- Open Internet Explorer and press on the Gear icon.
- Internet Options → Advanced tab.
- At the bottom, you will see a Reset button. Press that.
- In the window that appears, check the box that says Delete personal settings.
- Press Reset.
- Click OK to exit the window.
- Restart your browser.

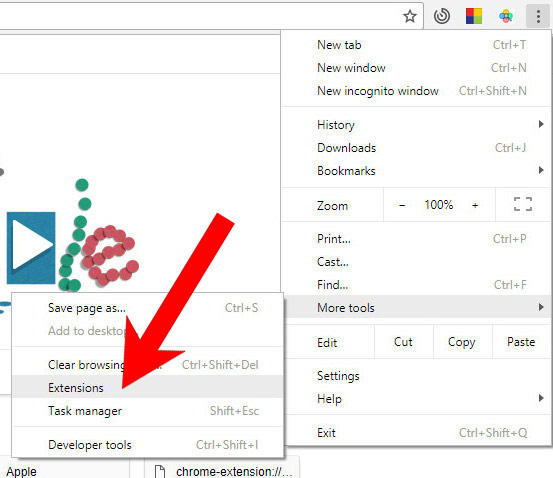
e) Remove McAfee Invoice from Google Chrome
- Open Google Chrome and press the menu icon on the right, next to the URL field.
- Choose More tools and Extensions.
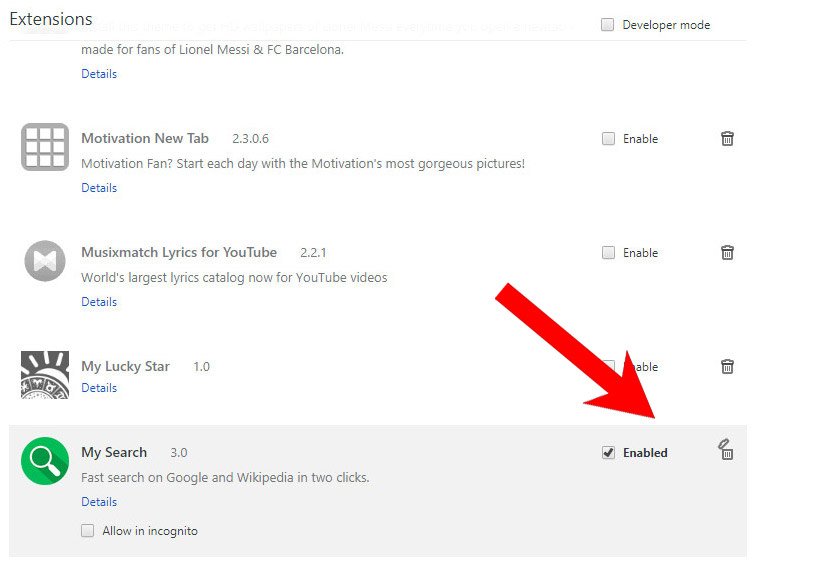
- Remove suspicious extensions by clicking the Trash icon next to them.
- If you are not certain about an extension, you can disable it by unchecking the box that says Enabled. If you later decide to keep it, simply check the box again.
f) Restore your homepage on Google Chrome
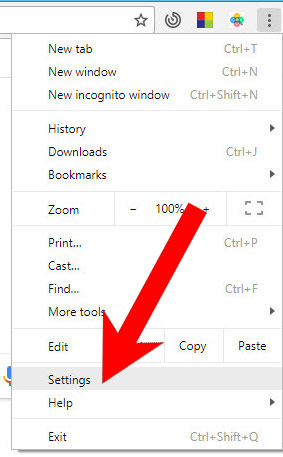
- Open Google Chrome and press the menu icon on the right, next to the URL field.
- Choose Settings.
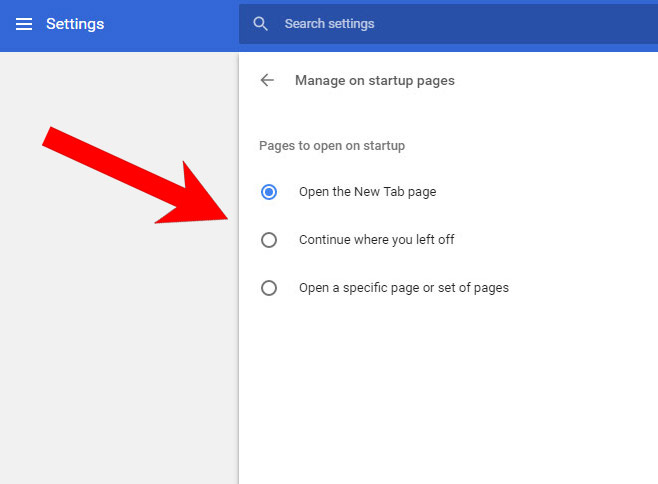
- In the window that appears, under On startup, there will be a Set pages option. Press on that.
- Remove the set website, and type in the one you prefer to be your homepage. Press OK.
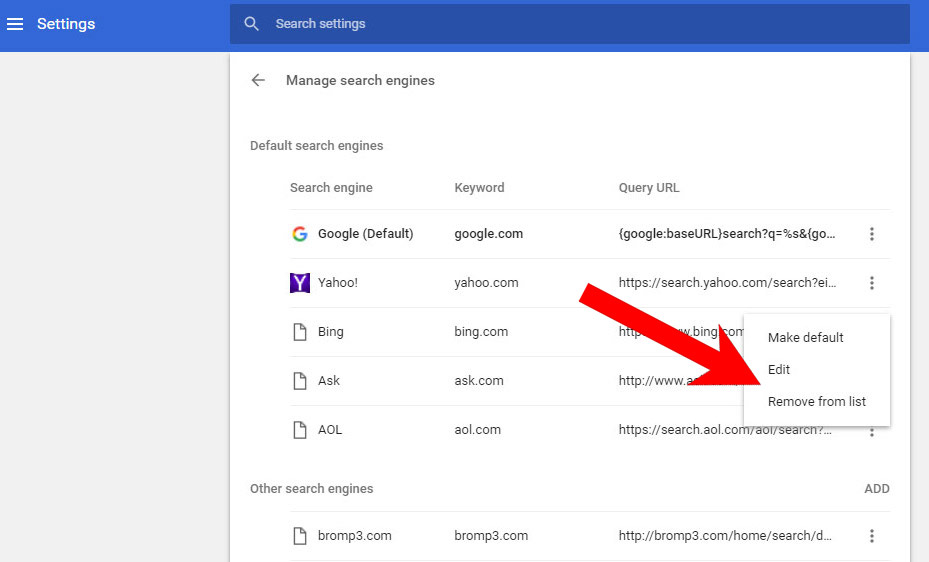
- In Settings, under Search, there is a Manage search engines option. Select that.
- Remove all search engines except the one you want to use. Click Done.
g) Reset Google Chrome
- Open Google Chrome and press the menu icon on the right, next to the URL field.
- Choose Settings.
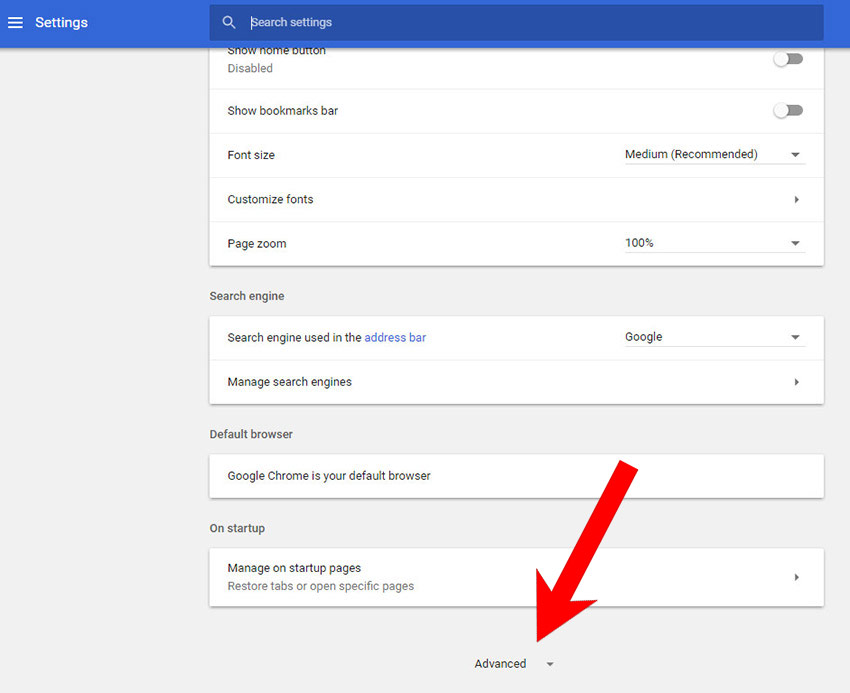
- Scroll down and press on Show advanced settings.
- Find and press the Reset button.
- In the confirmation window that appears, press Reset.
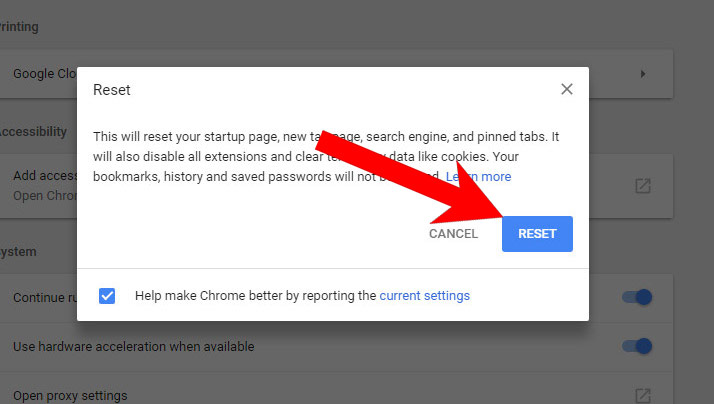
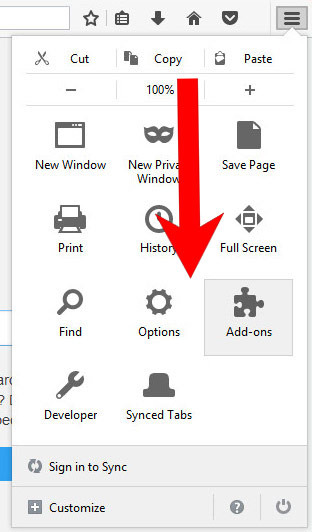
h) Remove McAfee Invoice from Mozilla Firefox
- Open Mozilla Firefox and access the menu by clicking on the three bars on the right of the screen.
- Select Add-ons.
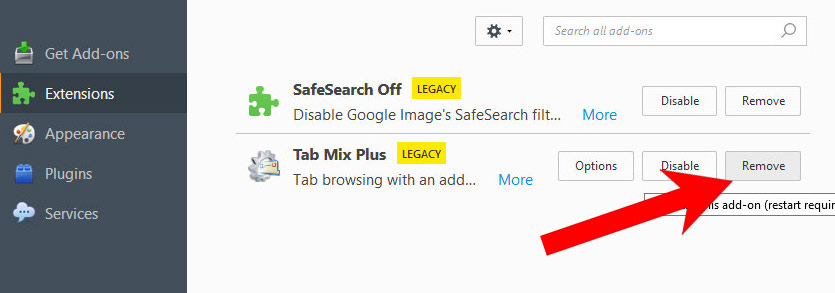
- Select the Extensions tab, and remove all questionable extensions.
- If you are not certain about an extension, you can disable it by clicking Disable. If you later decide to keep it, simply press Enable.
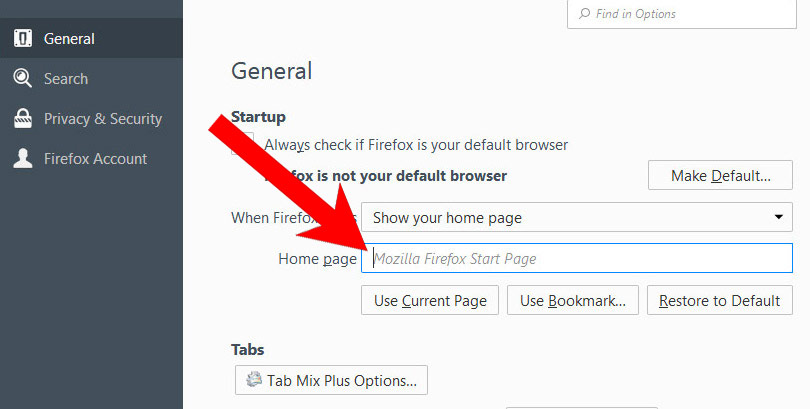
i) Restore your homepage on Mozilla Firefox
- Open Mozilla Firefox and access the menu by clicking on the three bars on the right side of the screen.
- Select Options.
- In General, click Restore to Default below the Home Page field.
j) Reset Mozilla Firefox
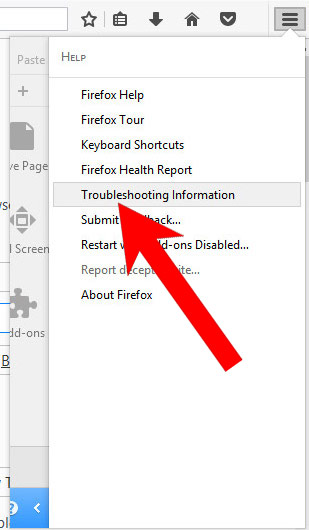
- Open Mozilla Firefox and access the menu by clicking on the three bars on the right of the screen.
- Press the question mark at the bottom of the menu.
- Select Troubleshooting Information.
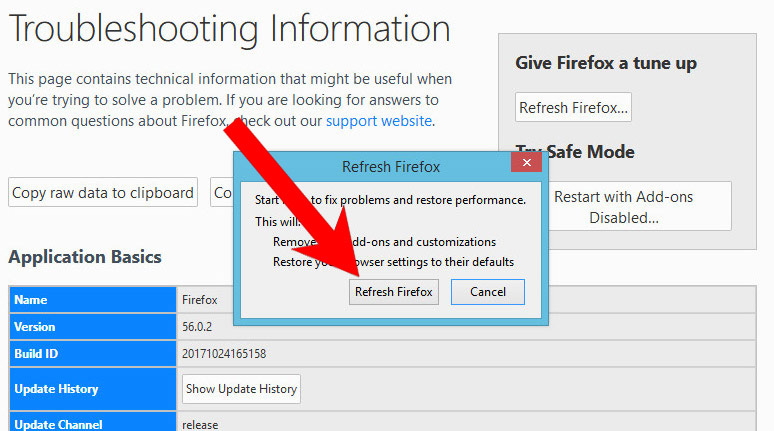
- Select the Refresh Firefox option.
k) Remove McAfee Invoice from Safari (for Mac)
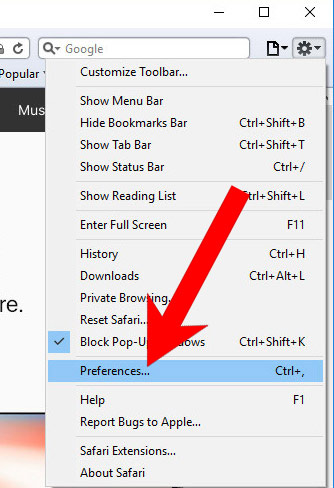
- Open Safari.
- Select Preferences (can be accesses by pressing on Safari at the top of your screen).
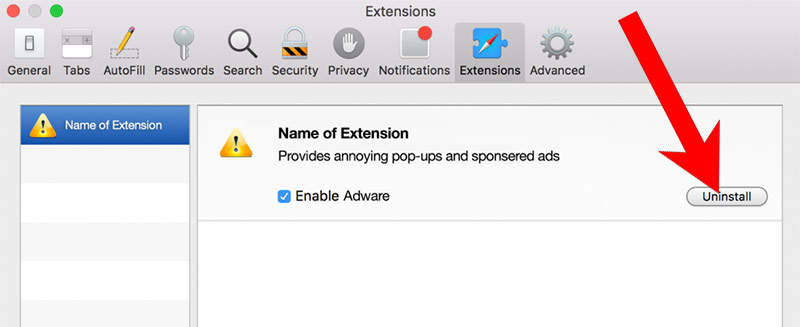
- Choose the Extensions tab.
- Uninstall all questionable extensions.
- If you are not certain about an extension, you can disable it by unchecking the box that says Enabled. If you later decide to keep it, simply check the box again.
l) Reset Safari
If you are using the Yosemite, El Capitan or the Sierra versions, the option to reset Safari with one click is not available. Thus you will have to clear the history and empty the caches in separate steps.- Open Safari.
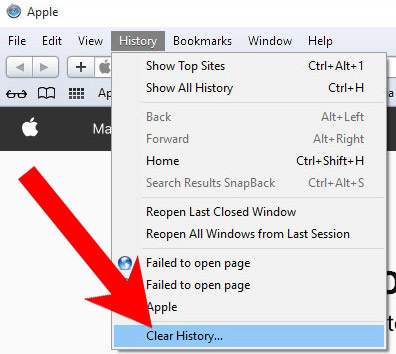
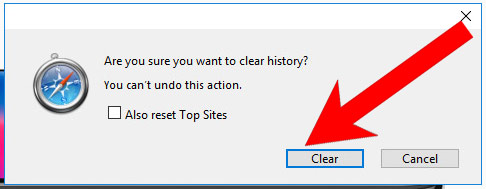
- Select Clear History (can be accesses by pressing on Safari at the top of your screen).
- Choose from what time you want the history deleted, and press Clear History.
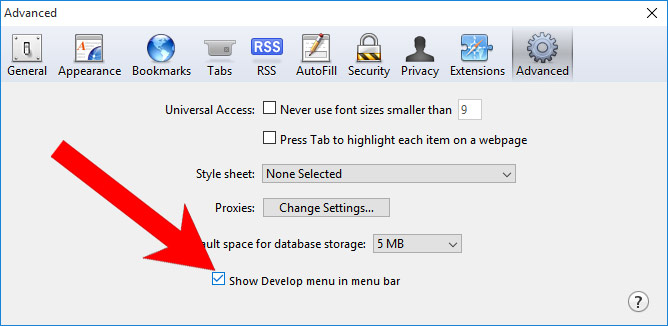
- Press on Safari at the top of the screen and select Preferences.
- Select the Advanced tab and check the box next to Show Develop menu in menu bar.
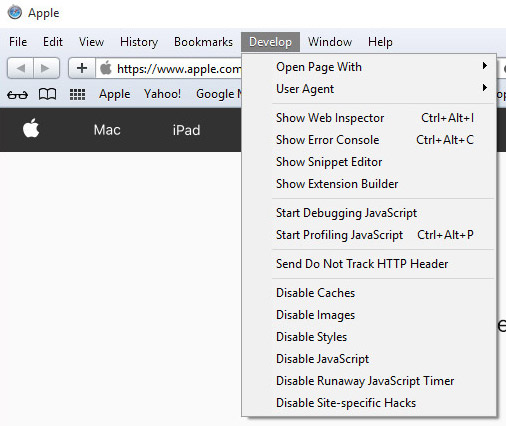
- Select Develop (from the menu bar at the top of the screen).
- Press Empty Caches.