Classic instructions on how to handle IBuddy
When discussing device viruses, grasping the origins of a exhibited cyber parasite is half the battle. The other half is successfully putting to use the obtained authorization in the oppose against malicious software and keeping your device sheltered from it. Now, this can appear uncomplicated but, nuturally, things are not because they look, and keeping your pc well-100% defended at all times against varying cyber malicious software could not always be potential. Even the the biggest number of competent and qualified people may regardless produce a glitch and have their oss invaded by some frightening and nasty malware for example the newly located IBuddy.
In the following lines, we shall tell you connected to what it could do to your operating system, how it could infect/ have polluted it, and what things you have to look out for henceforth so as to assure that it never returns after you delete it. Of course, we shall additionally assist you with the actual deletion of the parasite in packages with our instructions that you could read further down this portal. But former we provide you the guidelines, allow us to explain you something about…
Download Removal Toolto remove IBuddyDon’t undervalue Trojans
Damaging bits of malware threats like IBuddy are in addition to that terribly stealthy and in quite a lot of of the situations where they infiltrate a exhibited system, they wouldn’t terribly display any signs. On some individual occasions, the user may detect an odd enhance in the RAM and CPU that are being accustomed and there may also be random bugs or common crashes but not all Trojans are famous for that and even the ones that are could not always provoke such indications.
Also, the hugely parasite ought to transpire along with nothing to no apparent red flags. In the majority situations, the malware will be exhibited to the user below the cover up of something that is presumed to seem not malicious – an on the internet (spam) notification, a downloadable log, a (fake) upgrade ask, or something else. Though untrustworthy and potentially unsecured details are usually effortless to locate and prevent, some Trojans lurk stronger than others so this, combined together with the complete do not have of indications, ought to be enough to persuade you to purchase an antivirus program application to keep your machine shielded for these occasions when your warn could be insufficient. And, if you earlier have an anti-malware, then be sure to always upgrade it when a new variation is available.
As said in the at the start a piece of this post, the sole oriented OS as a result far is Windows 10, pieceicularly operating the updated updates. You might paralyze IBuddy if you visit onto sheltered settings or in a legacy environment that breaks IBuddy’s native registries.
Learn how to remove IBuddy from your computer
Step 1. IBuddy Removal from Windows
a) Windows 7/XP
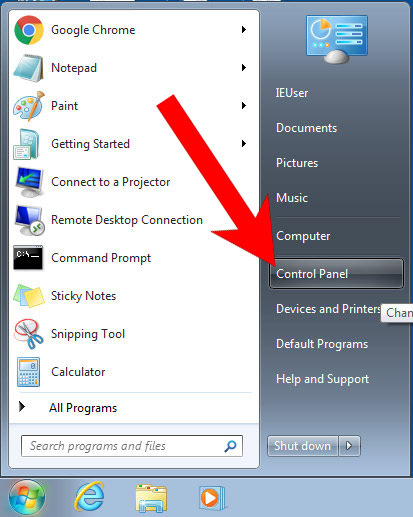
- Press on the Start icon.

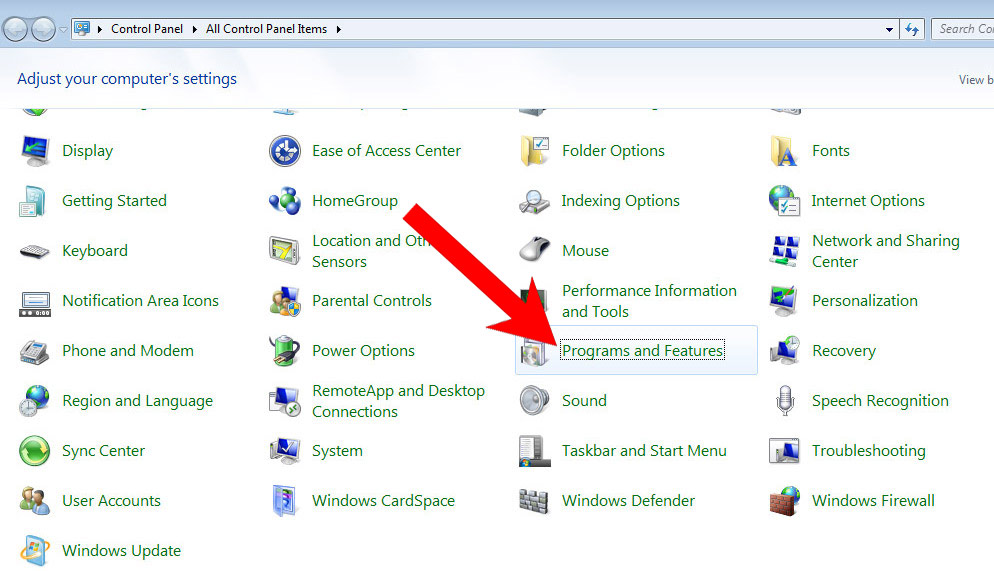
- Control Panel → Programs and Features.
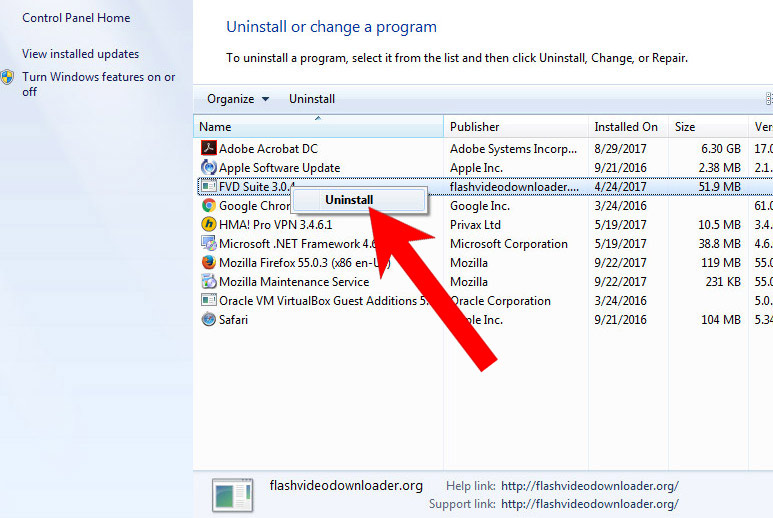
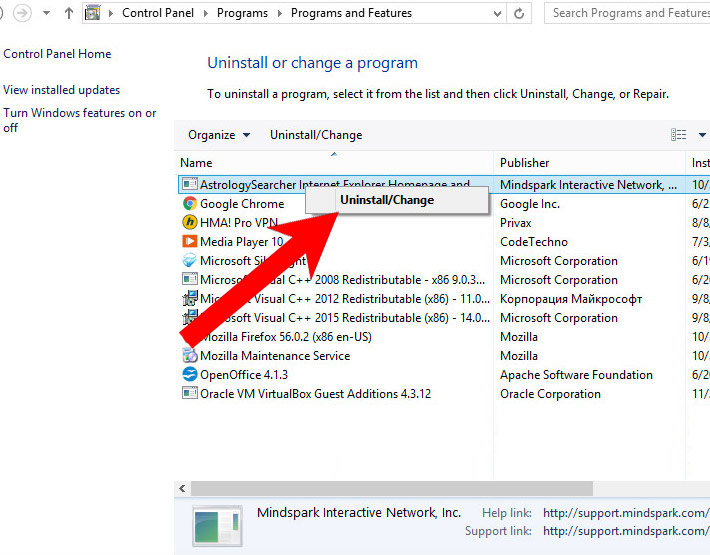
- Find the program you want to delete and press Uninstall.
b) Windows 8
- Right-click on the start icon (lower left corner).
- Select Control Panel.
- Click Programs and Features.
- Find and remove all unwanted programs.
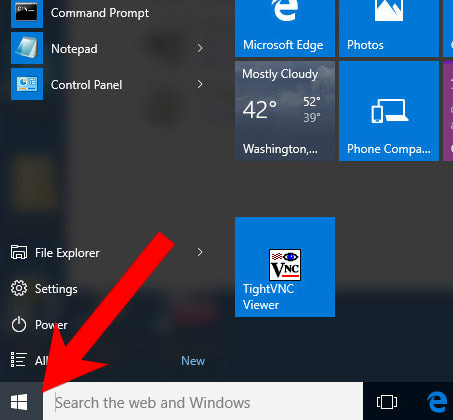

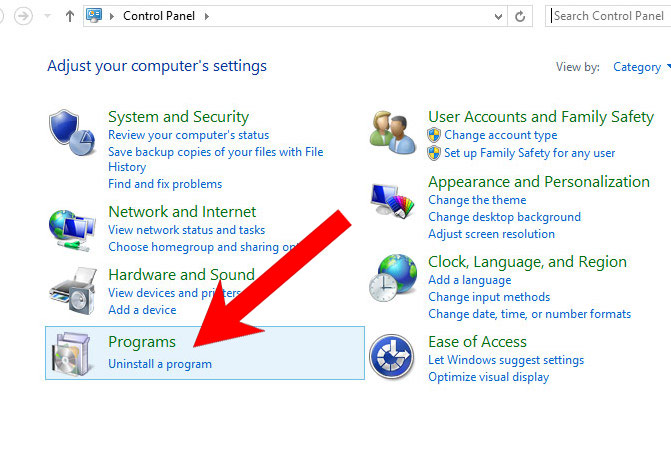
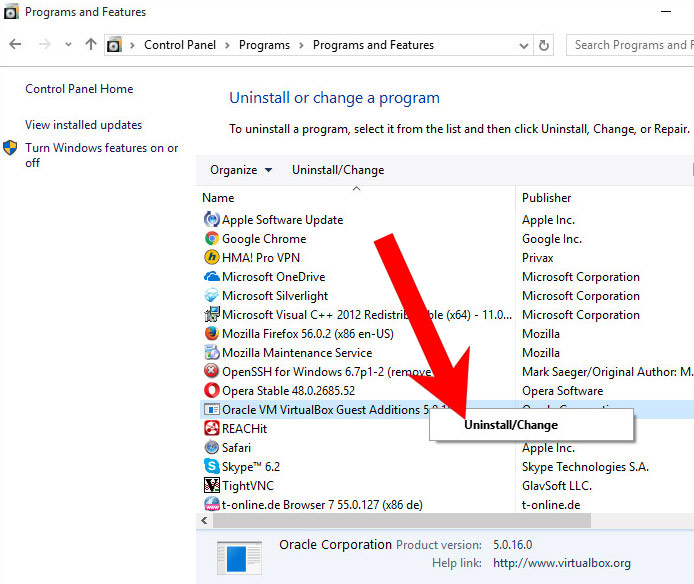
c) Windows 10
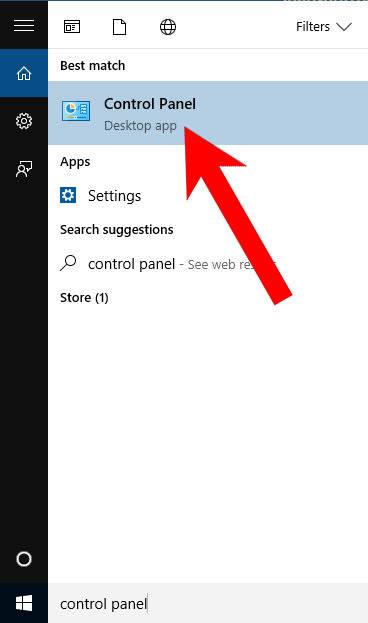
- Open Start menu and click on the magnifying glass (next to the shut down button).
- Type in Control Panel.
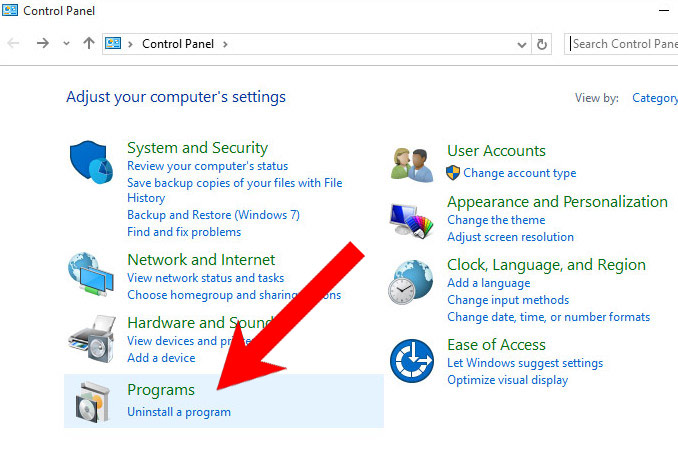
- Control Panel → Programs and Features.
- Find and remove all unwanted programs.
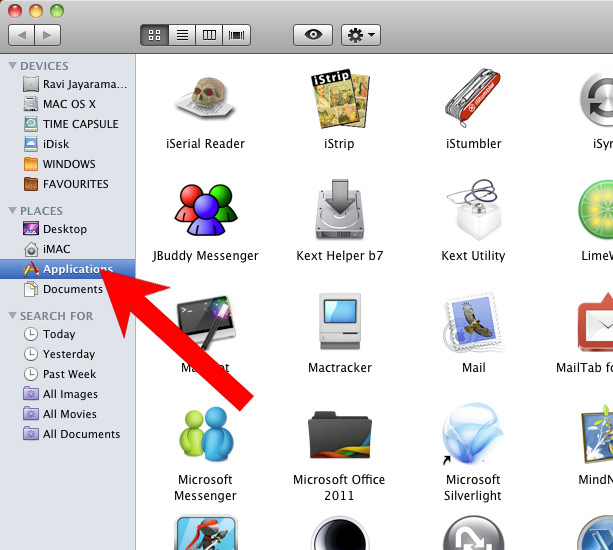
d) Mac OS X
- Open Finder and press Applications.
- Check all suspicious programs you want to get rid of.
- Drag them to the trash icon in your dock (Alternatively, right-click on the program and press Move to Trash).
- After you move all the unwanted programs, right-click on the trash icon and select Empty Trash.

Step 2. Delete IBuddy from browsers
a) Remove IBuddy from Microsoft Edge
Reset Microsoft Edge (Method 1)
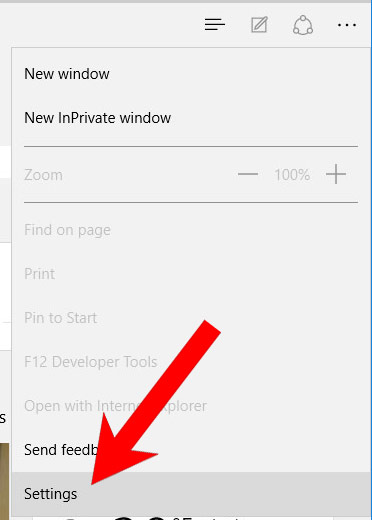
- Open Microsoft Edge.
- Press More located at the top right corner of the screen (the three dots).
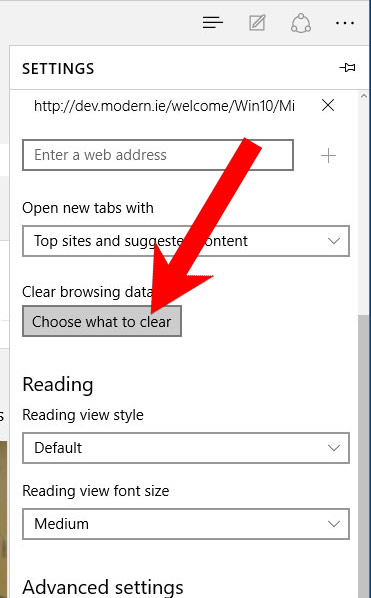
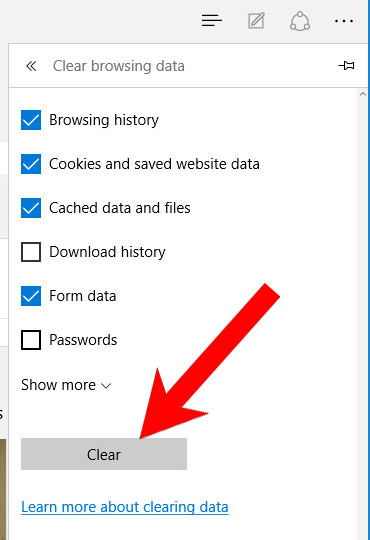
- Settings → Choose what to clear.
- Check the boxes of the items you want removed, and press Clear.
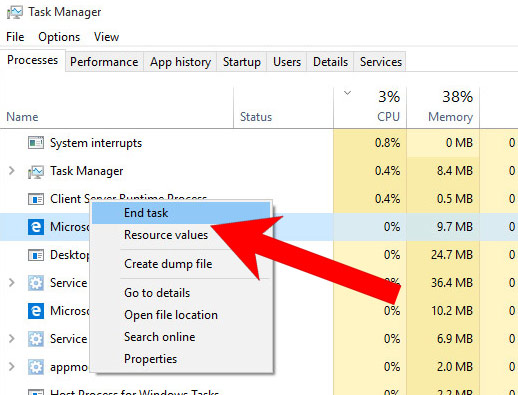
- Press Ctrl + Alt + Delete together.
- Choose Task Manager.
- In the Processes tab, find the Microsoft Edge process, right click on it, and press Go to details (or More details if Go to details is not available).
- Right-click on all Microsoft Edge processes, and choose End task.
(Method 2)
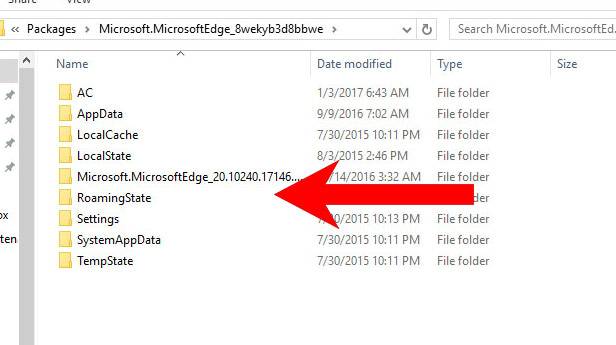
Before you proceed with this method, backup your data.- Go to C:\Users\%username%\AppData\Local\Packages\Microsoft.MicrosoftEdge_xxxxxxxxxx.
- Select all the folders, right-click on them and press Delete.
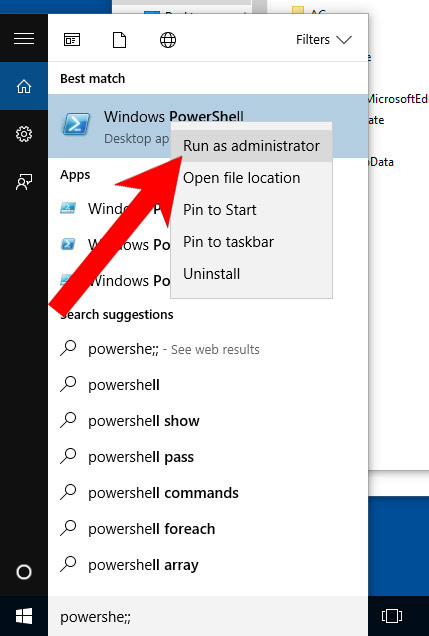
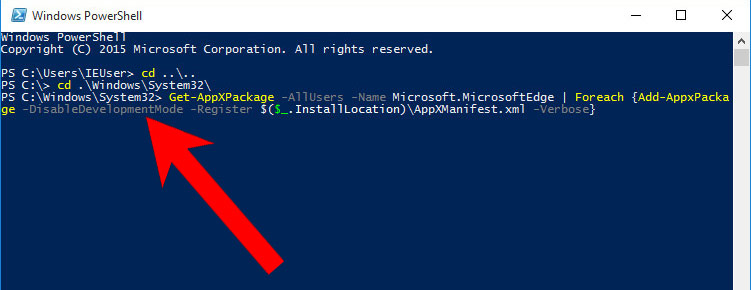
- Press the start button, and type in Windows PowerShell in the search box.
- Right-click on the result, and select Run as administrator.
- In Administrator: Windows PowerShell, paste
Get-AppXPackage -AllUsers -Name Microsoft.MicrosoftEdge | Foreach {Add-AppxPackage -DisableDevelopmentMode -Register $($_.InstallLocation)\AppXManifest.xml -Verbose}
under PS C:\WINDOWS\system32> and tap Enter.
- The issue should be gone now.
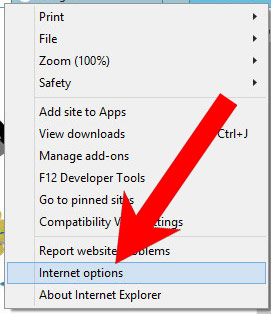
b) Remove IBuddy from Internet Explorer
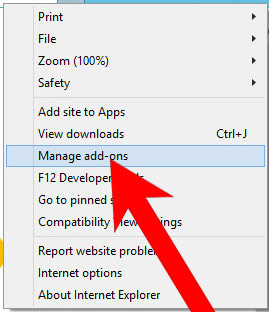
- Open Internet Explorer and press on the Gear icon.
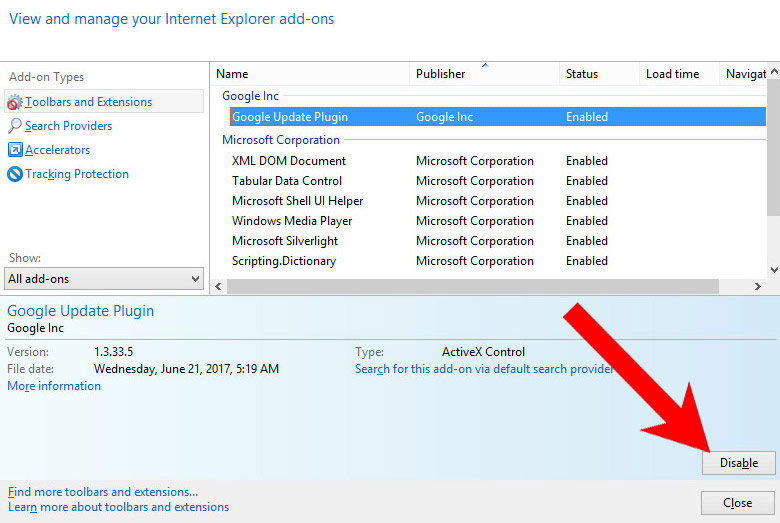
- Select Manage add-ons, and then Toolbars and Extensions.
- Find and disable all suspicious extensions.
- Close the window.
c) Restore your homepage on Internet Explorer
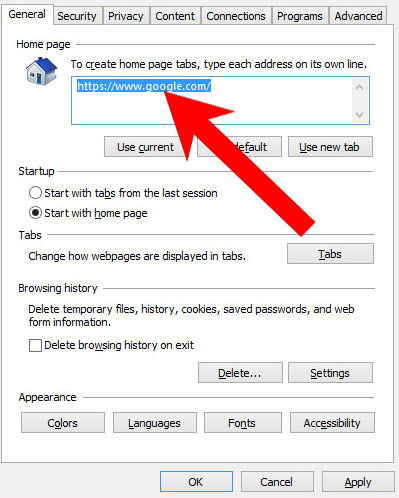
- Open Internet Explorer and press on the Gear icon.
- Internet Options → General tab. Delete the homepage URL and type in your preferred one.
- Press Apply.
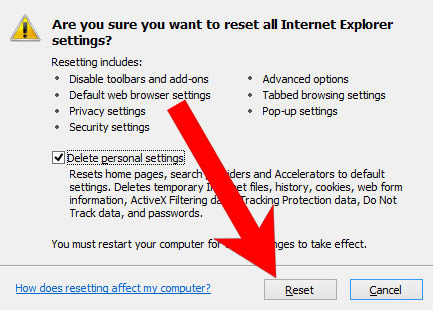
d) Reset Internet Explorer
- Open Internet Explorer and press on the Gear icon.
- Internet Options → Advanced tab.
- At the bottom, you will see a Reset button. Press that.
- In the window that appears, check the box that says Delete personal settings.
- Press Reset.
- Click OK to exit the window.
- Restart your browser.

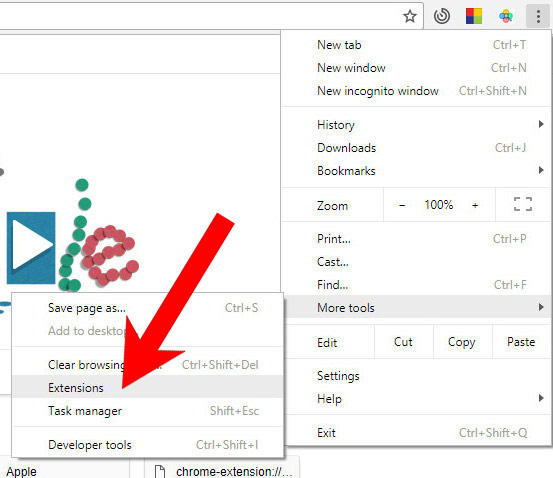
e) Remove IBuddy from Google Chrome
- Open Google Chrome and press the menu icon on the right, next to the URL field.
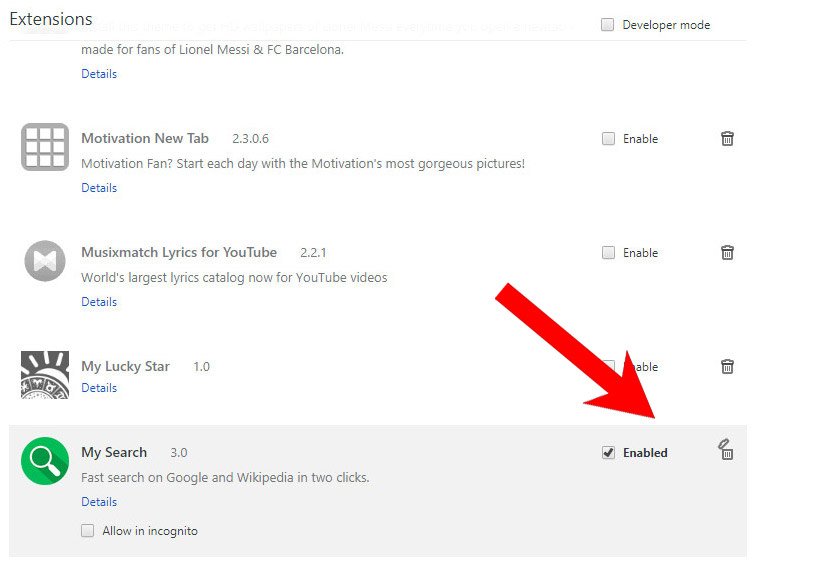
- Choose More tools and Extensions.
- Remove suspicious extensions by clicking the Trash icon next to them.
- If you are not certain about an extension, you can disable it by unchecking the box that says Enabled. If you later decide to keep it, simply check the box again.
f) Restore your homepage on Google Chrome
- Open Google Chrome and press the menu icon on the right, next to the URL field.
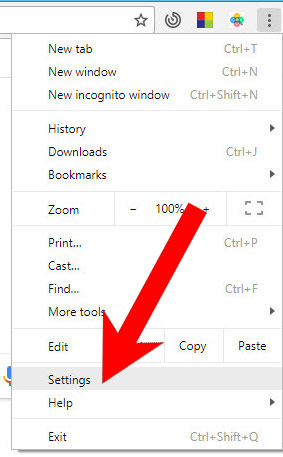
- Choose Settings.
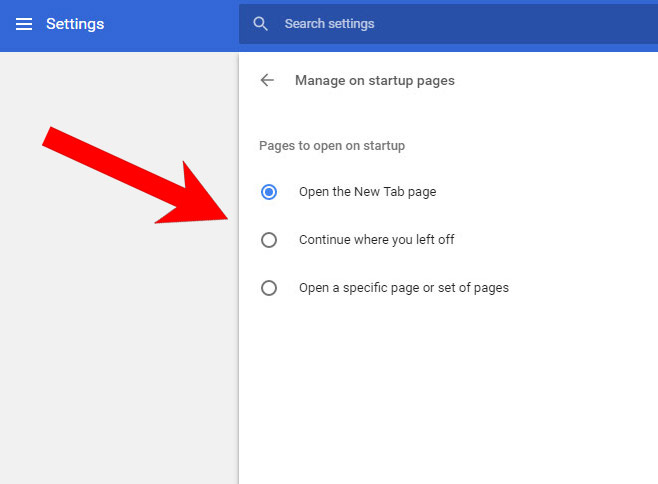
- In the window that appears, under On startup, there will be a Set pages option. Press on that.
- Remove the set website, and type in the one you prefer to be your homepage. Press OK.
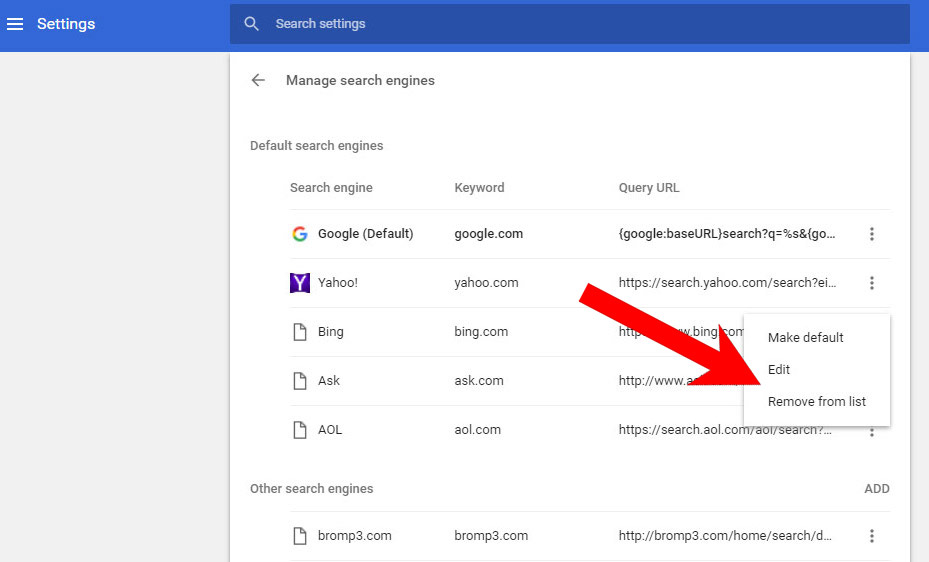
- In Settings, under Search, there is a Manage search engines option. Select that.
- Remove all search engines except the one you want to use. Click Done.
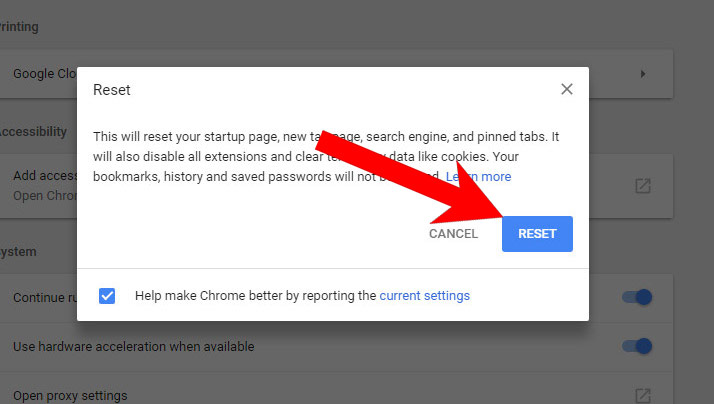
g) Reset Google Chrome
- Open Google Chrome and press the menu icon on the right, next to the URL field.
- Choose Settings.
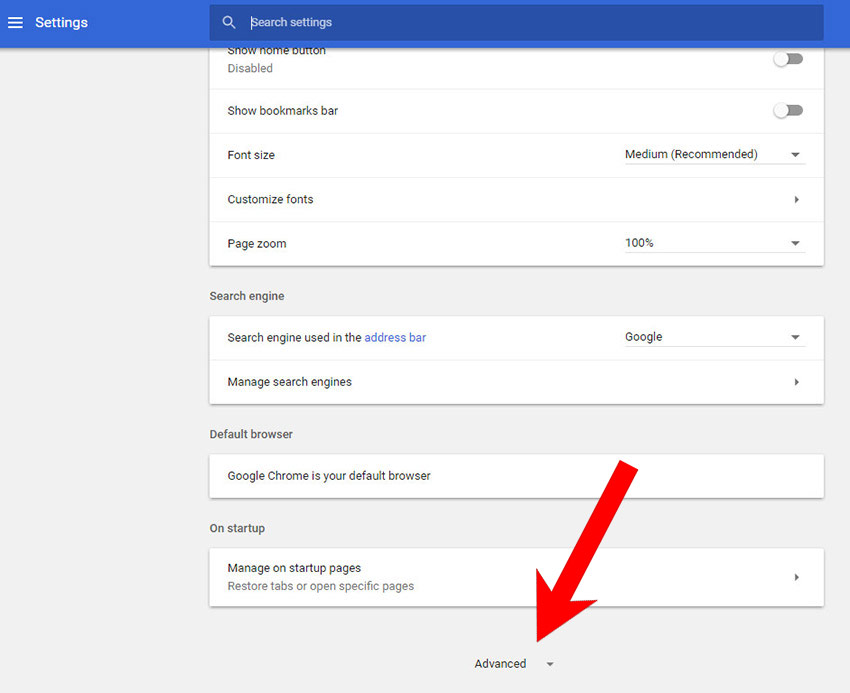
- Scroll down and press on Show advanced settings.
- Find and press the Reset button.
- In the confirmation window that appears, press Reset.
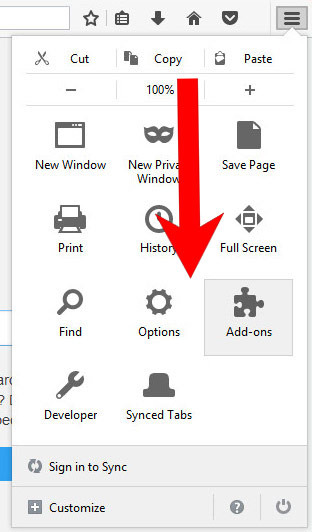
h) Remove IBuddy from Mozilla Firefox
- Open Mozilla Firefox and access the menu by clicking on the three bars on the right of the screen.
- Select Add-ons.
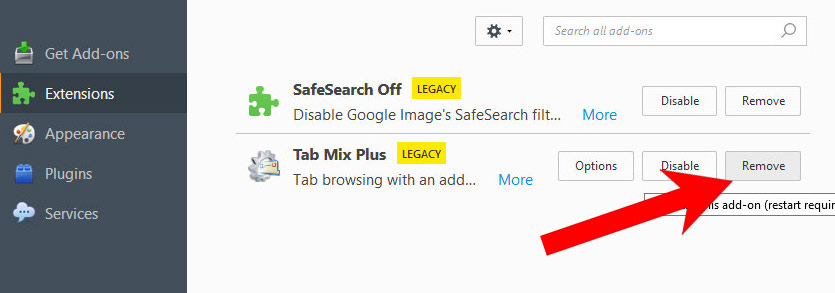
- Select the Extensions tab, and remove all questionable extensions.
- If you are not certain about an extension, you can disable it by clicking Disable. If you later decide to keep it, simply press Enable.
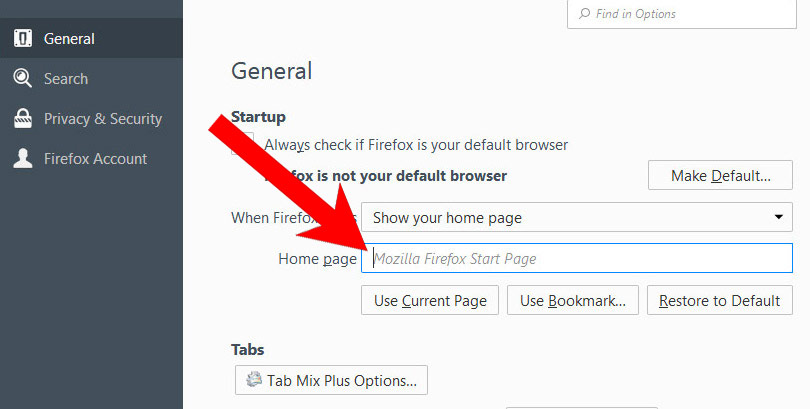
i) Restore your homepage on Mozilla Firefox
- Open Mozilla Firefox and access the menu by clicking on the three bars on the right side of the screen.
- Select Options.
- In General, click Restore to Default below the Home Page field.
j) Reset Mozilla Firefox
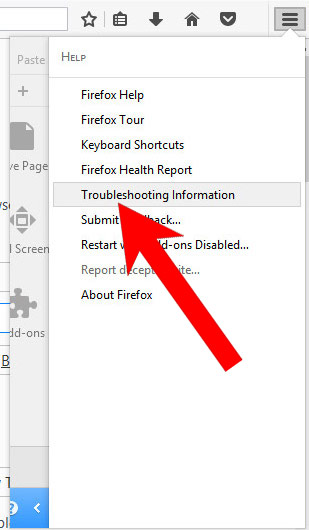
- Open Mozilla Firefox and access the menu by clicking on the three bars on the right of the screen.
- Press the question mark at the bottom of the menu.
- Select Troubleshooting Information.
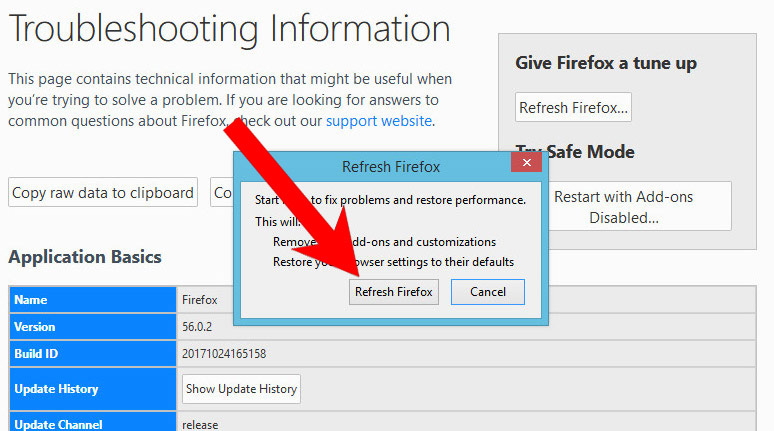
- Select the Refresh Firefox option.
k) Remove IBuddy from Safari (for Mac)
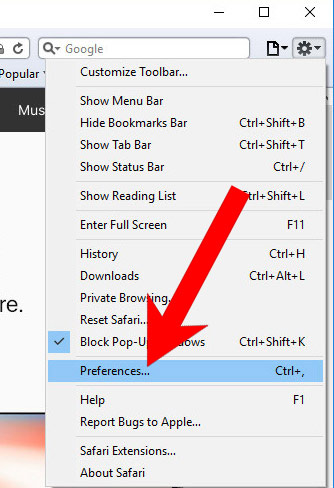
- Open Safari.
- Select Preferences (can be accesses by pressing on Safari at the top of your screen).
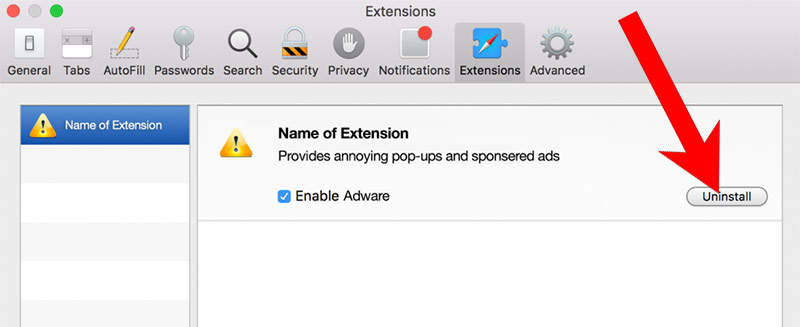
- Choose the Extensions tab.
- Uninstall all questionable extensions.
- If you are not certain about an extension, you can disable it by unchecking the box that says Enabled. If you later decide to keep it, simply check the box again.
l) Reset Safari
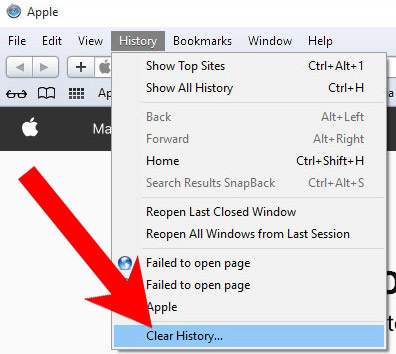
If you are using the Yosemite, El Capitan or the Sierra versions, the option to reset Safari with one click is not available. Thus you will have to clear the history and empty the caches in separate steps.- Open Safari.
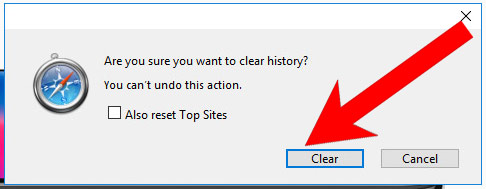
- Select Clear History (can be accesses by pressing on Safari at the top of your screen).
- Choose from what time you want the history deleted, and press Clear History.
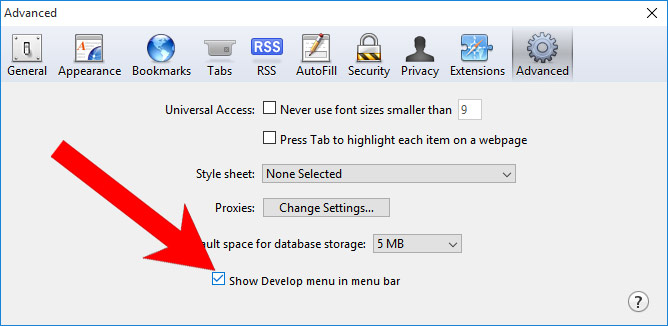
- Press on Safari at the top of the screen and select Preferences.
- Select the Advanced tab and check the box next to Show Develop menu in menu bar.
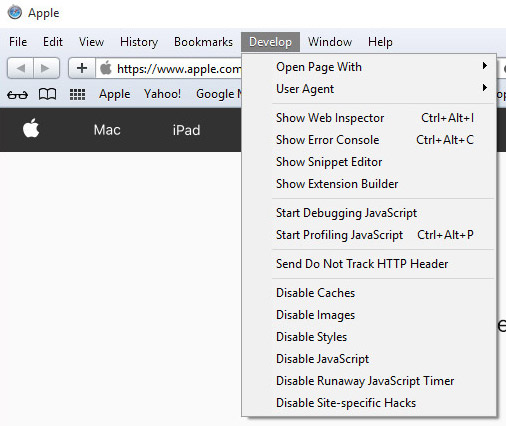
- Select Develop (from the menu bar at the top of the screen).
- Press Empty Caches.